You can not select more than 25 topics
Topics must start with a letter or number, can include dashes ('-') and can be up to 35 characters long.
78 lines
4.6 KiB
78 lines
4.6 KiB
--- |
|
comments: true |
|
description: Learn how to use Ultralytics HUB for efficient and user-friendly AI model training in the cloud. Follow our detailed guide for easy model creation, training, evaluation, and deployment. |
|
keywords: Ultralytics, HUB Models, AI model training, model creation, model training, model evaluation, model deployment |
|
--- |
|
|
|
# Cloud Training |
|
|
|
[Ultralytics HUB](https://hub.ultralytics.com/) provides a powerful and user-friendly cloud platform to train custom object detection models. Easily select your dataset and the desired training method, then kick off the process with just a few clicks. Ultralytics HUB offers pre-built options and various model architectures to streamline your workflow. |
|
|
|
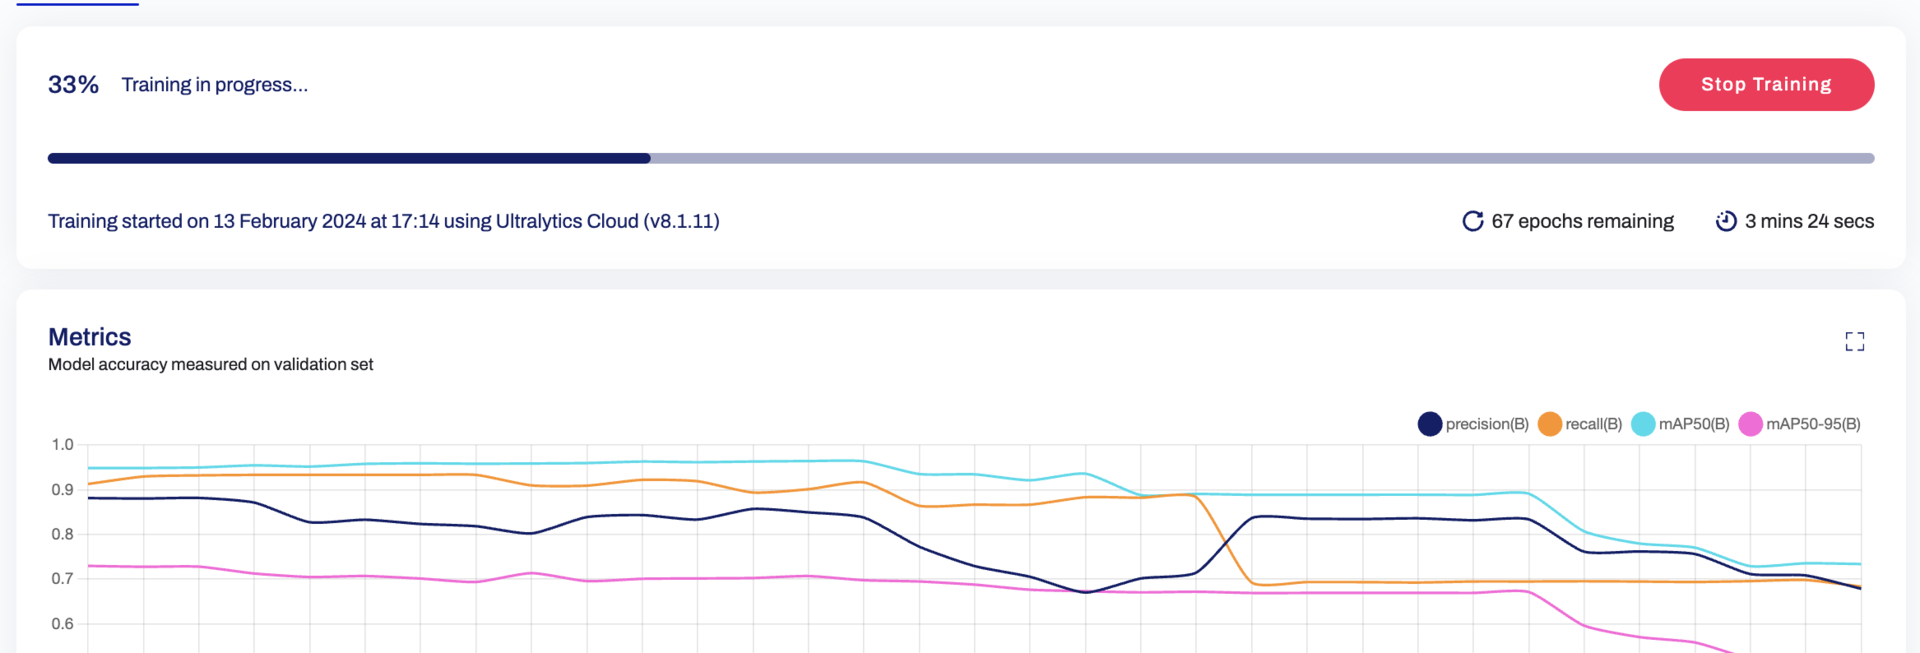 |
|
|
|
Read more about creating and other details of a Model at our [HUB Models page](models.md) |
|
|
|
## Selecting an Instance |
|
|
|
For details on picking a model and instances for it, please read our [Instances guide Page](models.md) |
|
|
|
## Steps to Train the Model |
|
|
|
Once the instance has been selected, training a model using Ultralytics HUB is a three-step process, as below: |
|
|
|
1. Picking a Dataset - Read more about datasets, steps to add/remove datasets from the [Dataset page](datasets.md) |
|
2. Picking a Model - Read more about models, steps to create/share and handle a model on the [HUB Models page](models.md) |
|
3. Training the Model on the Chosen Dataset |
|
|
|
Ultralytics HUB offers three training options: |
|
|
|
- **Ultralytics Cloud** - Explained in this page. |
|
- **Google Colab** - Train on Google's popular Colab notebooks. |
|
- **Bring your own agent** - Train models locally on your own hardware or on-premise GPU servers. |
|
|
|
In order to start training your model, follow the instructions presented in these steps. |
|
|
|
## Training via Ultralytics Cloud |
|
|
|
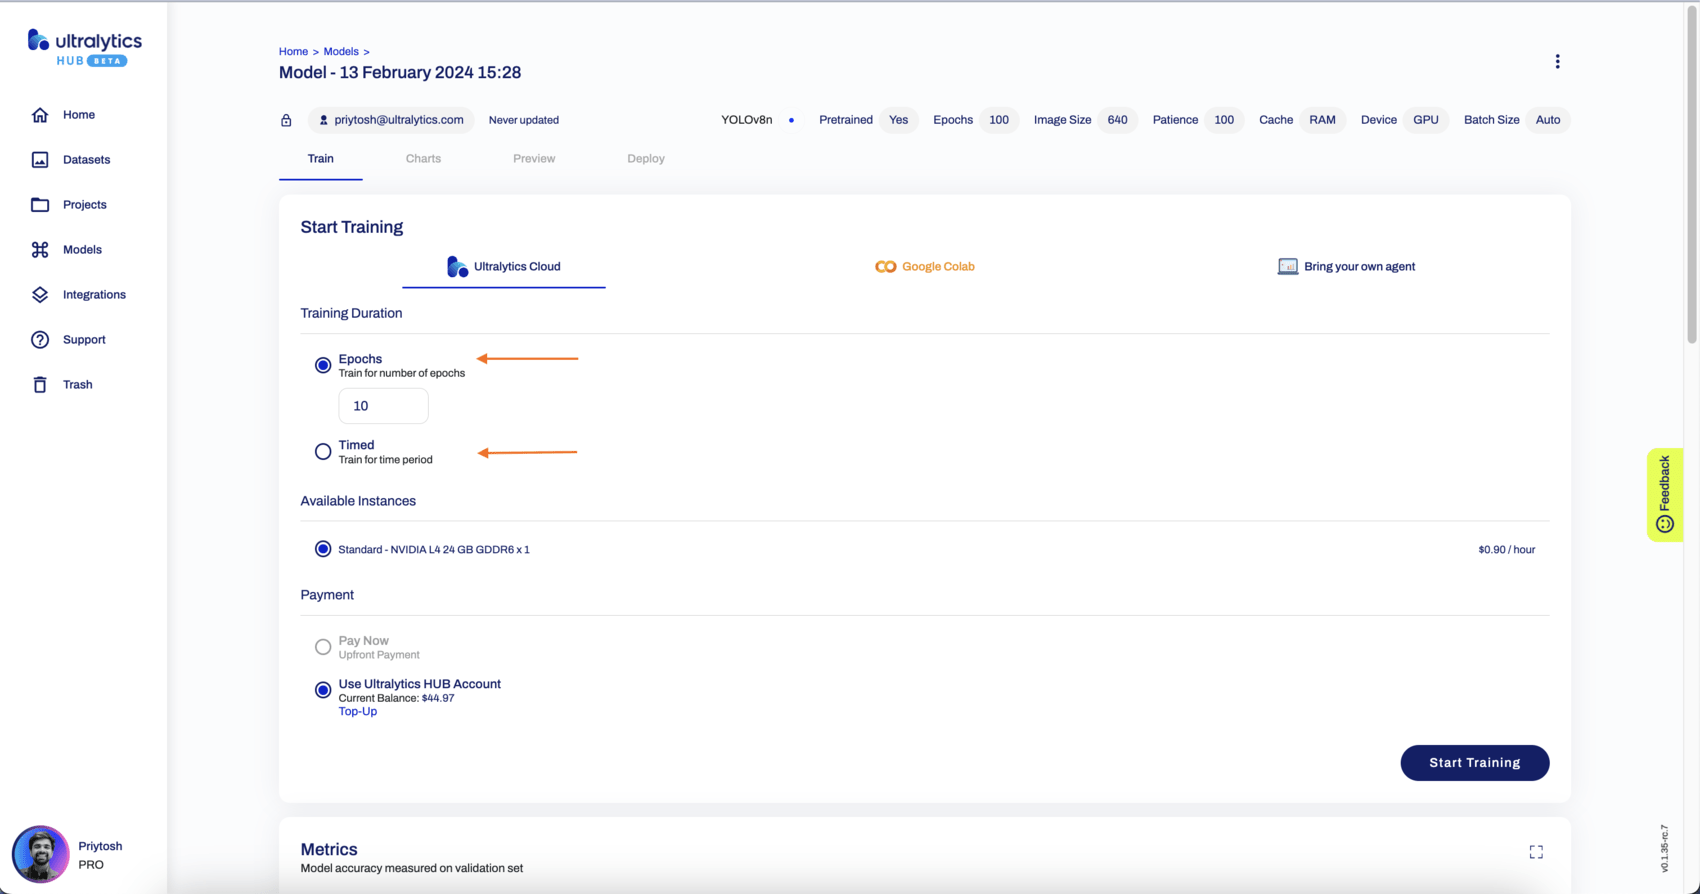
To start training your model using Ultralytics Cloud, simply select the Training Duration, Available Instances, and Payment options. |
|
|
|
**Training Duration** - Ultralytics offers two kinds of training durations: |
|
|
|
1. Training based on `Epochs`: This option allows you to train your model based on the number of times your dataset needs to go through the cycle of train, label, and test. The exact pricing based on the number of epochs is hard to determine. Hence, if the credit gets exhausted before the intended number of epochs, the training pauses, and you get a prompt to top-up and resume training. |
|
2. Timed Training: The timed training feature allows you to fix the time duration of the entire training process and also determines the estimated amount before the start of training. |
|
|
|
 |
|
|
|
When the training starts, you can click **Done** and monitor the training progress on the Model page. |
|
|
|
## Monitor Your Training |
|
|
|
Once the model and mode of training have been selected, you can monitor the training procedure on the `Train` section with the link provided in the terminal (on your agent/Google Colab) or a button from Ultralytics Cloud. |
|
|
|
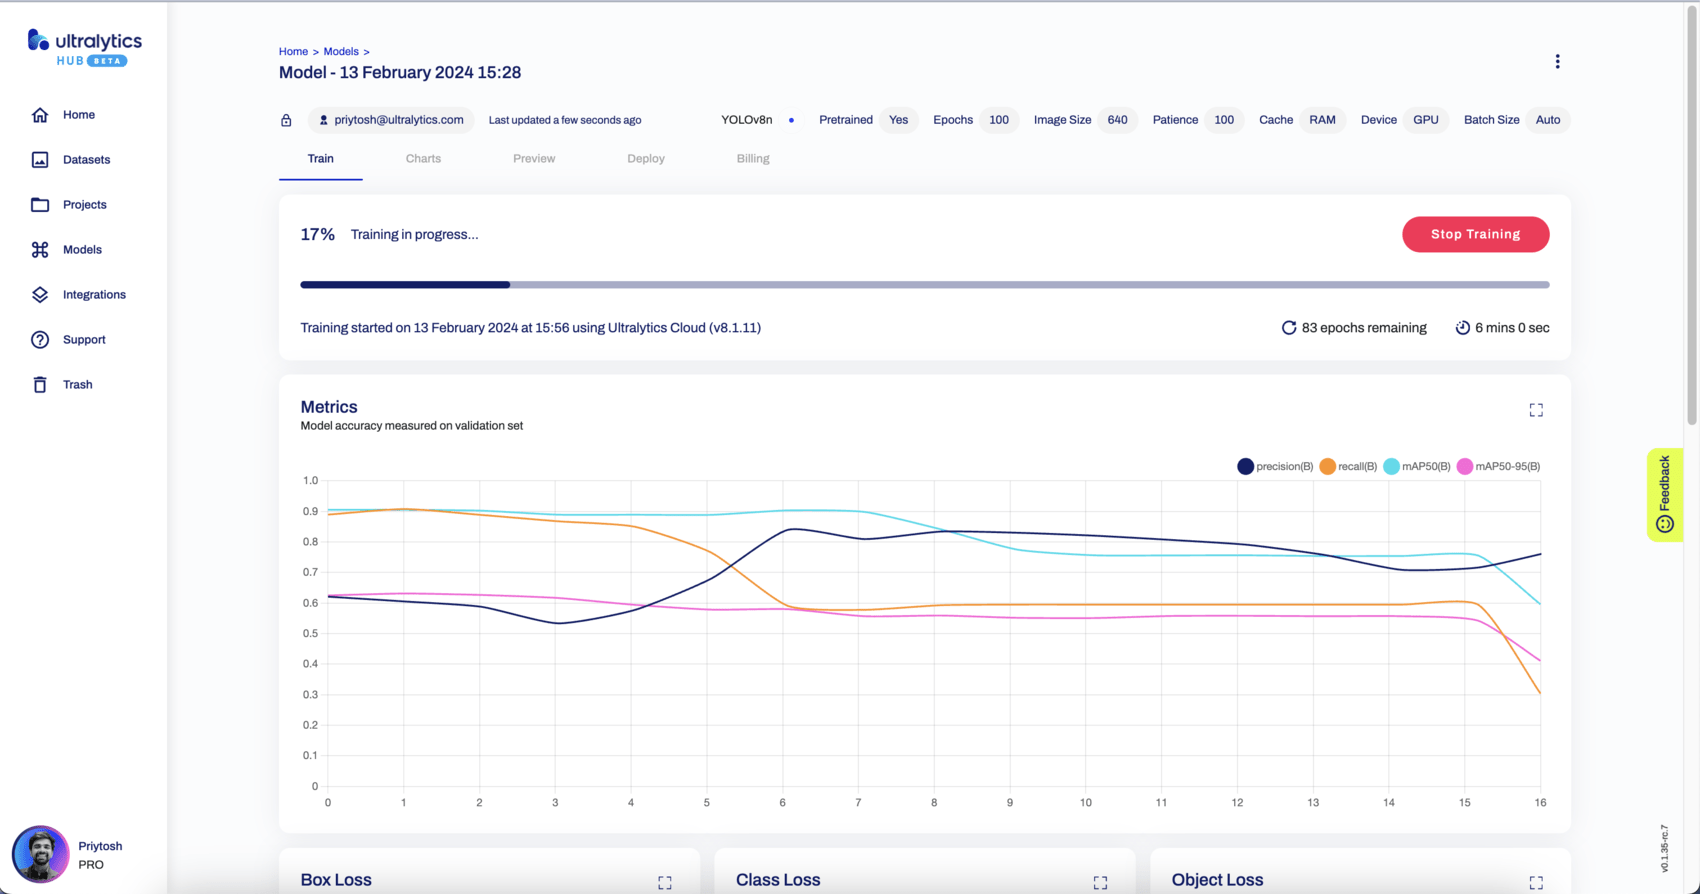 |
|
|
|
## Stopping and Resuming Your Training |
|
|
|
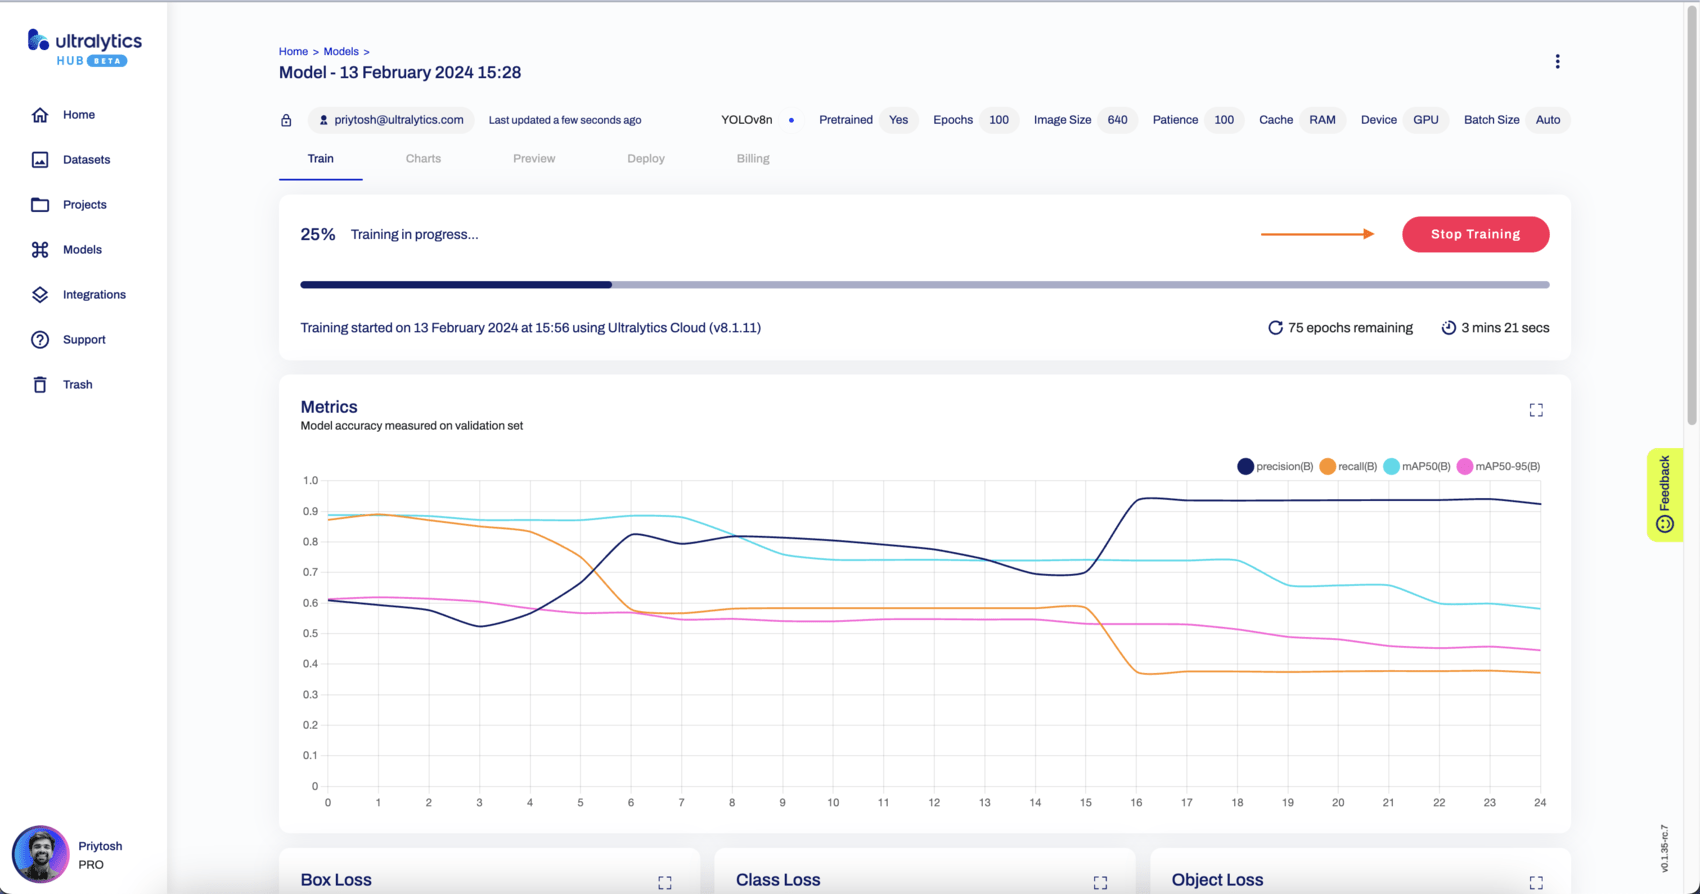
Once the training has started, you can `Stop` the training, which will also correspondingly pause the credit usage. You can then `Resume` the training from the point where it stopped. |
|
|
|
 |
|
|
|
## Payments and Billing Options |
|
|
|
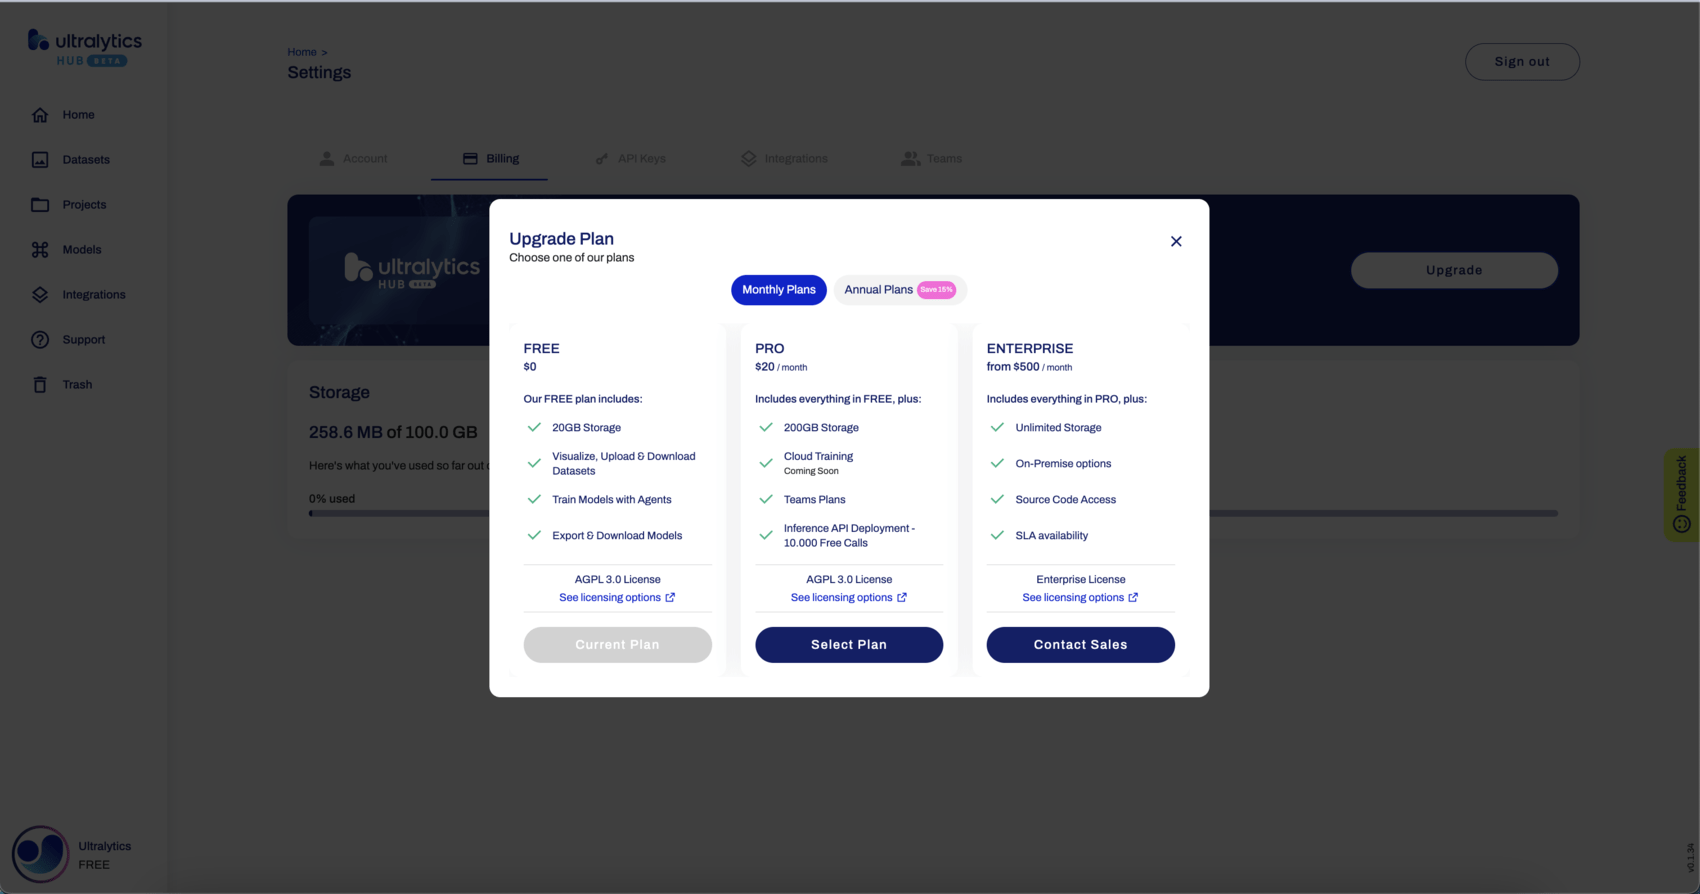
Ultralytics HUB offers `Pay Now` as upfront and/or using `Ultralytics HUB Account` as a wallet to top up and fulfill the billing. You can choose from two types of accounts: `Free` and `Pro` user. |
|
|
|
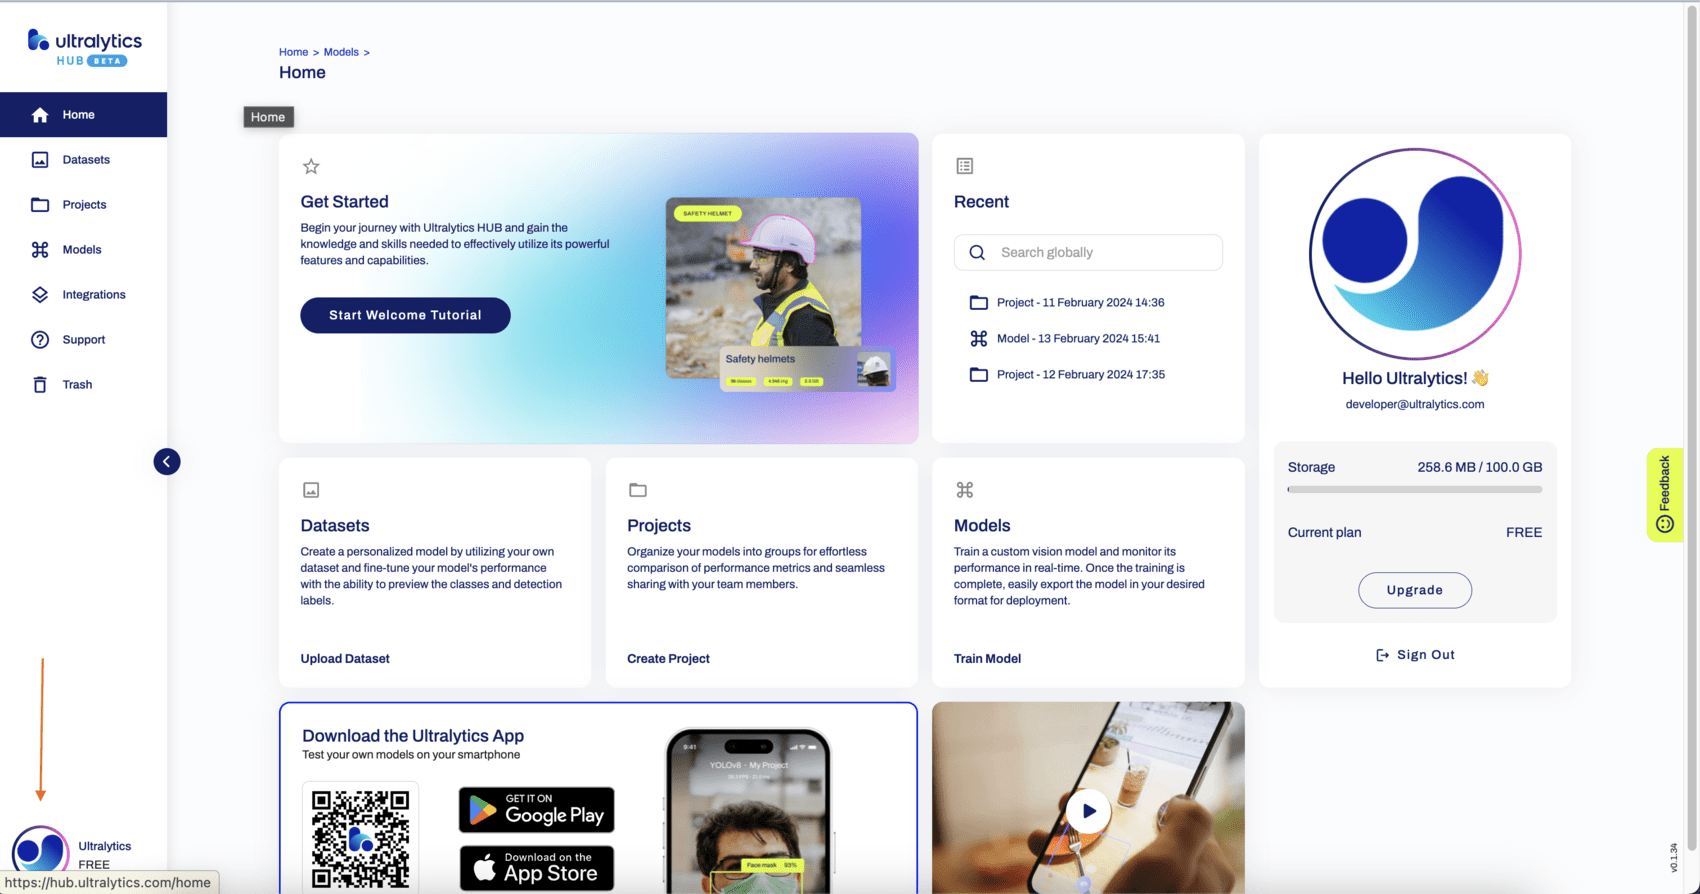
To access your profile, click on the profile picture in the bottom left corner. |
|
|
|
 |
|
|
|
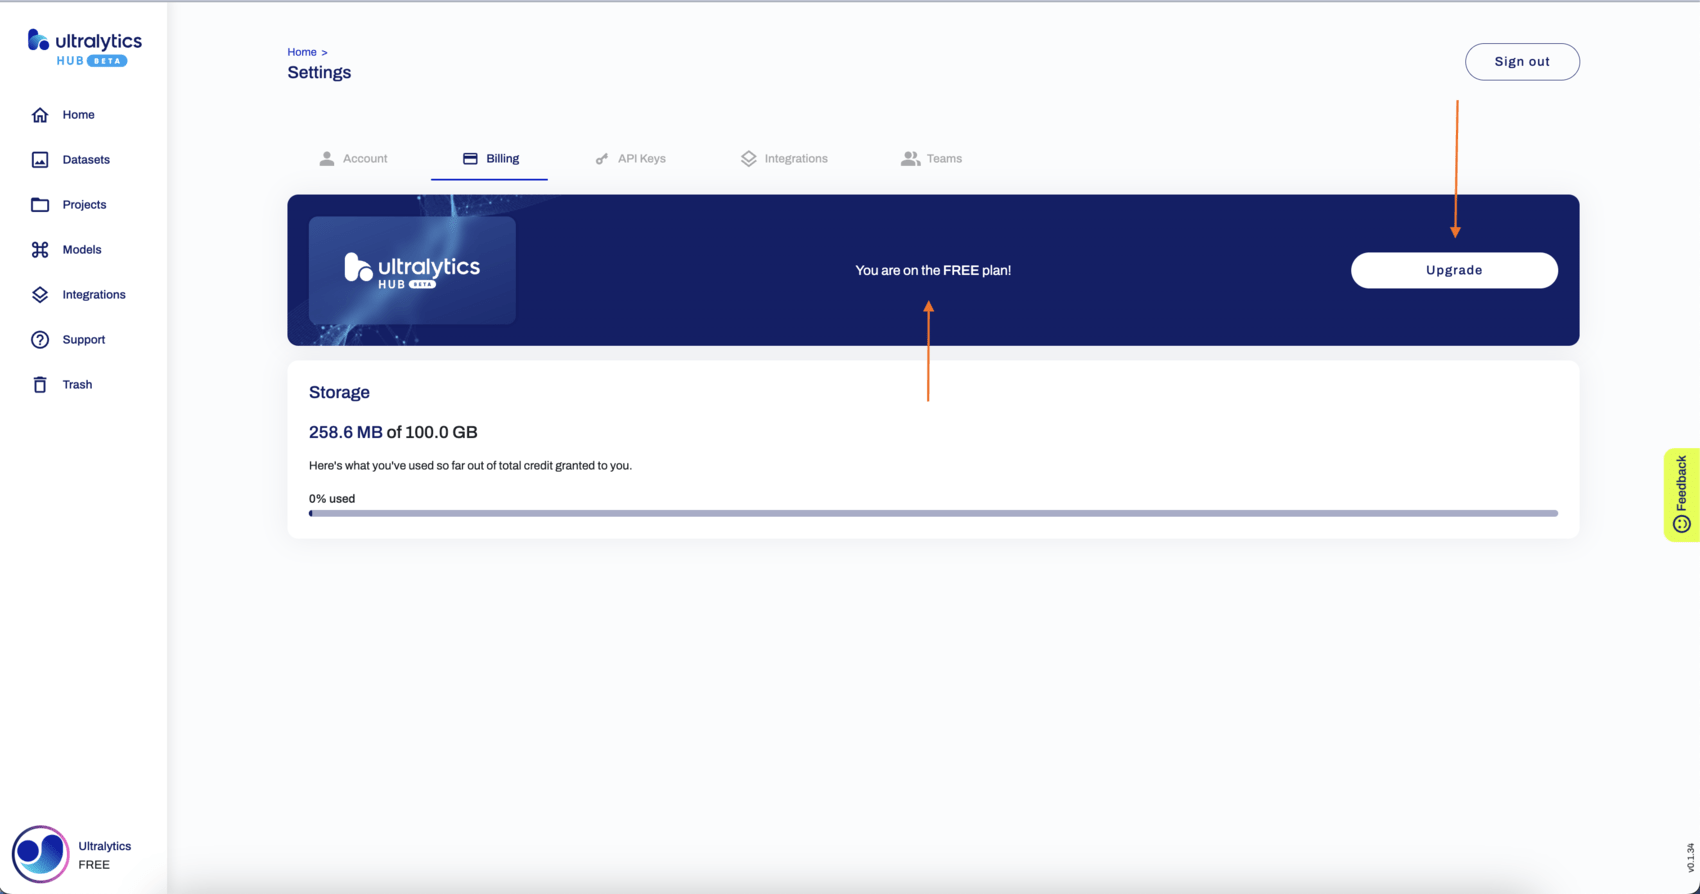
Click on the Billing tab to view your current plan and options to upgrade it. |
|
|
|
 |
|
|
|
You will be prompted with different available plans, and you can pick from the available plans as shown below. |
|
|
|
 |
|
|
|
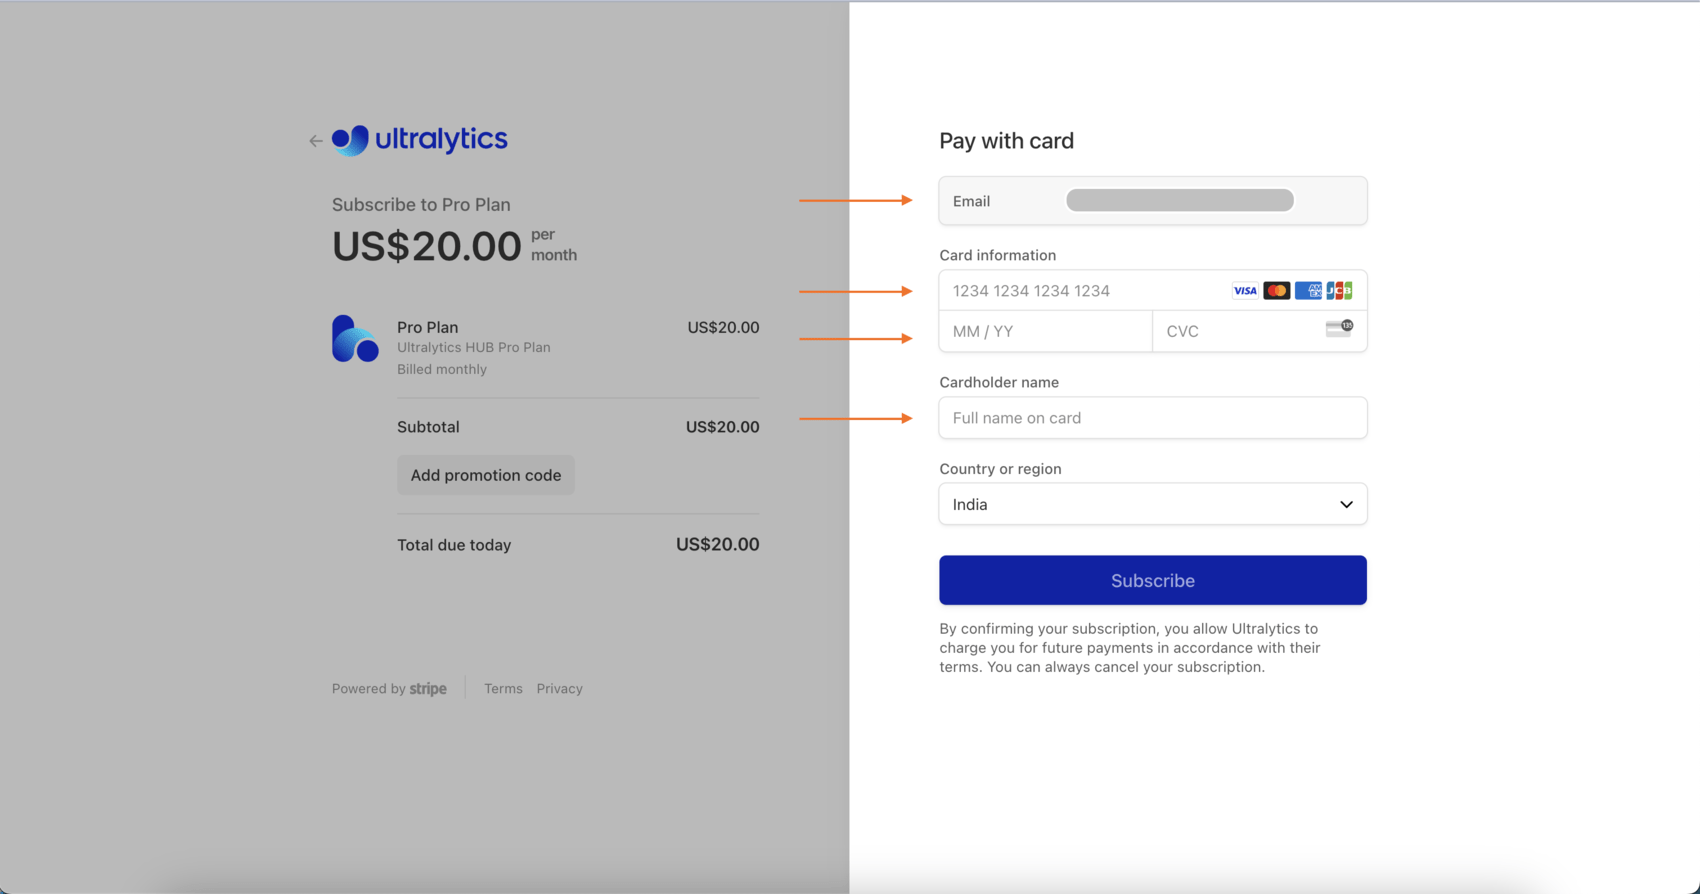
Navigate to the Payment page, fill in the details, and complete the payment. |
|
|
|
|
|
|