18 KiB
| comments | description | keywords |
|---|---|---|
| true | Explore Ultralytics HUB for easy training, analysis, preview, deployment and sharing of custom vision AI models using YOLOv8. Start training today!. | Ultralytics HUB, YOLOv8, custom AI models, model training, model deployment, model analysis, vision AI |
Ultralytics HUB Models
Ultralytics HUB models provide a streamlined solution for training vision AI models on custom datasets.
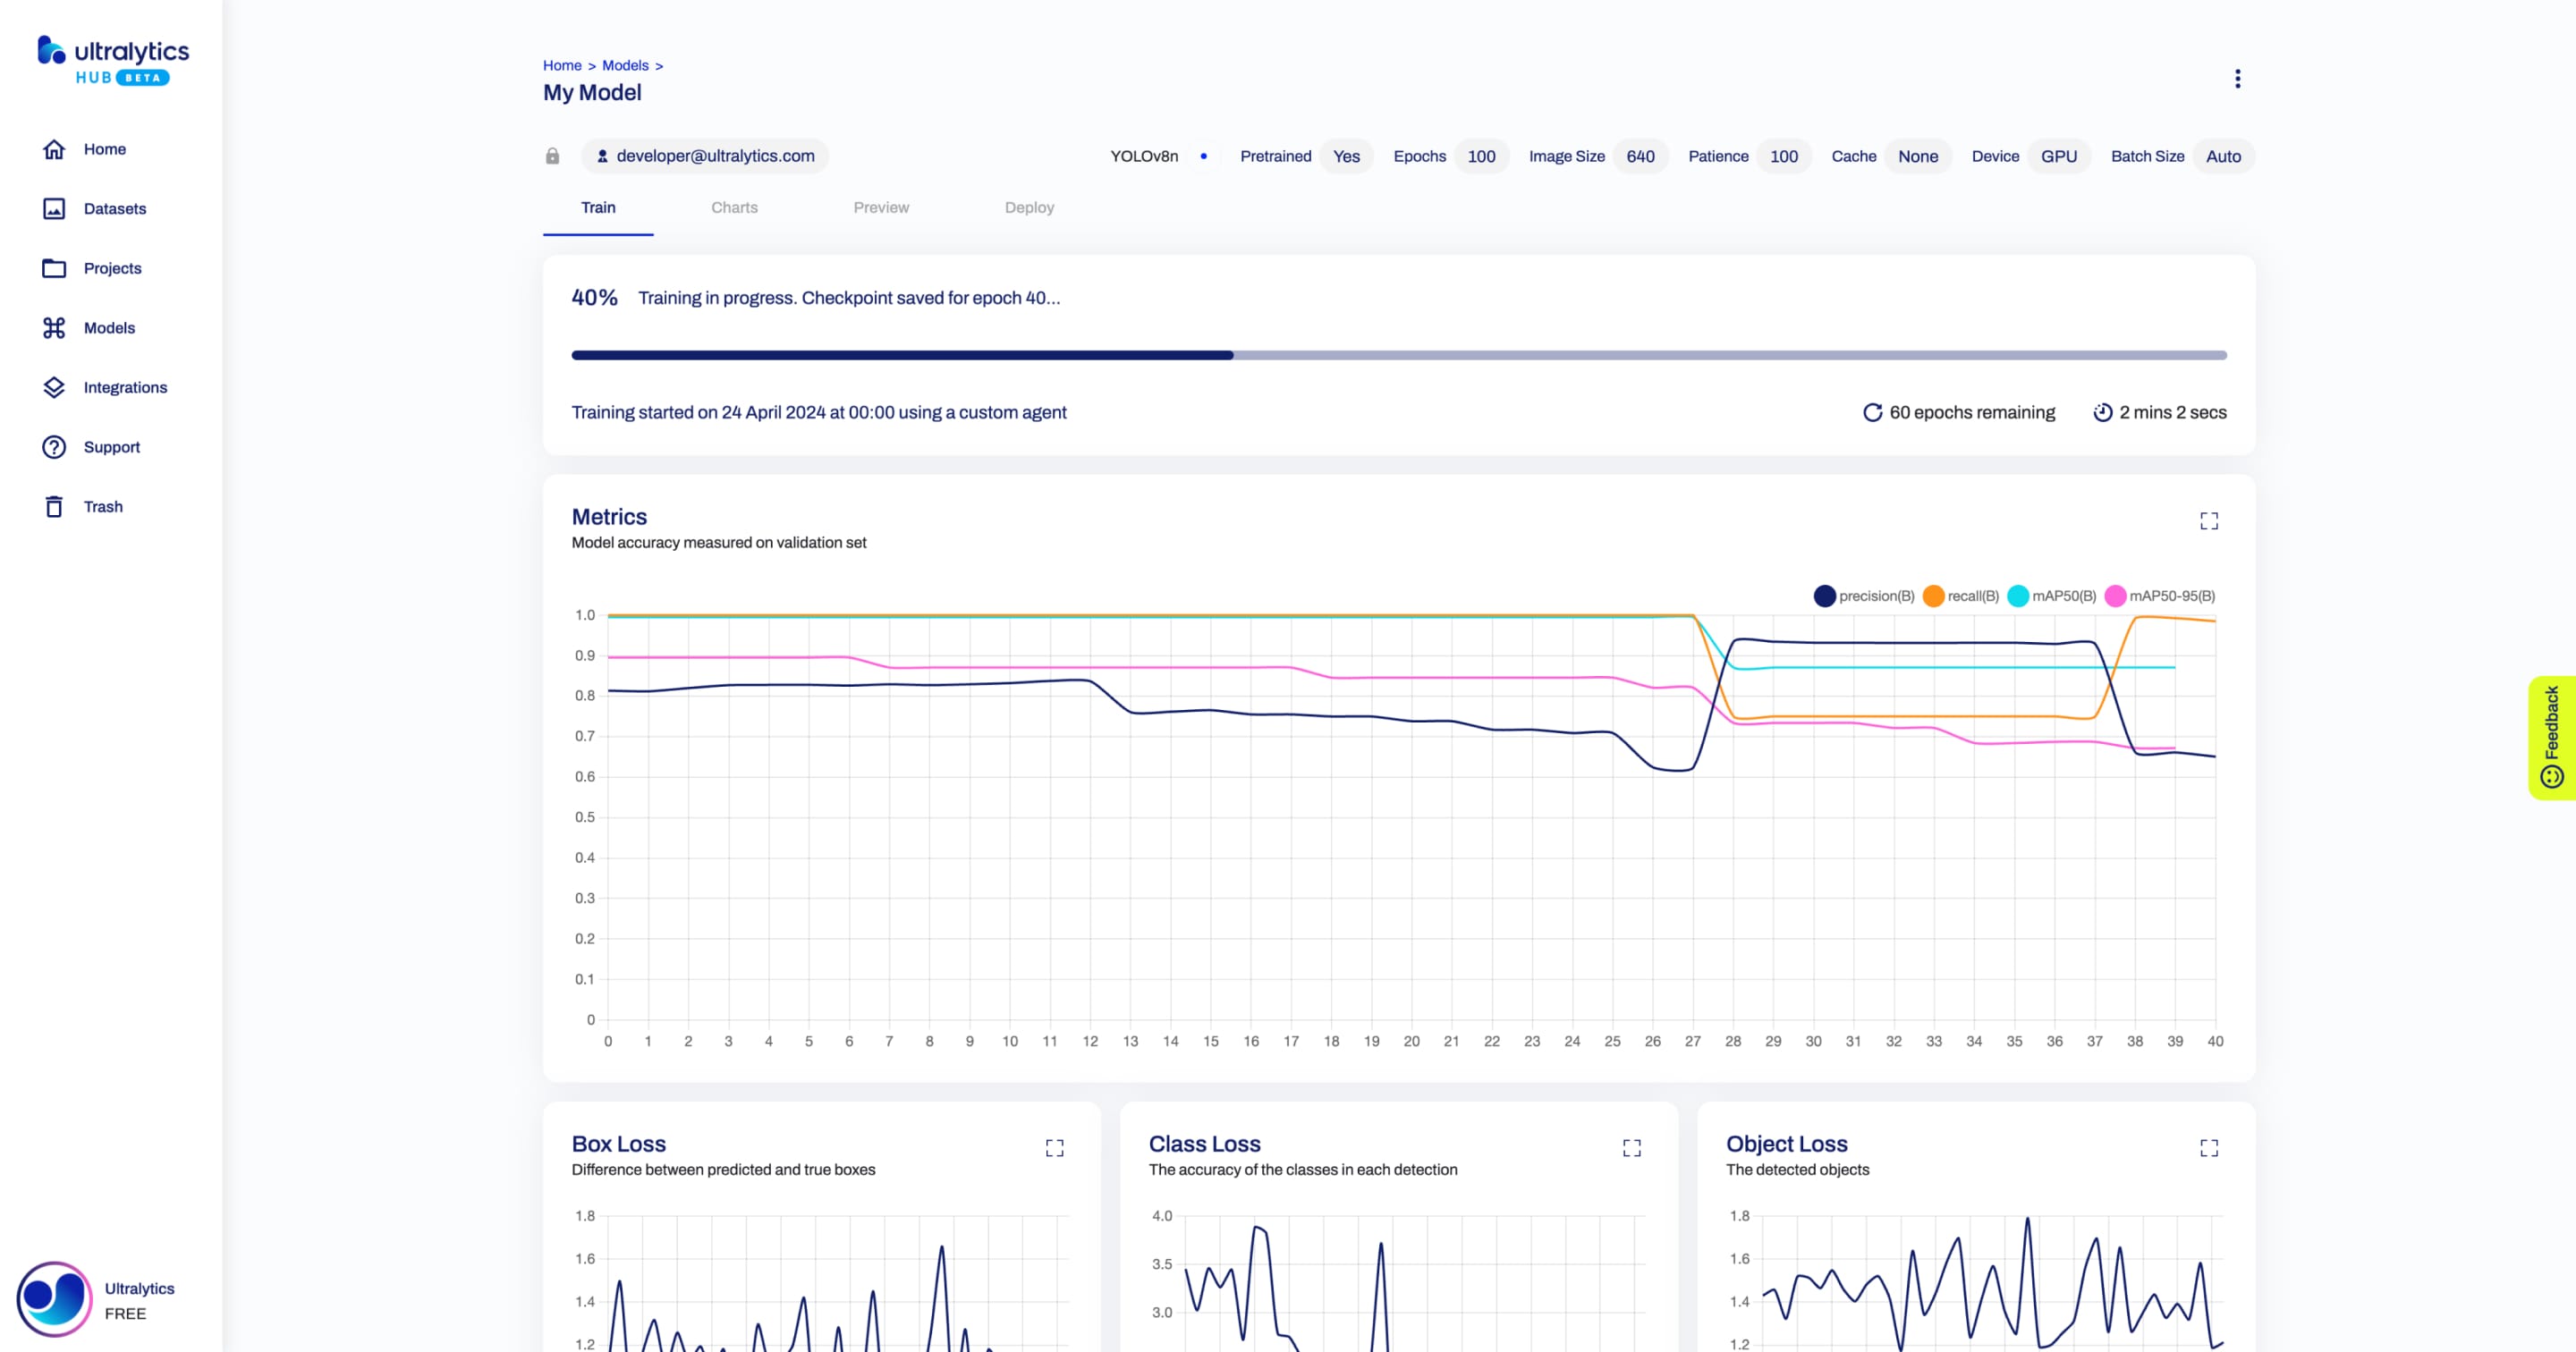
The process is user-friendly and efficient, involving a simple three-step creation and accelerated training powered by Ultralytics YOLOv8. During training, real-time updates on model metrics are available so that you can monitor each step of the progress. Once training is completed, you can preview your model and easily deploy it to real-world applications. Therefore, Ultralytics HUB offers a comprehensive yet straightforward system for model creation, training, evaluation, and deployment.
Watch: Ultralytics HUB Training and Validation Overview
Train Model
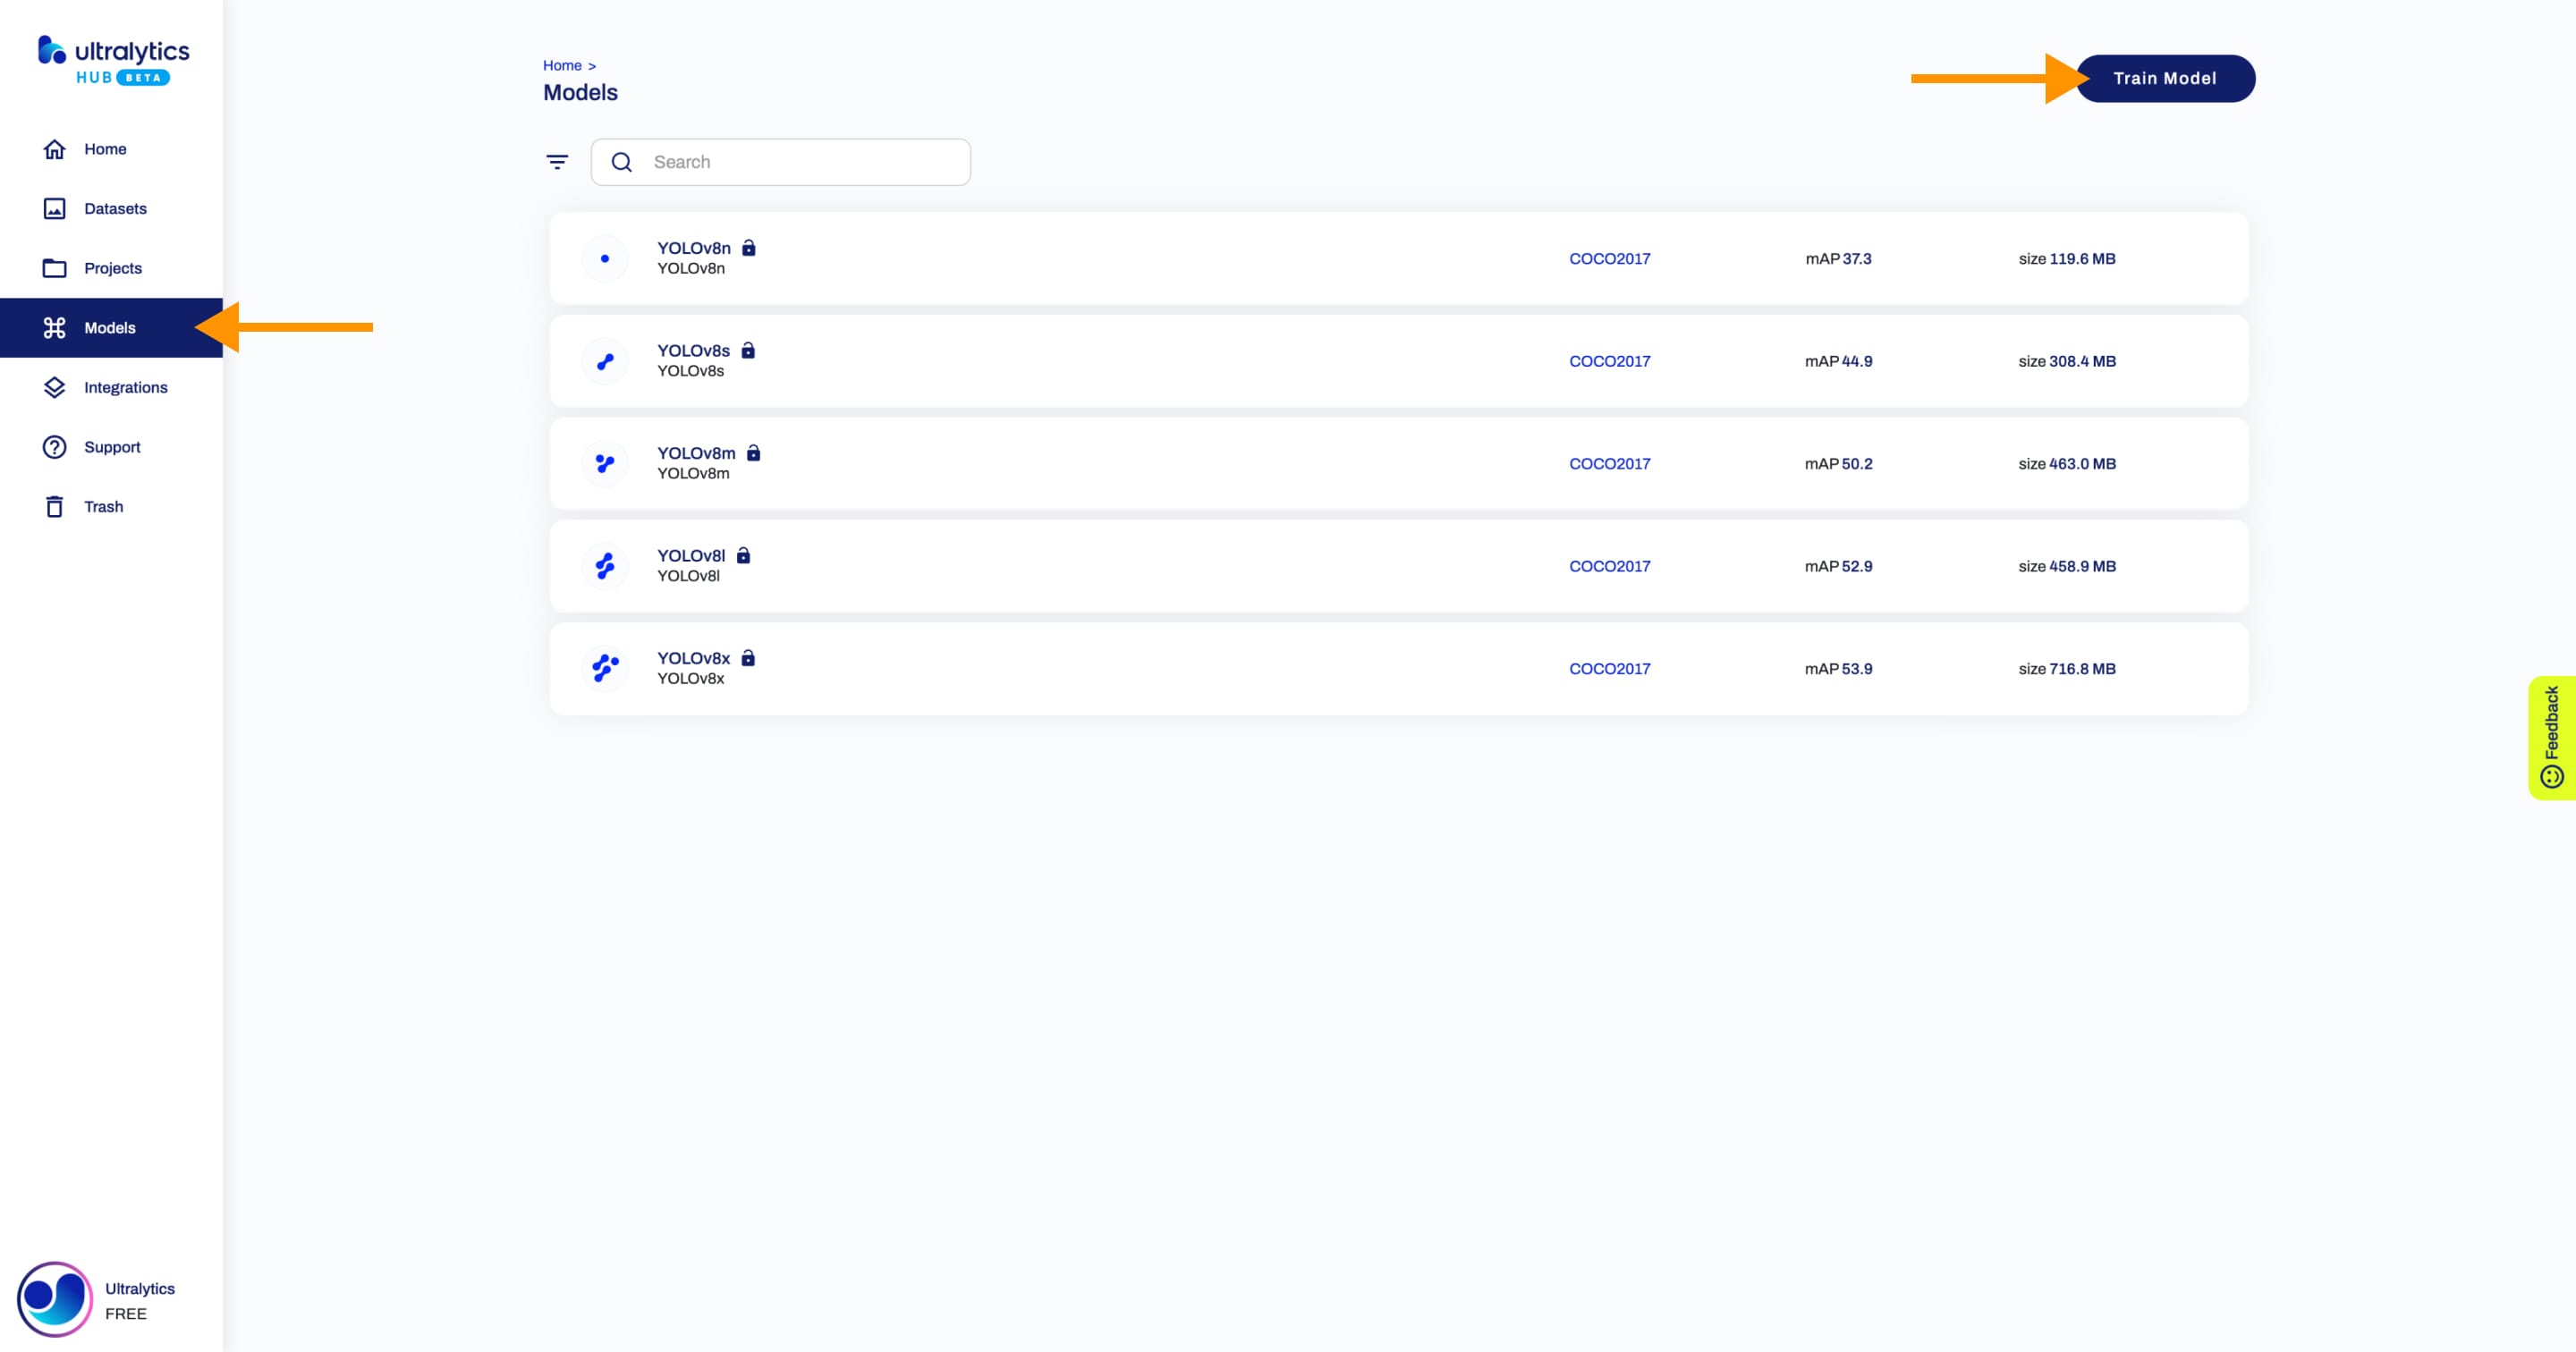
Navigate to the Models page by clicking on the Models button in the sidebar and click on the Train Model button on the top right of the page.
??? tip "Tip"
You can train a model directly from the [Home](https://hub.ultralytics.com/home) page.
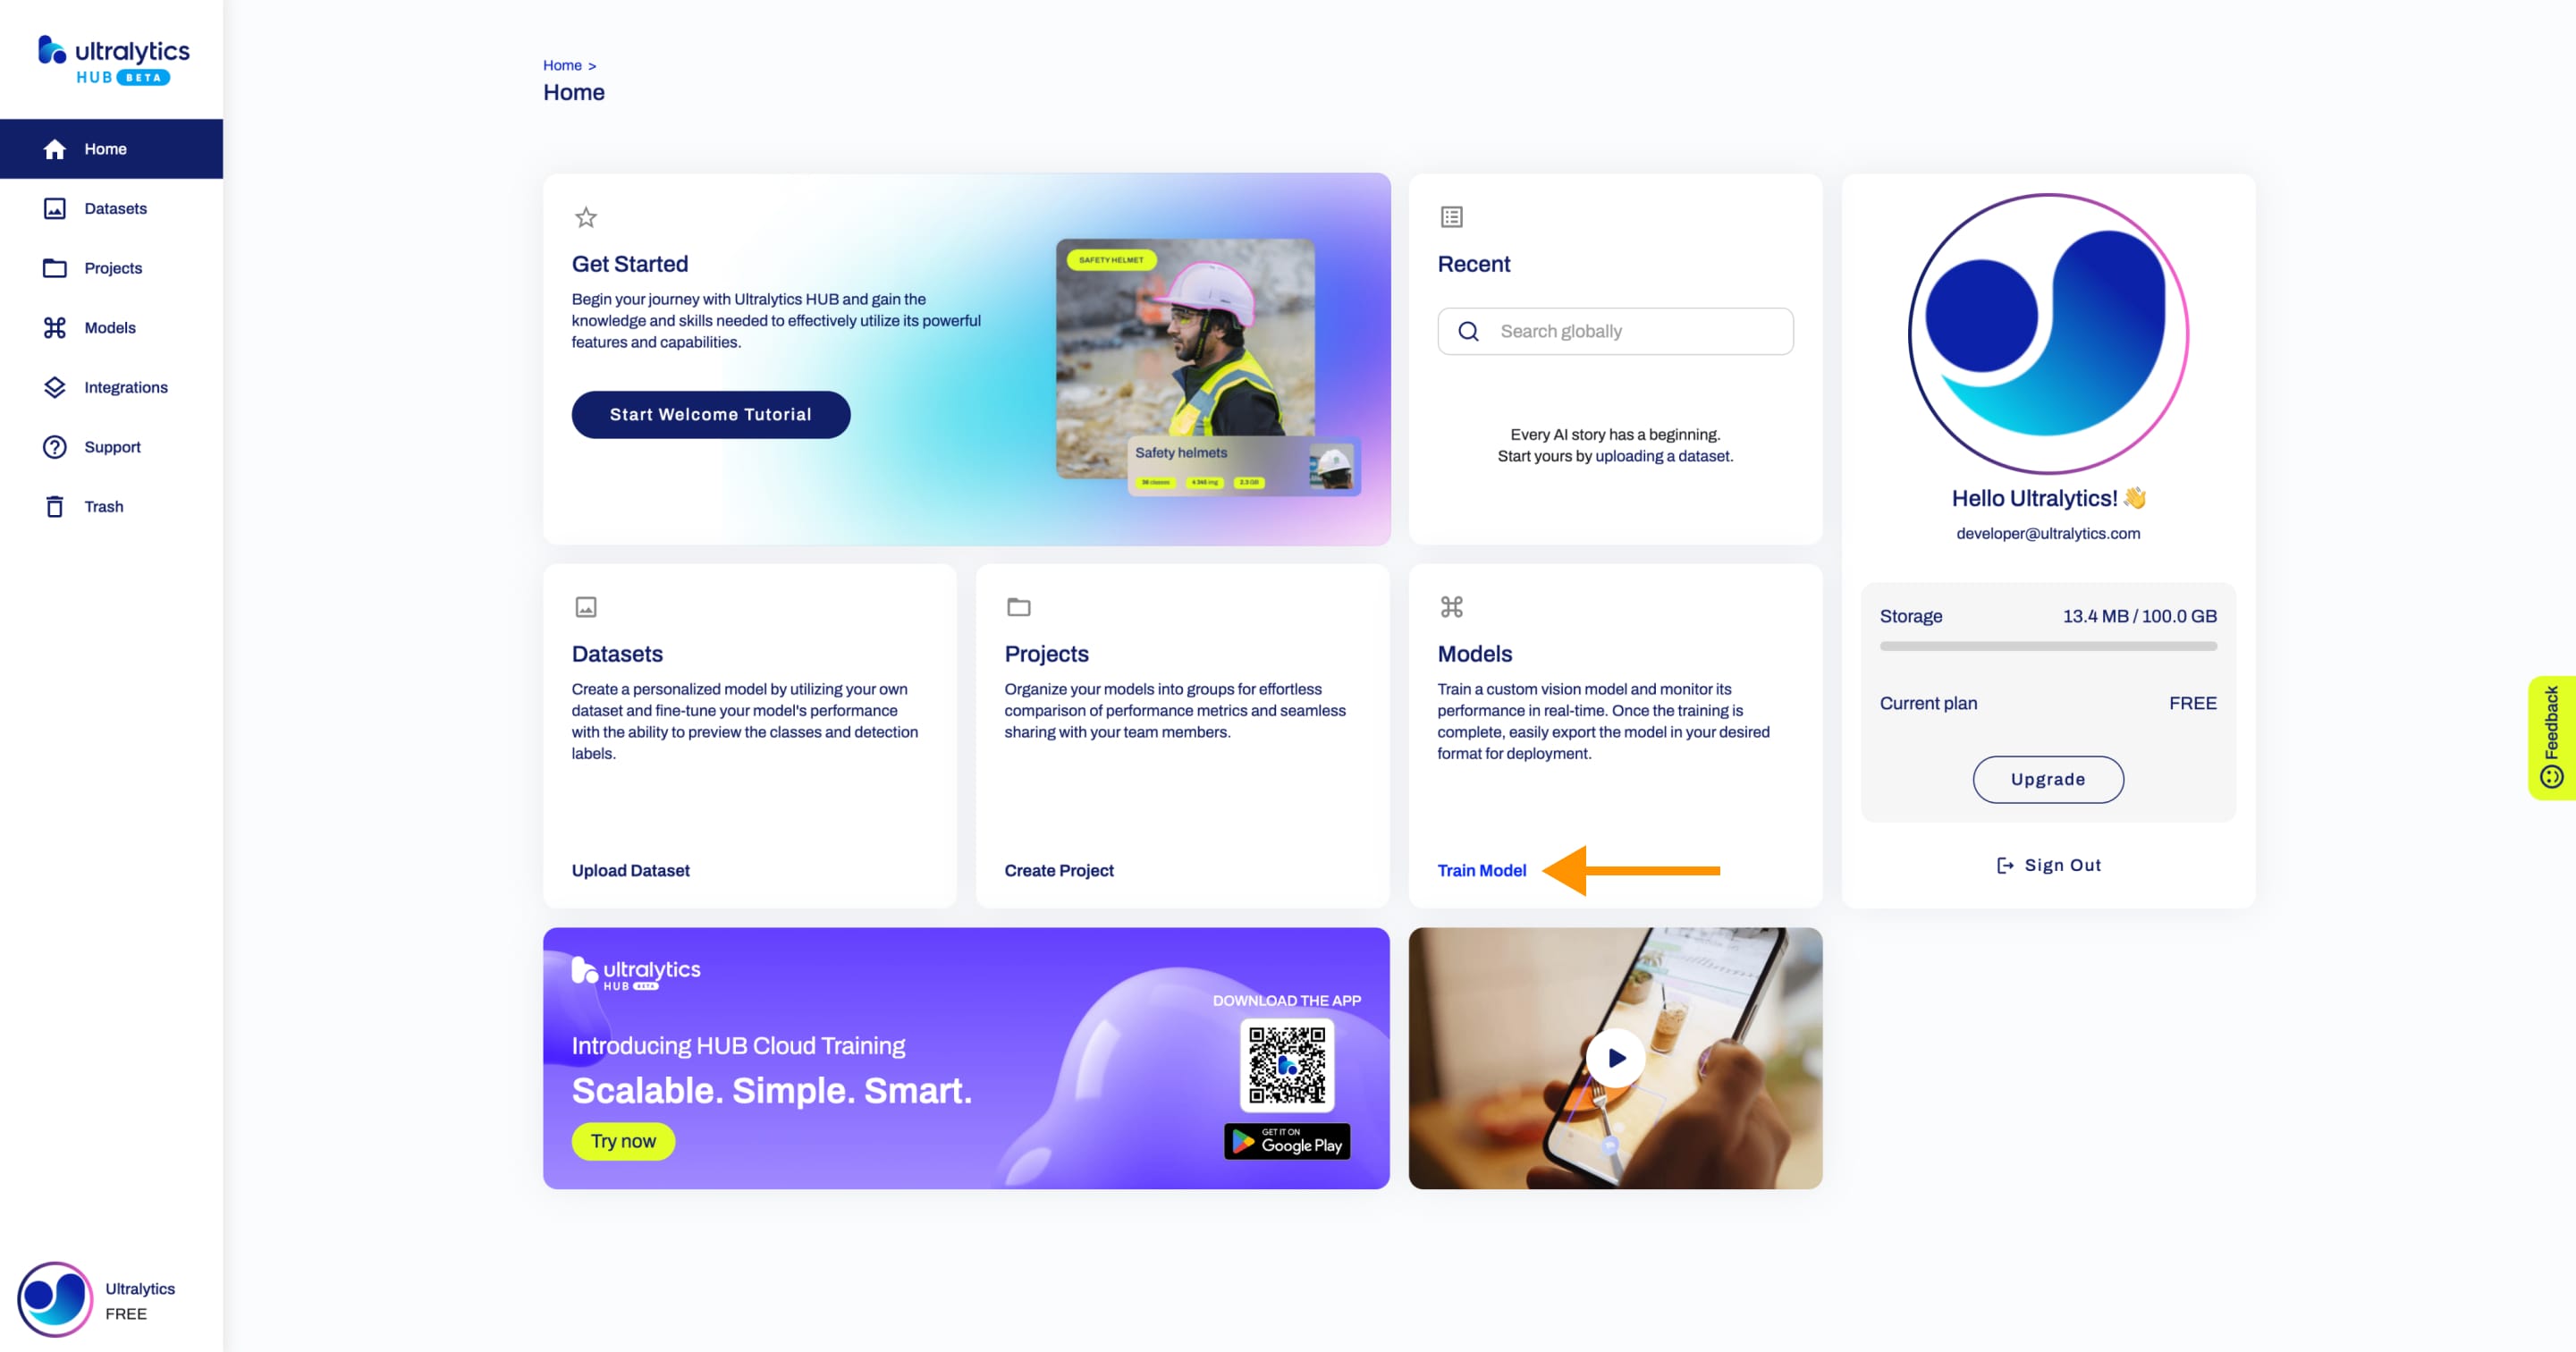
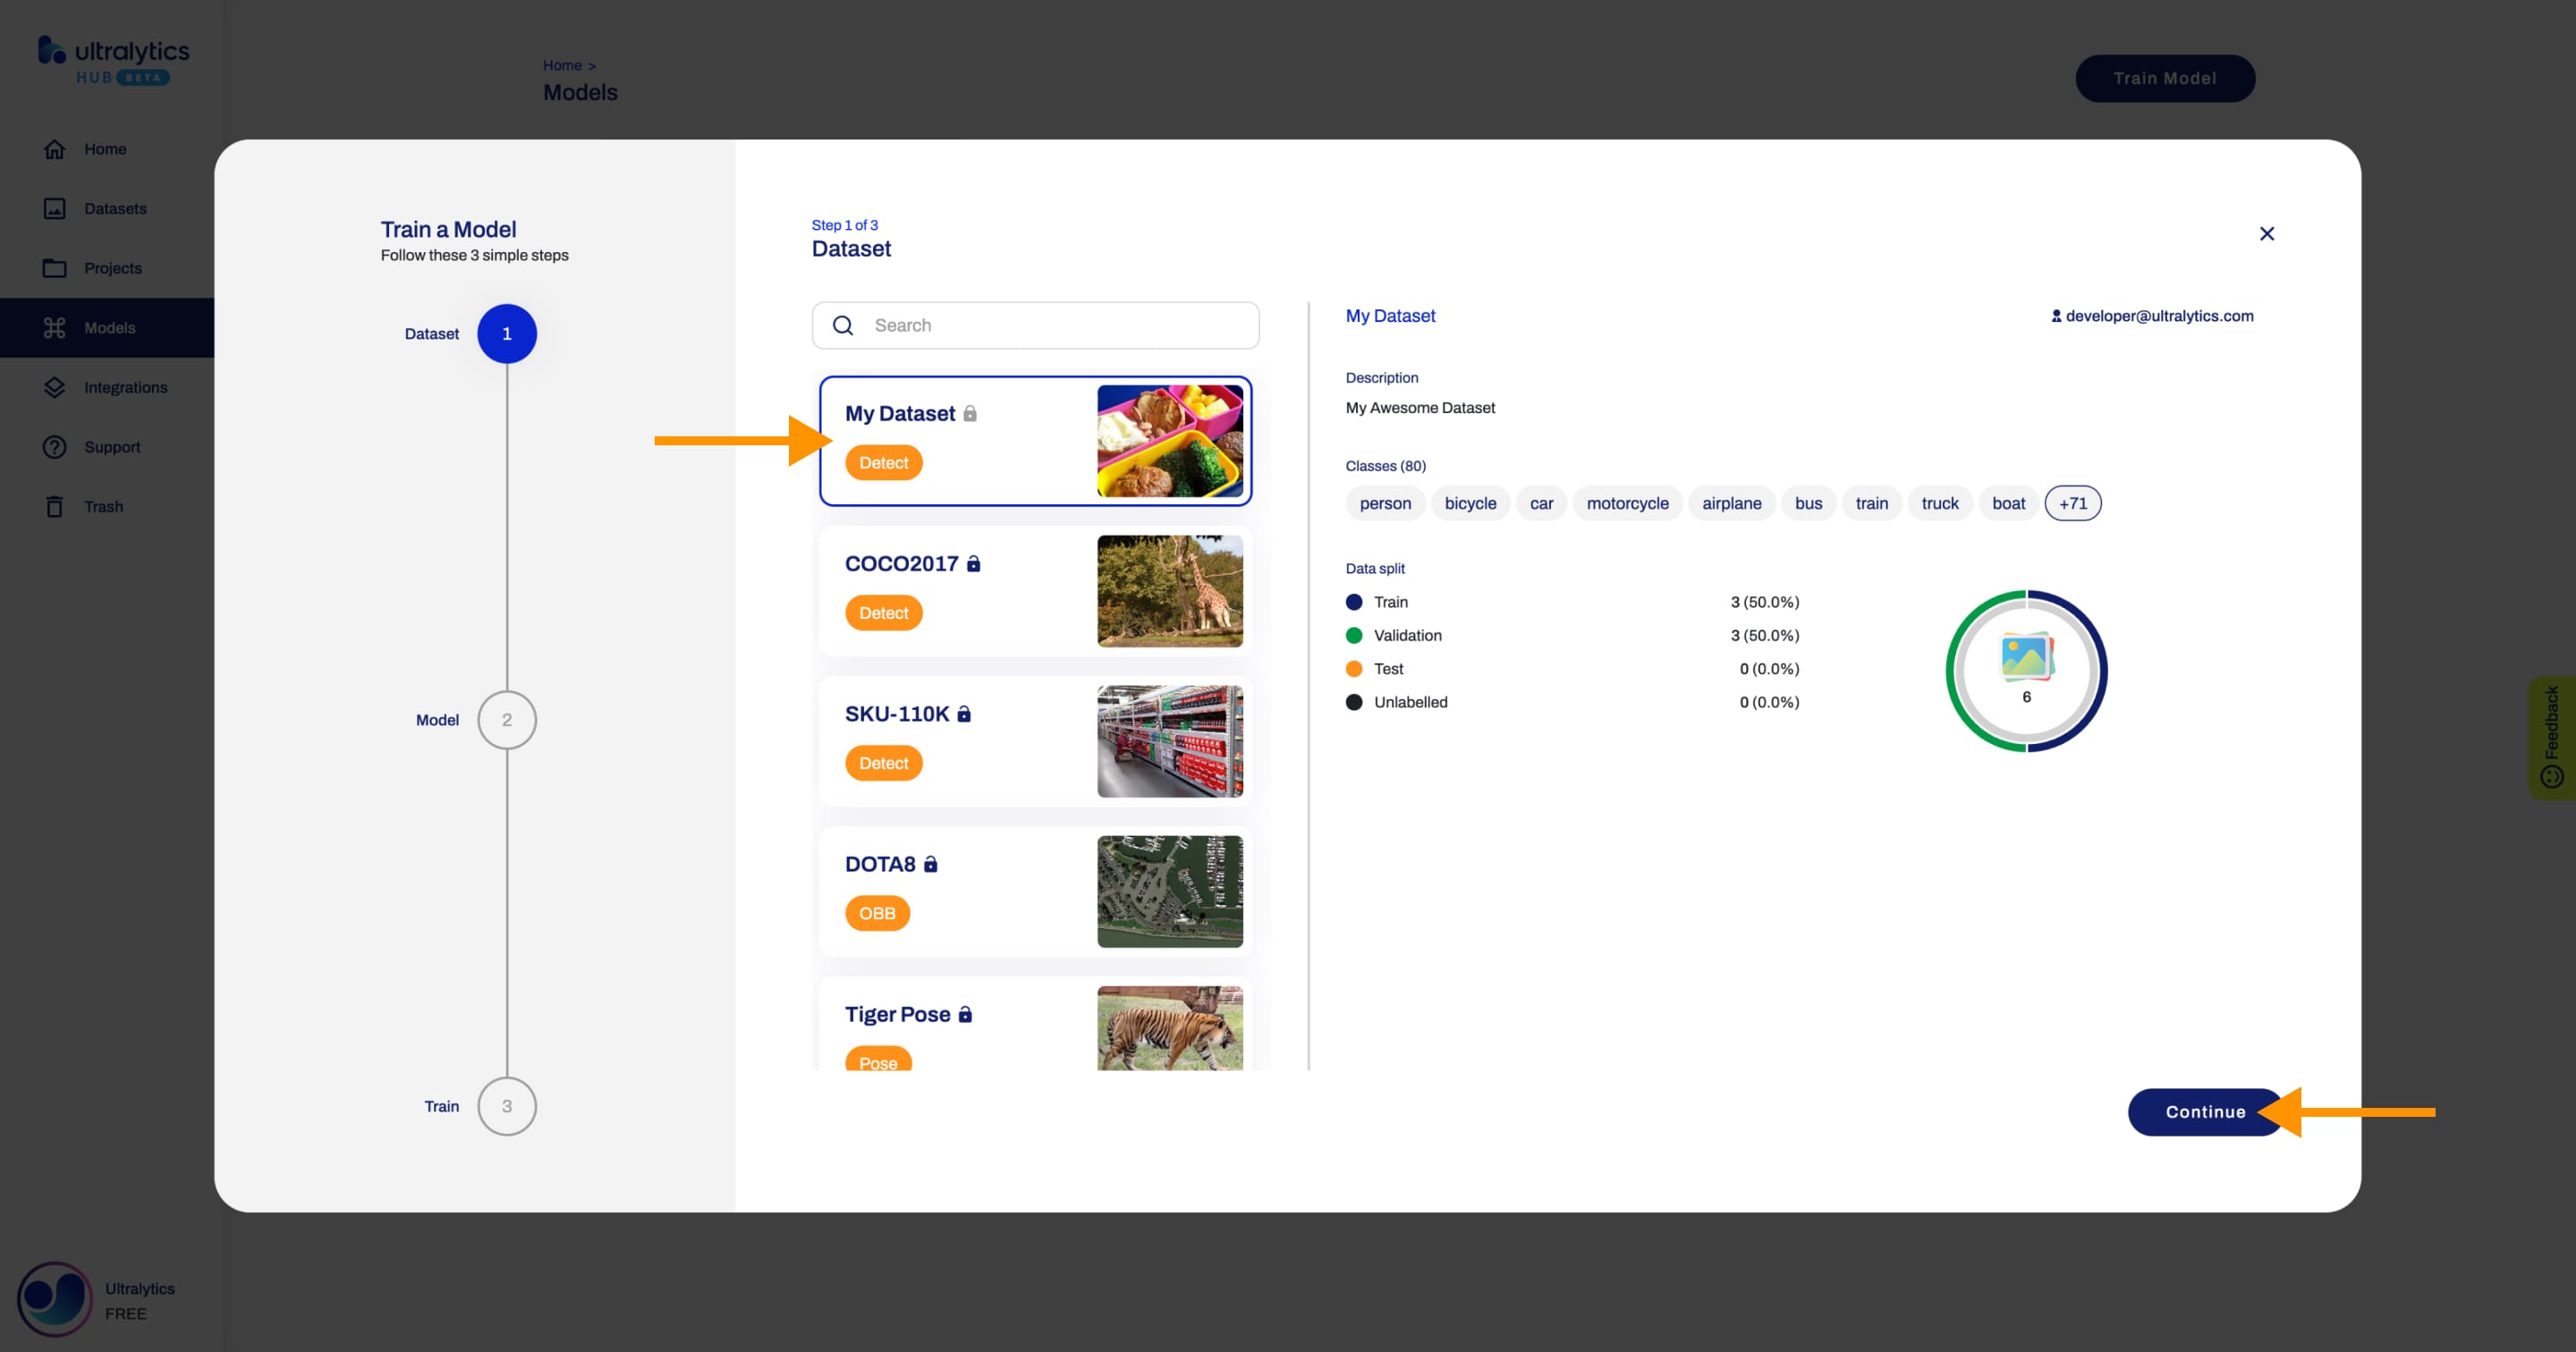
This action will trigger the Train Model dialog which has three simple steps:
1. Dataset
In this step, you have to select the dataset you want to train your model on. After you selected a dataset, click Continue.
??? tip "Tip"
You can skip this step if you train a model directly from the Dataset page.
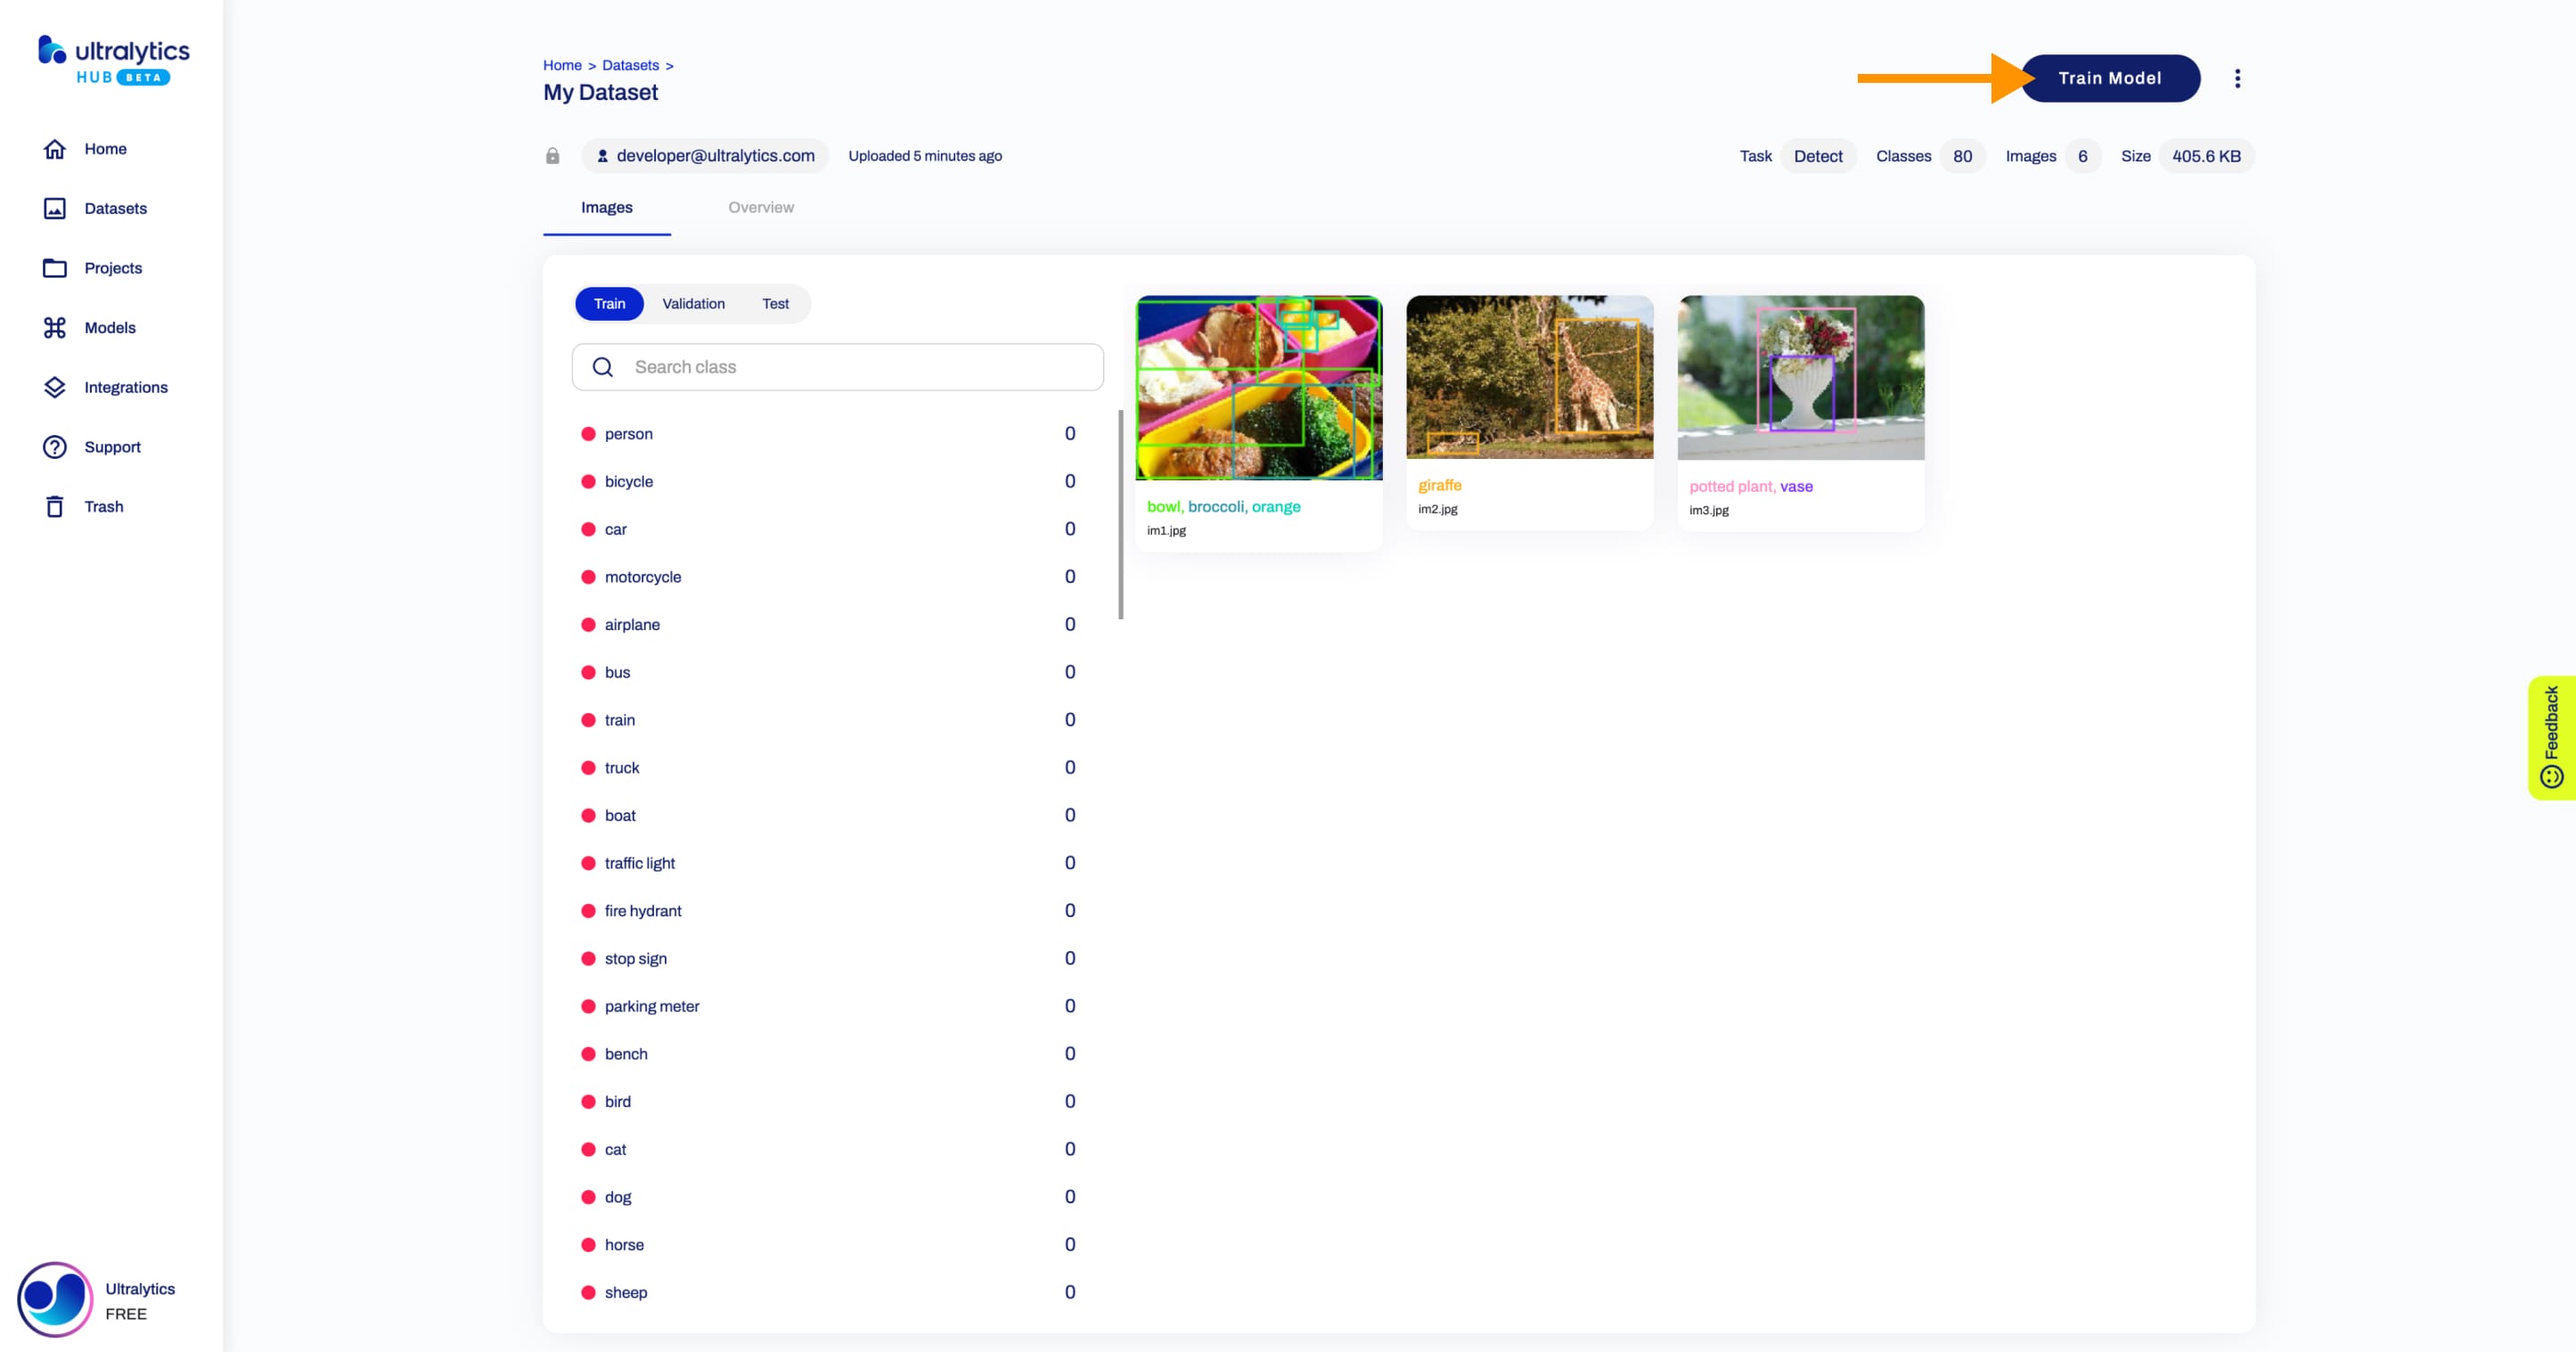
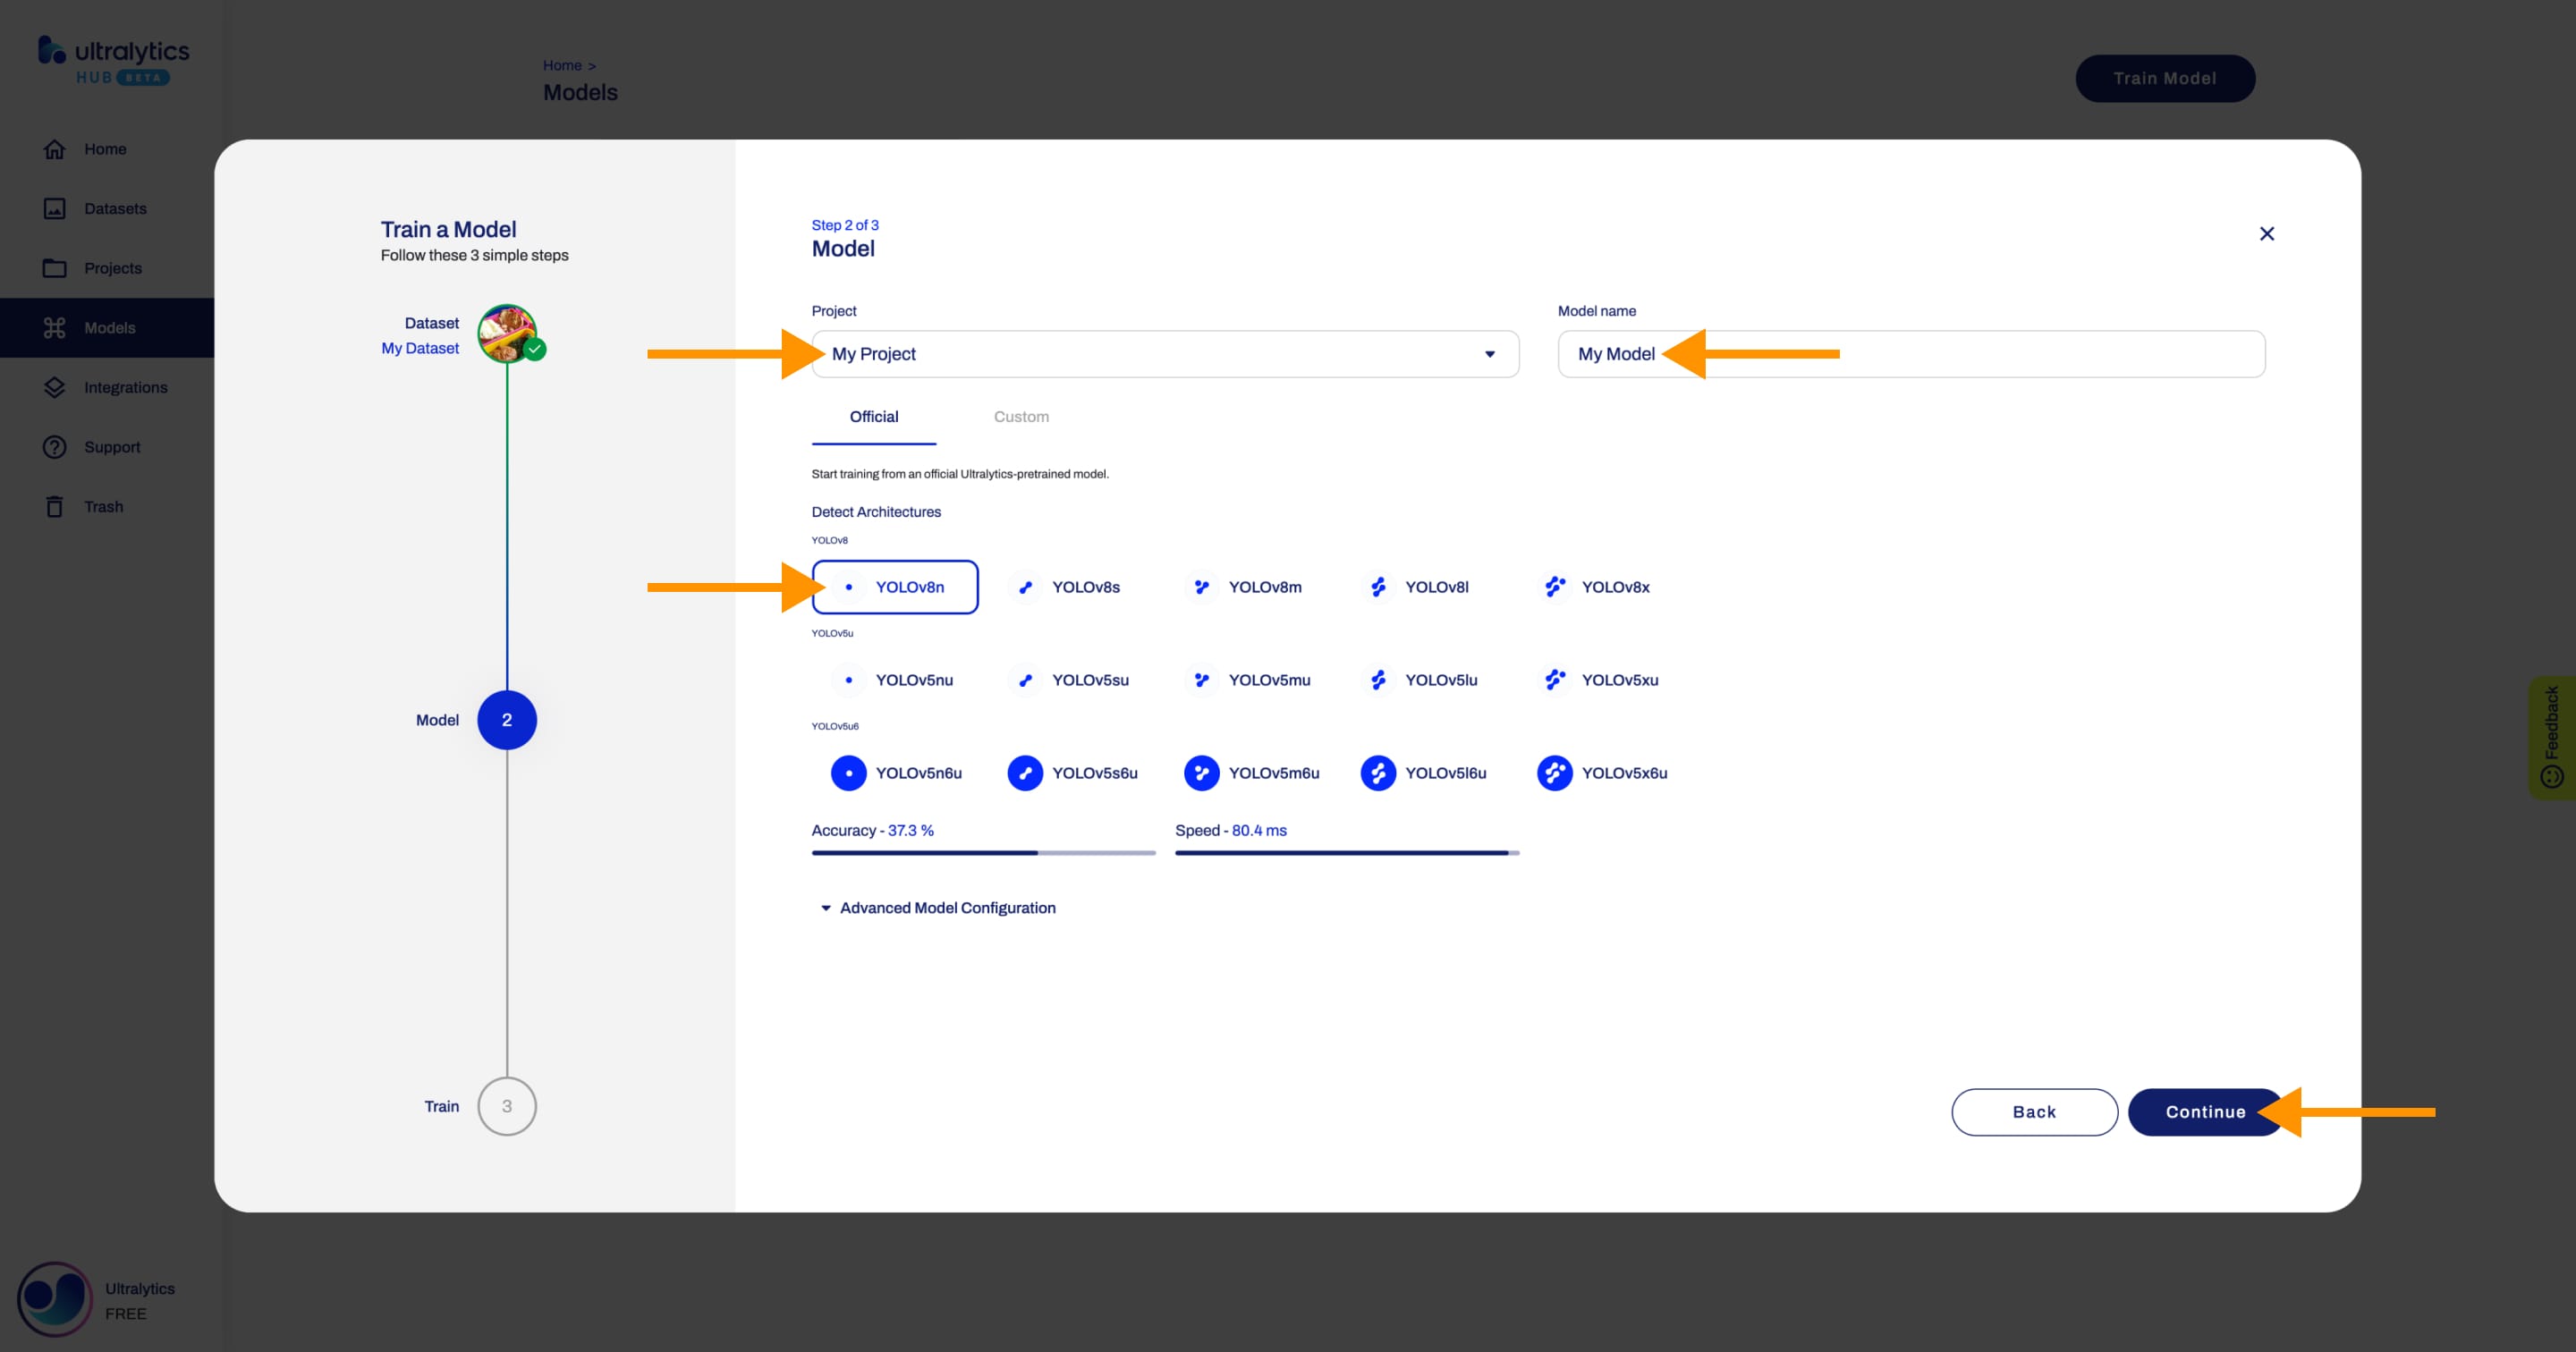
2. Model
In this step, you have to choose the project in which you want to create your model, the name of your model and your model's architecture.
??? note "Note"
Ultralytics HUB will try to pre-select the project.
If you opened the **Train Model** dialog as described above, [Ultralytics HUB](https://ultralytics.com/hub) will pre-select the last project you used.
If you opened the **Train Model** dialog from the Project page, [Ultralytics HUB](https://ultralytics.com/hub) will pre-select the project you were inside of.
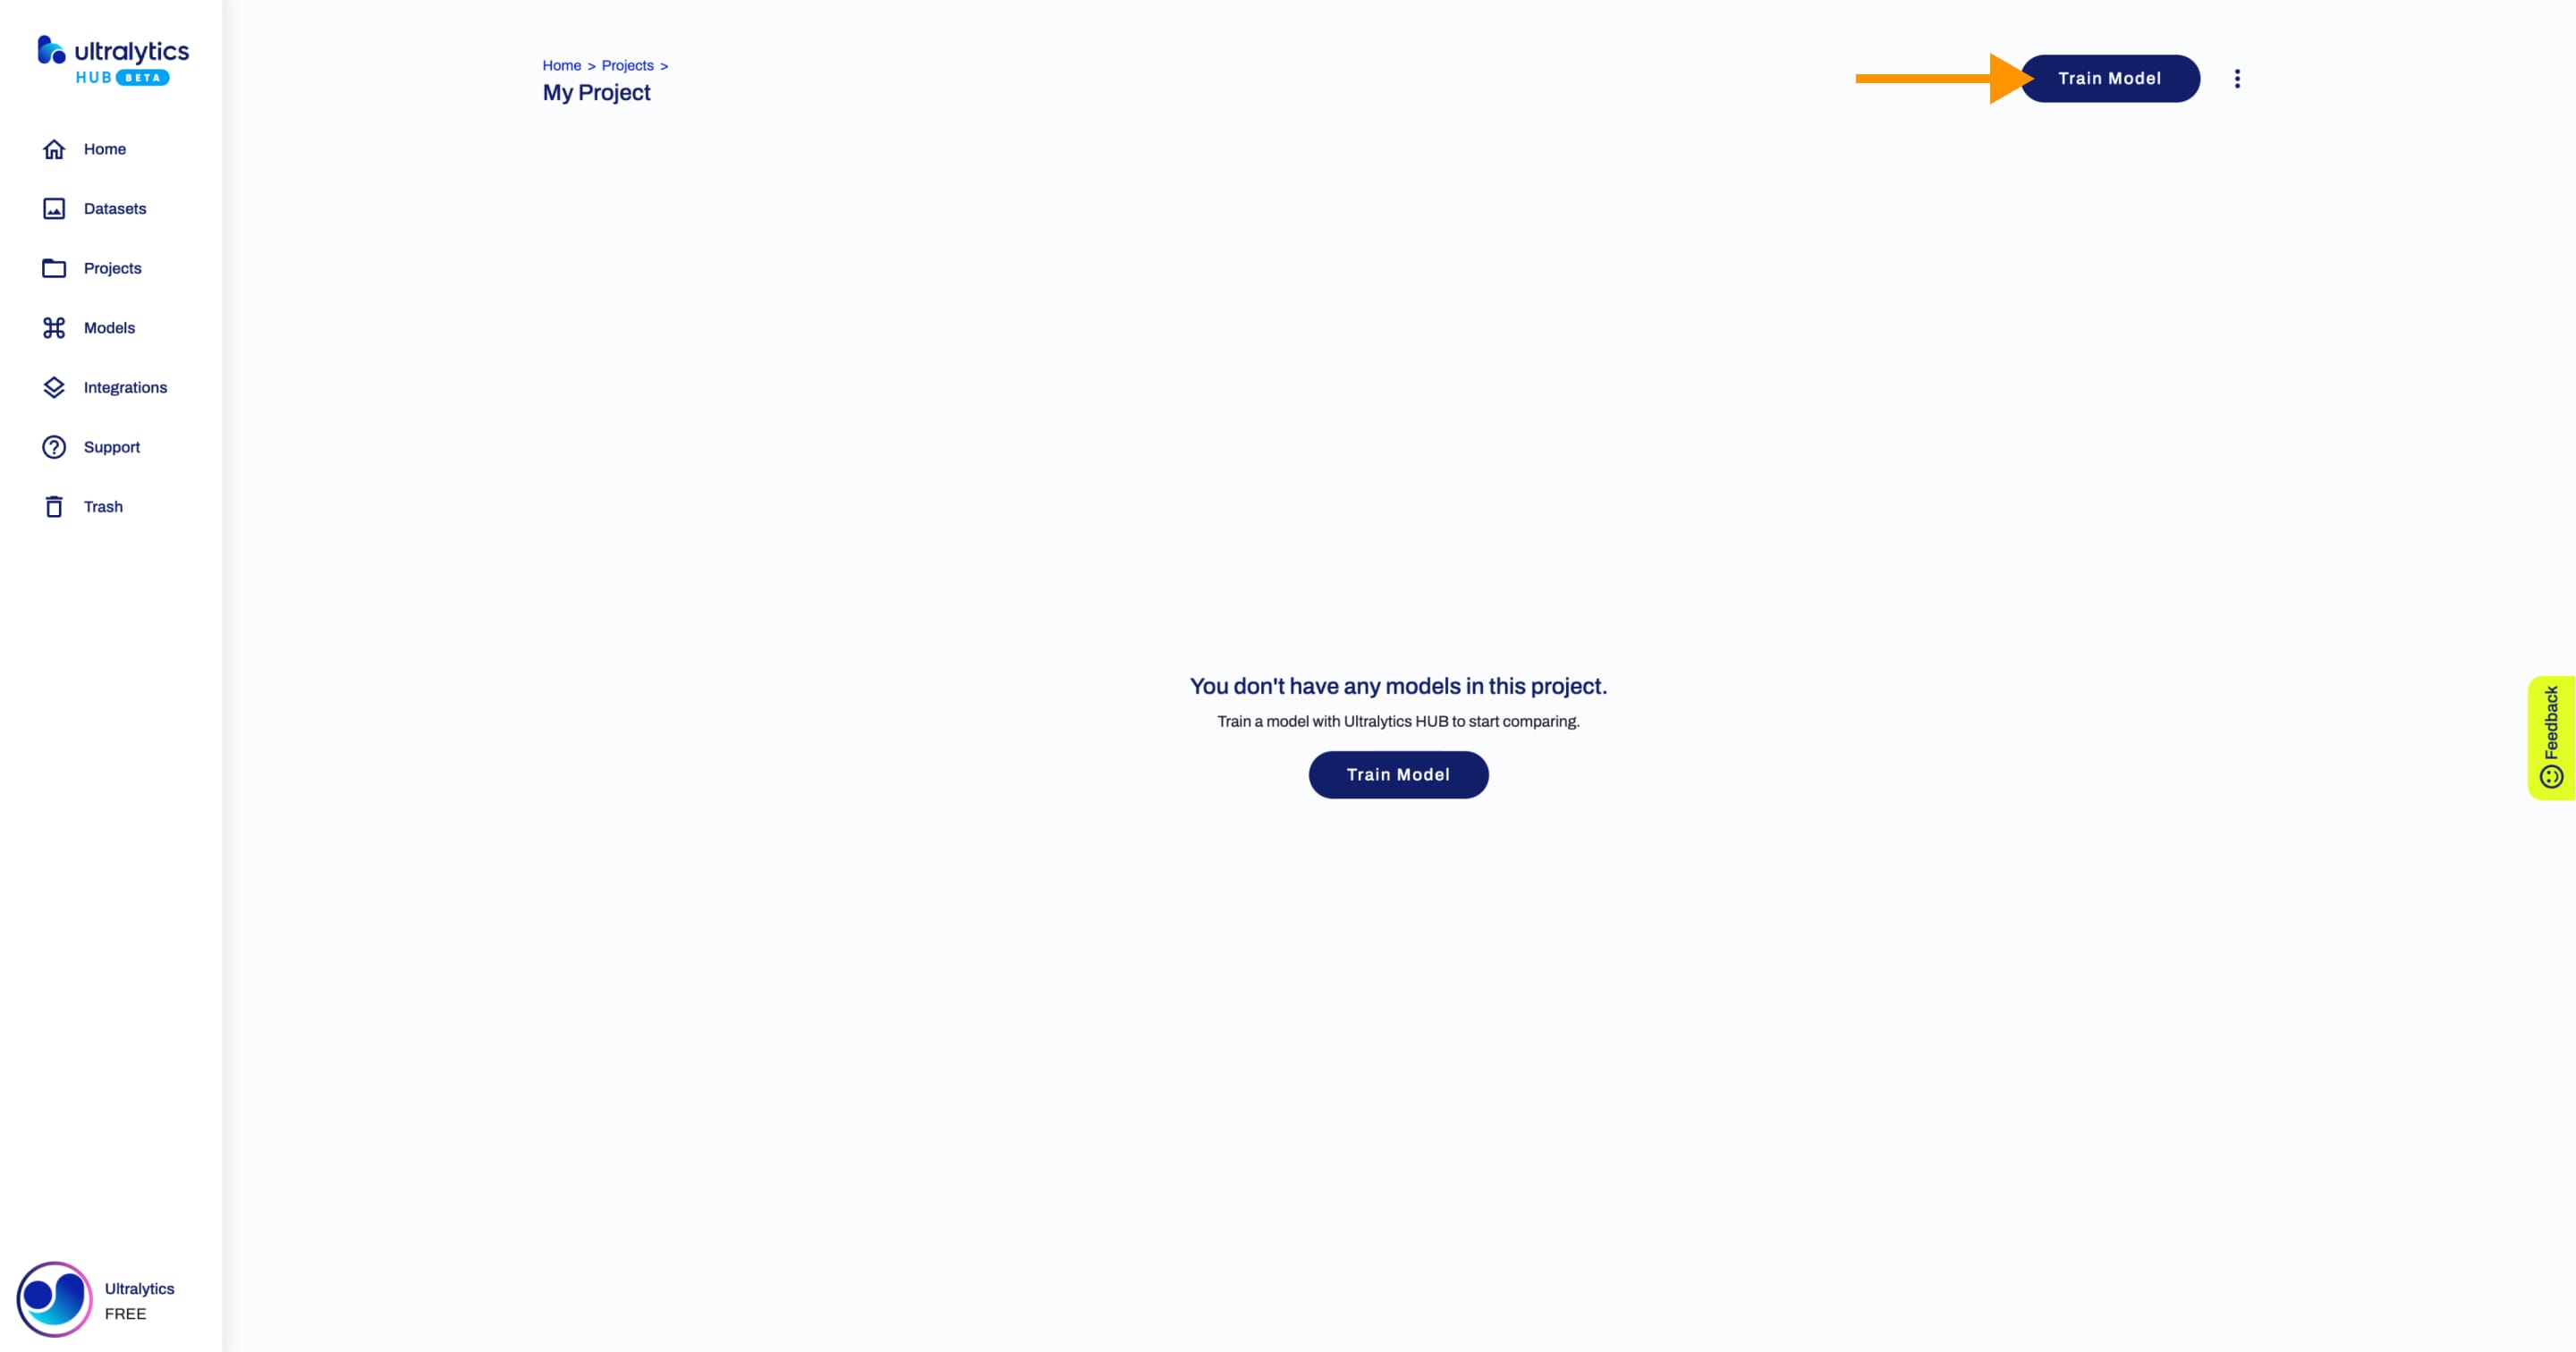
In case you don't have a project created yet, you can set the name of your project in this step and it will be created together with your model.
!!! Info "Info"
You can read more about the available [YOLOv8](https://docs.ultralytics.com/models/yolov8) (and [YOLOv5](https://docs.ultralytics.com/models/yolov5)) architectures in our documentation.
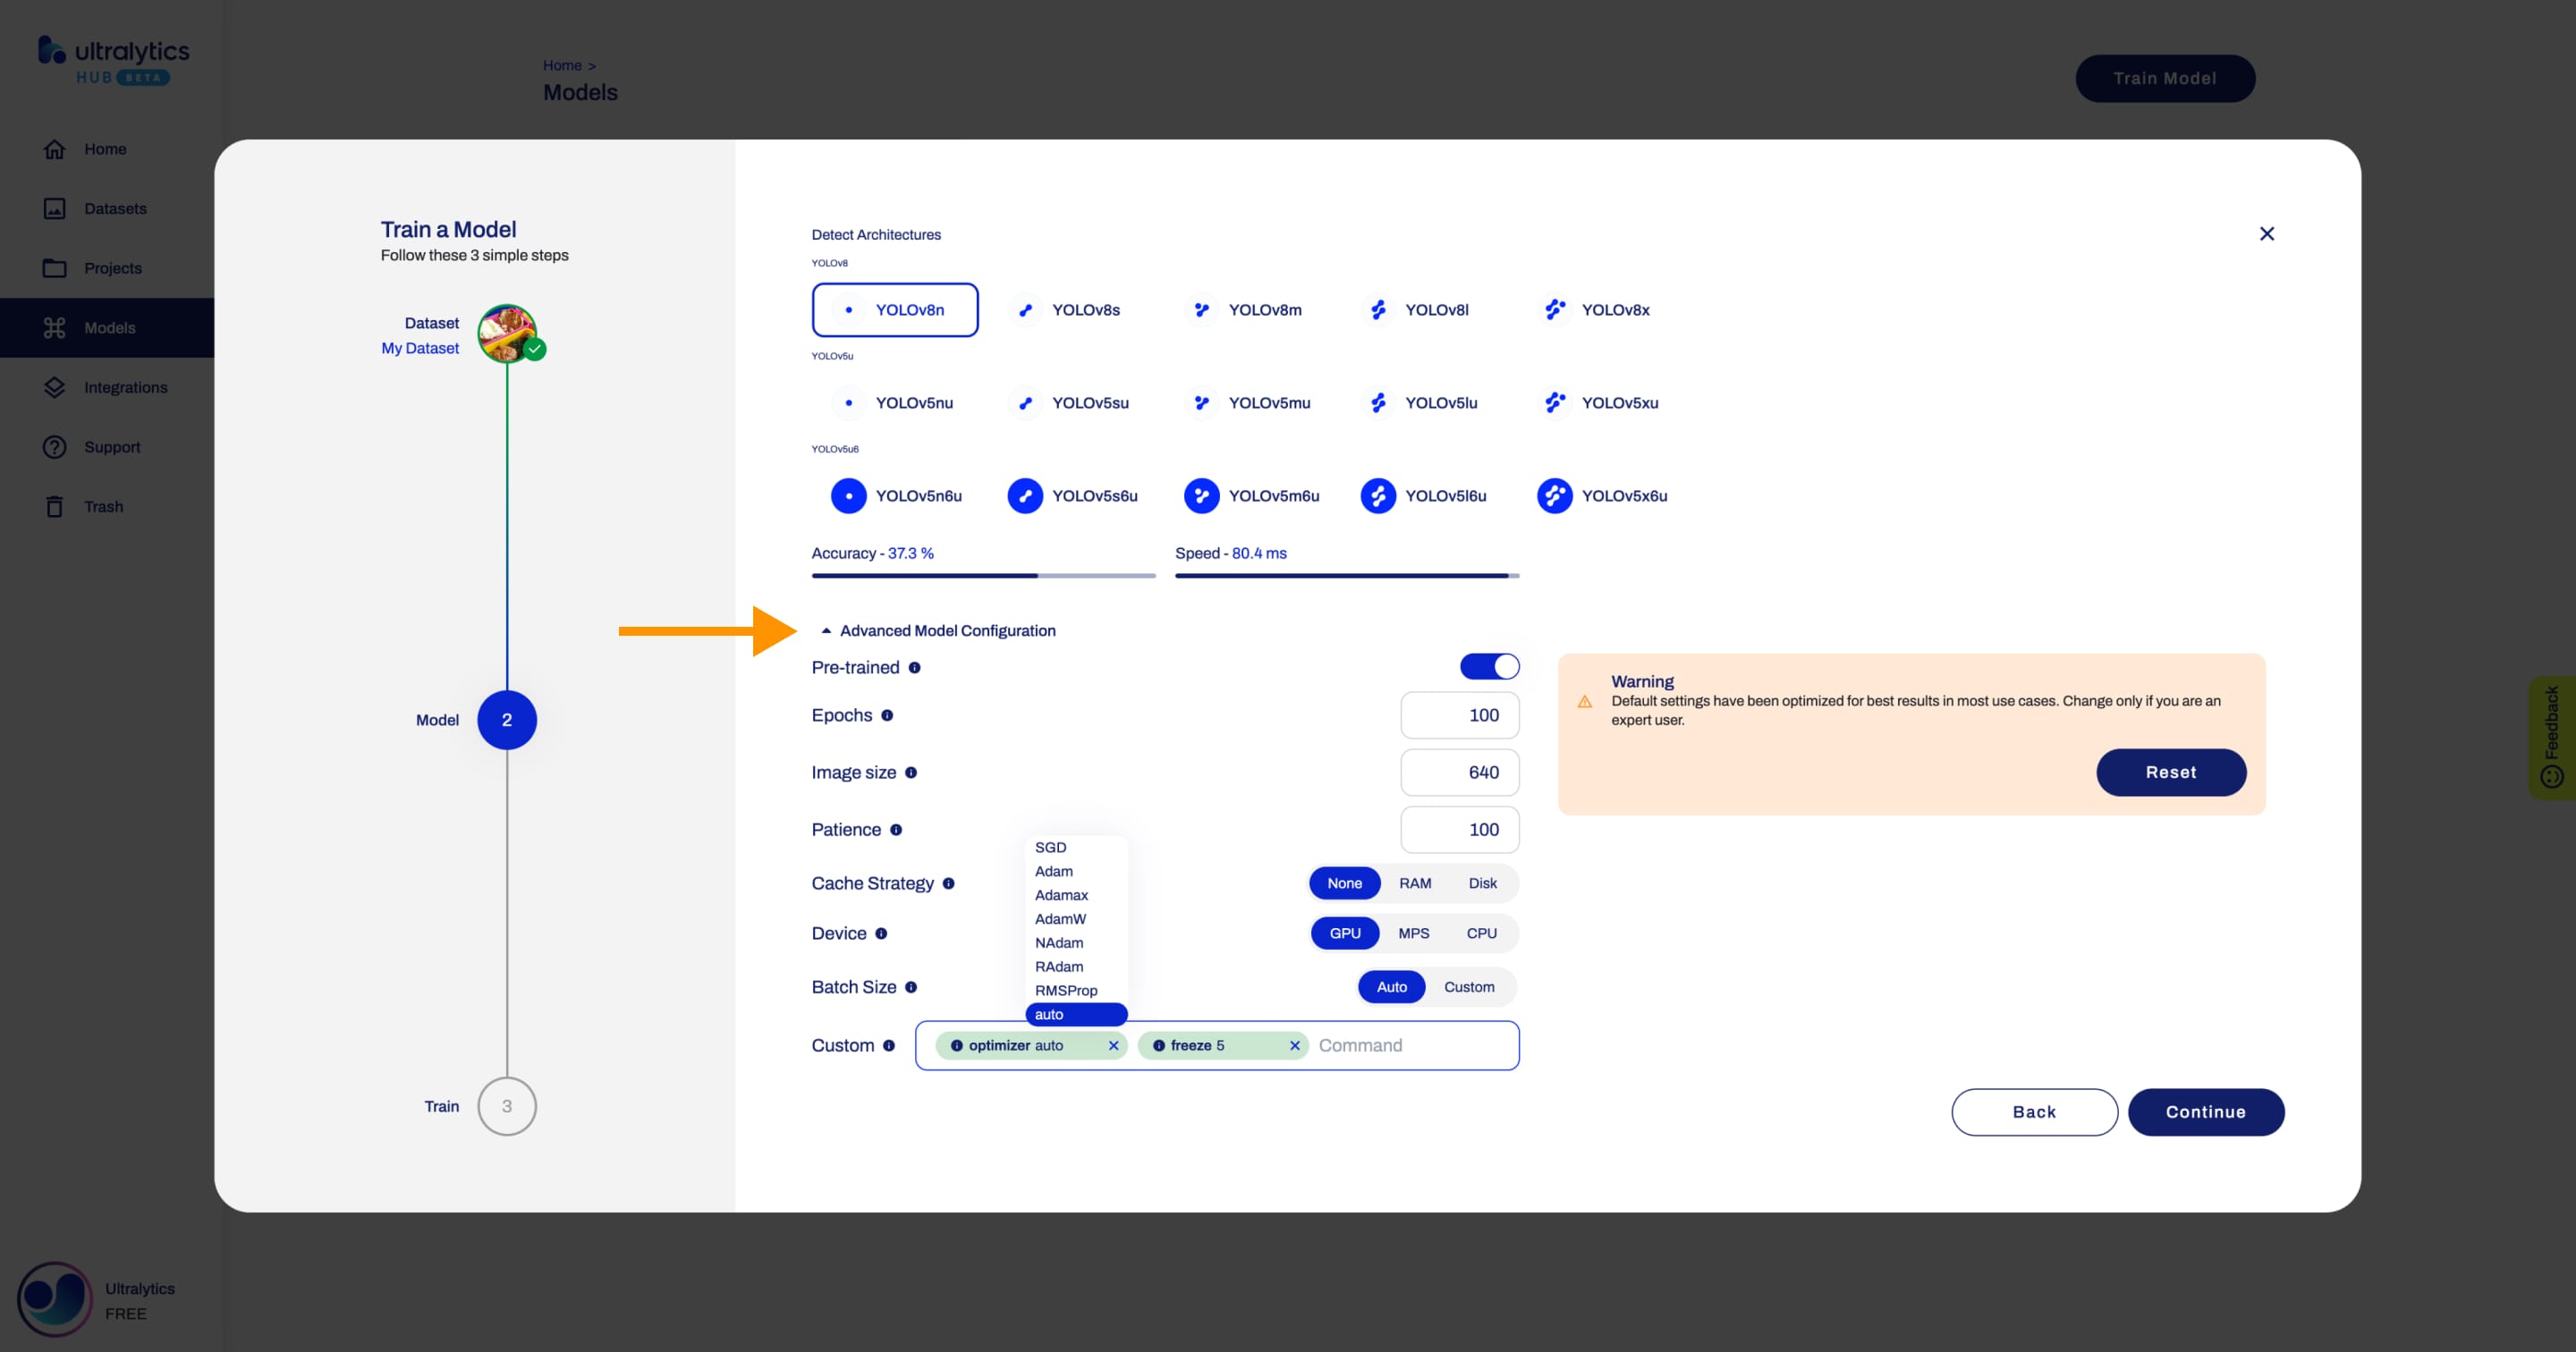
By default, your model will use a pre-trained model (trained on the COCO dataset) to reduce training time. You can change this behavior and tweak your model's configuration by opening the Advanced Model Configuration accordion.
!!! note "Note"
You can easily change the most common model configuration options (such as the number of epochs) but you can also use the **Custom** option to access all [Train Settings](https://docs.ultralytics.com/modes/train/#train-settings) relevant to [Ultralytics HUB](https://ultralytics.com/hub).
Watch: How to Configure Ultralytics YOLOv8 Training Parameters in Ultralytics HUB
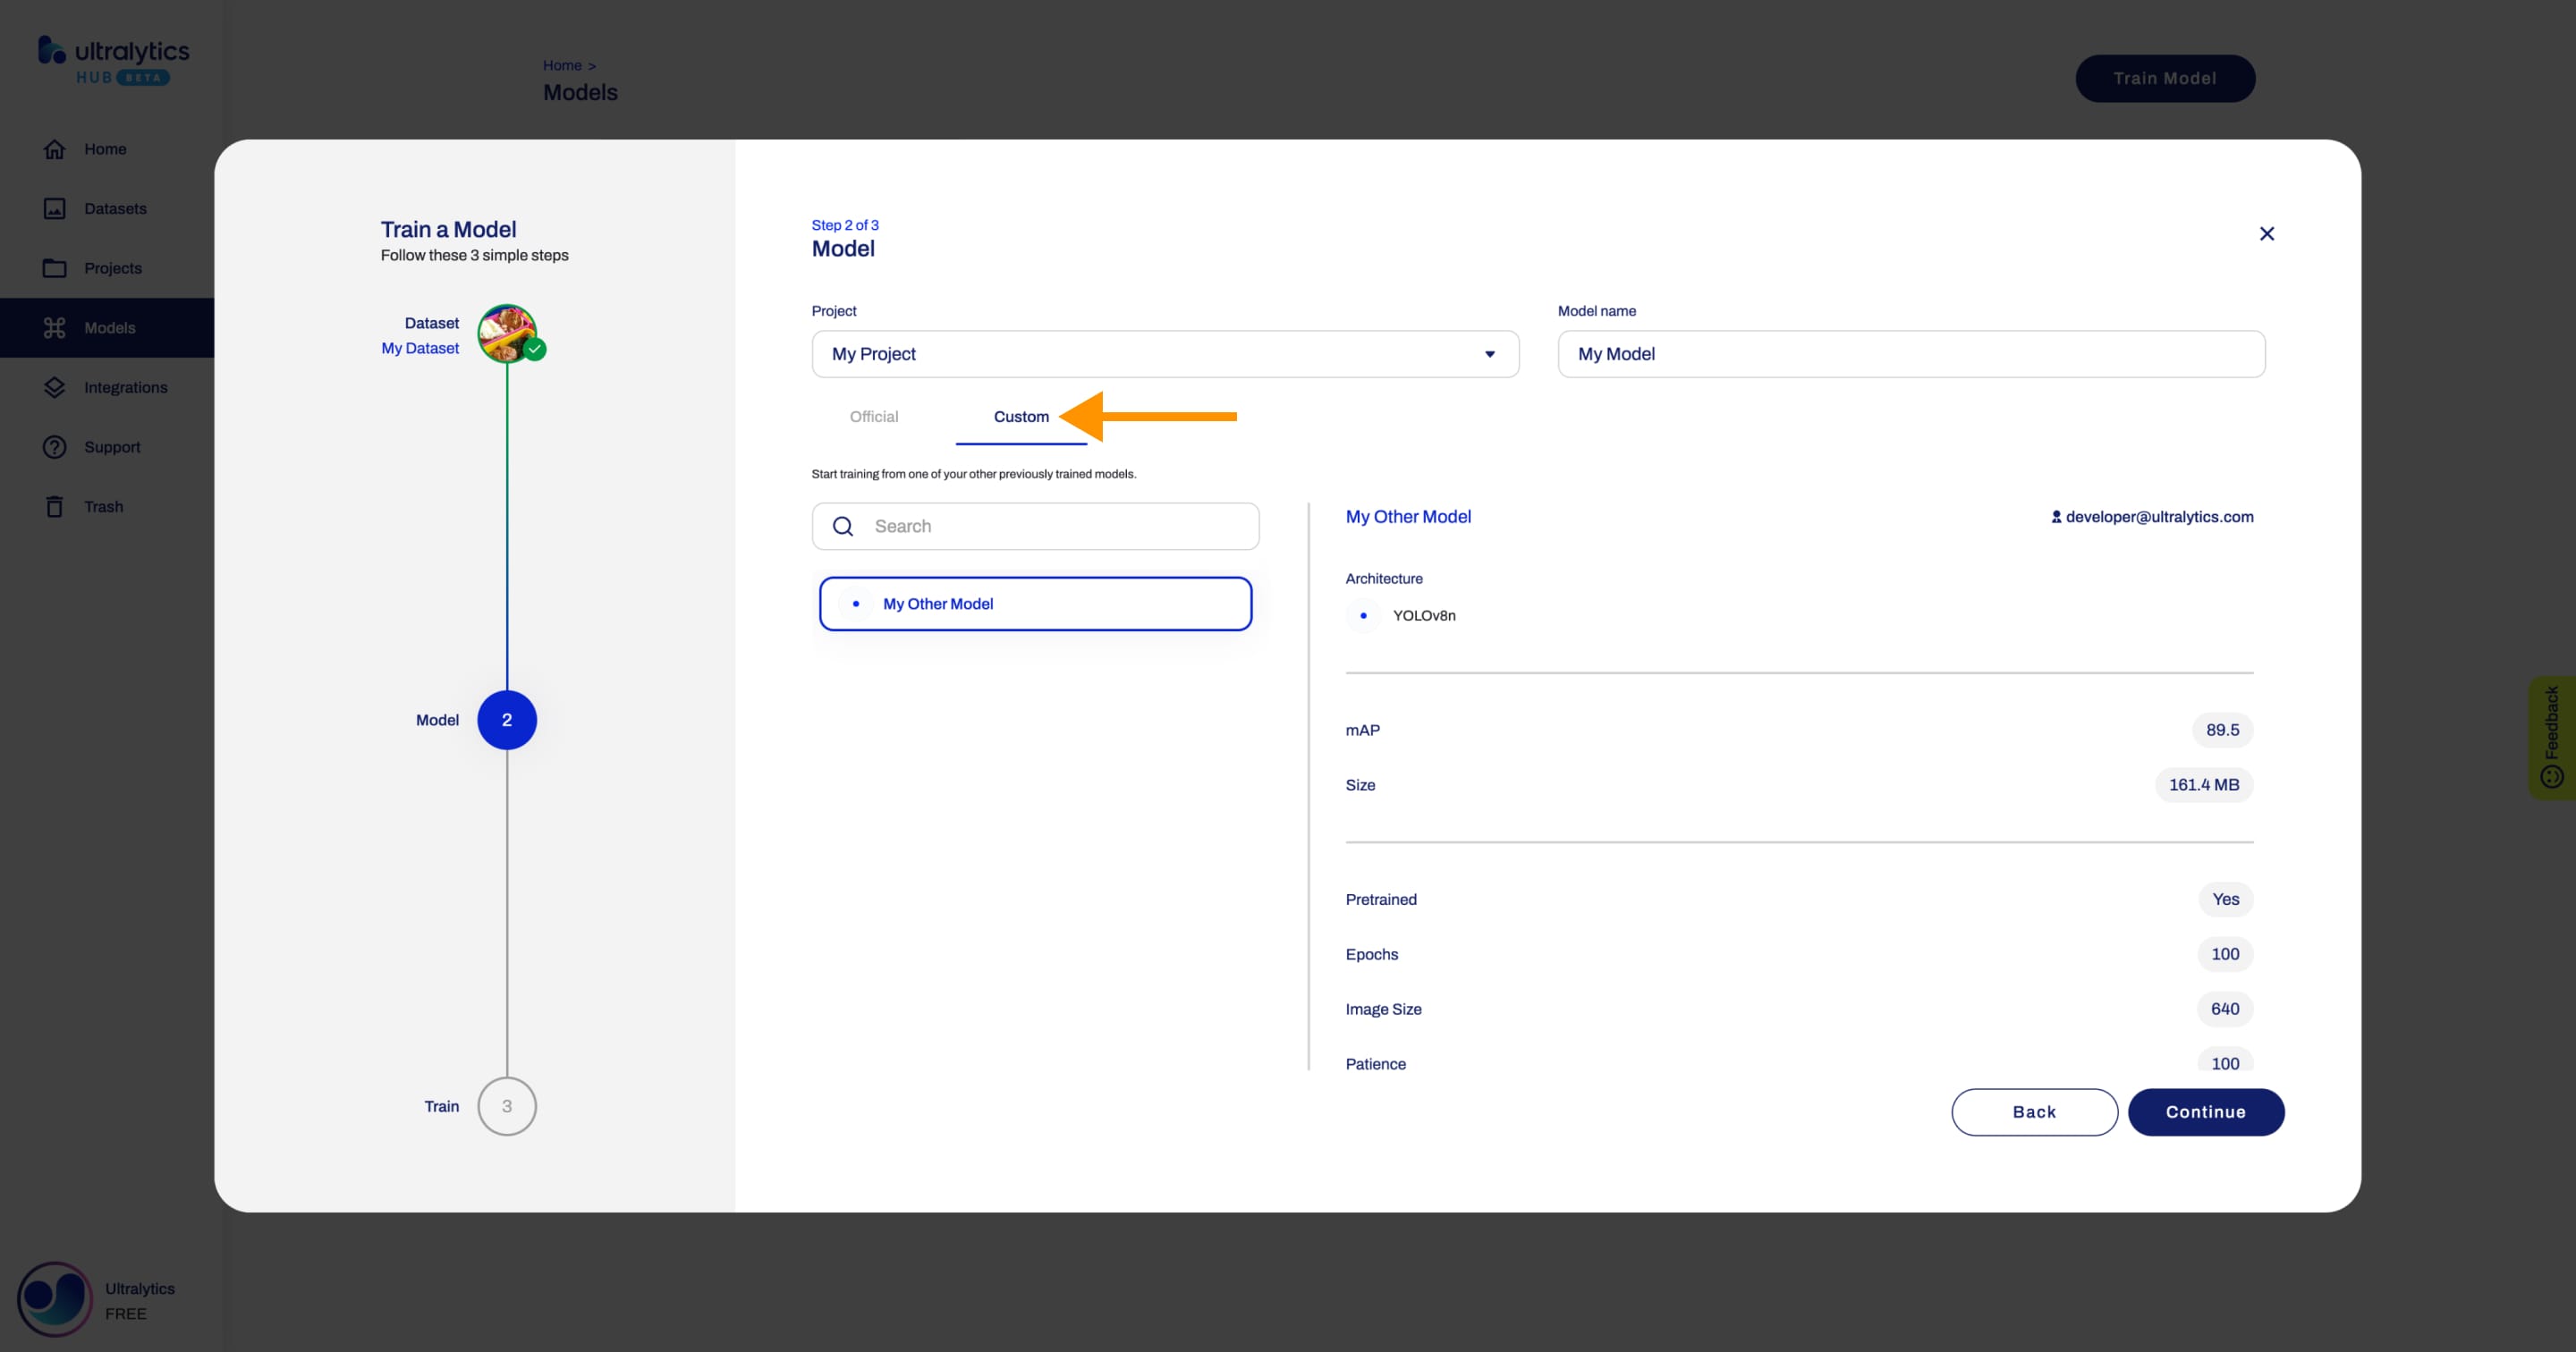
Alternatively, you start training from one of your previously trained models by clicking on the Custom tab.
When you're happy with your model configuration, click Continue.
3. Train
In this step, you will start training you model.
??? note "Note"
When you are on this step, you have the option to close the **Train Model** dialog and start training your model from the Model page later.
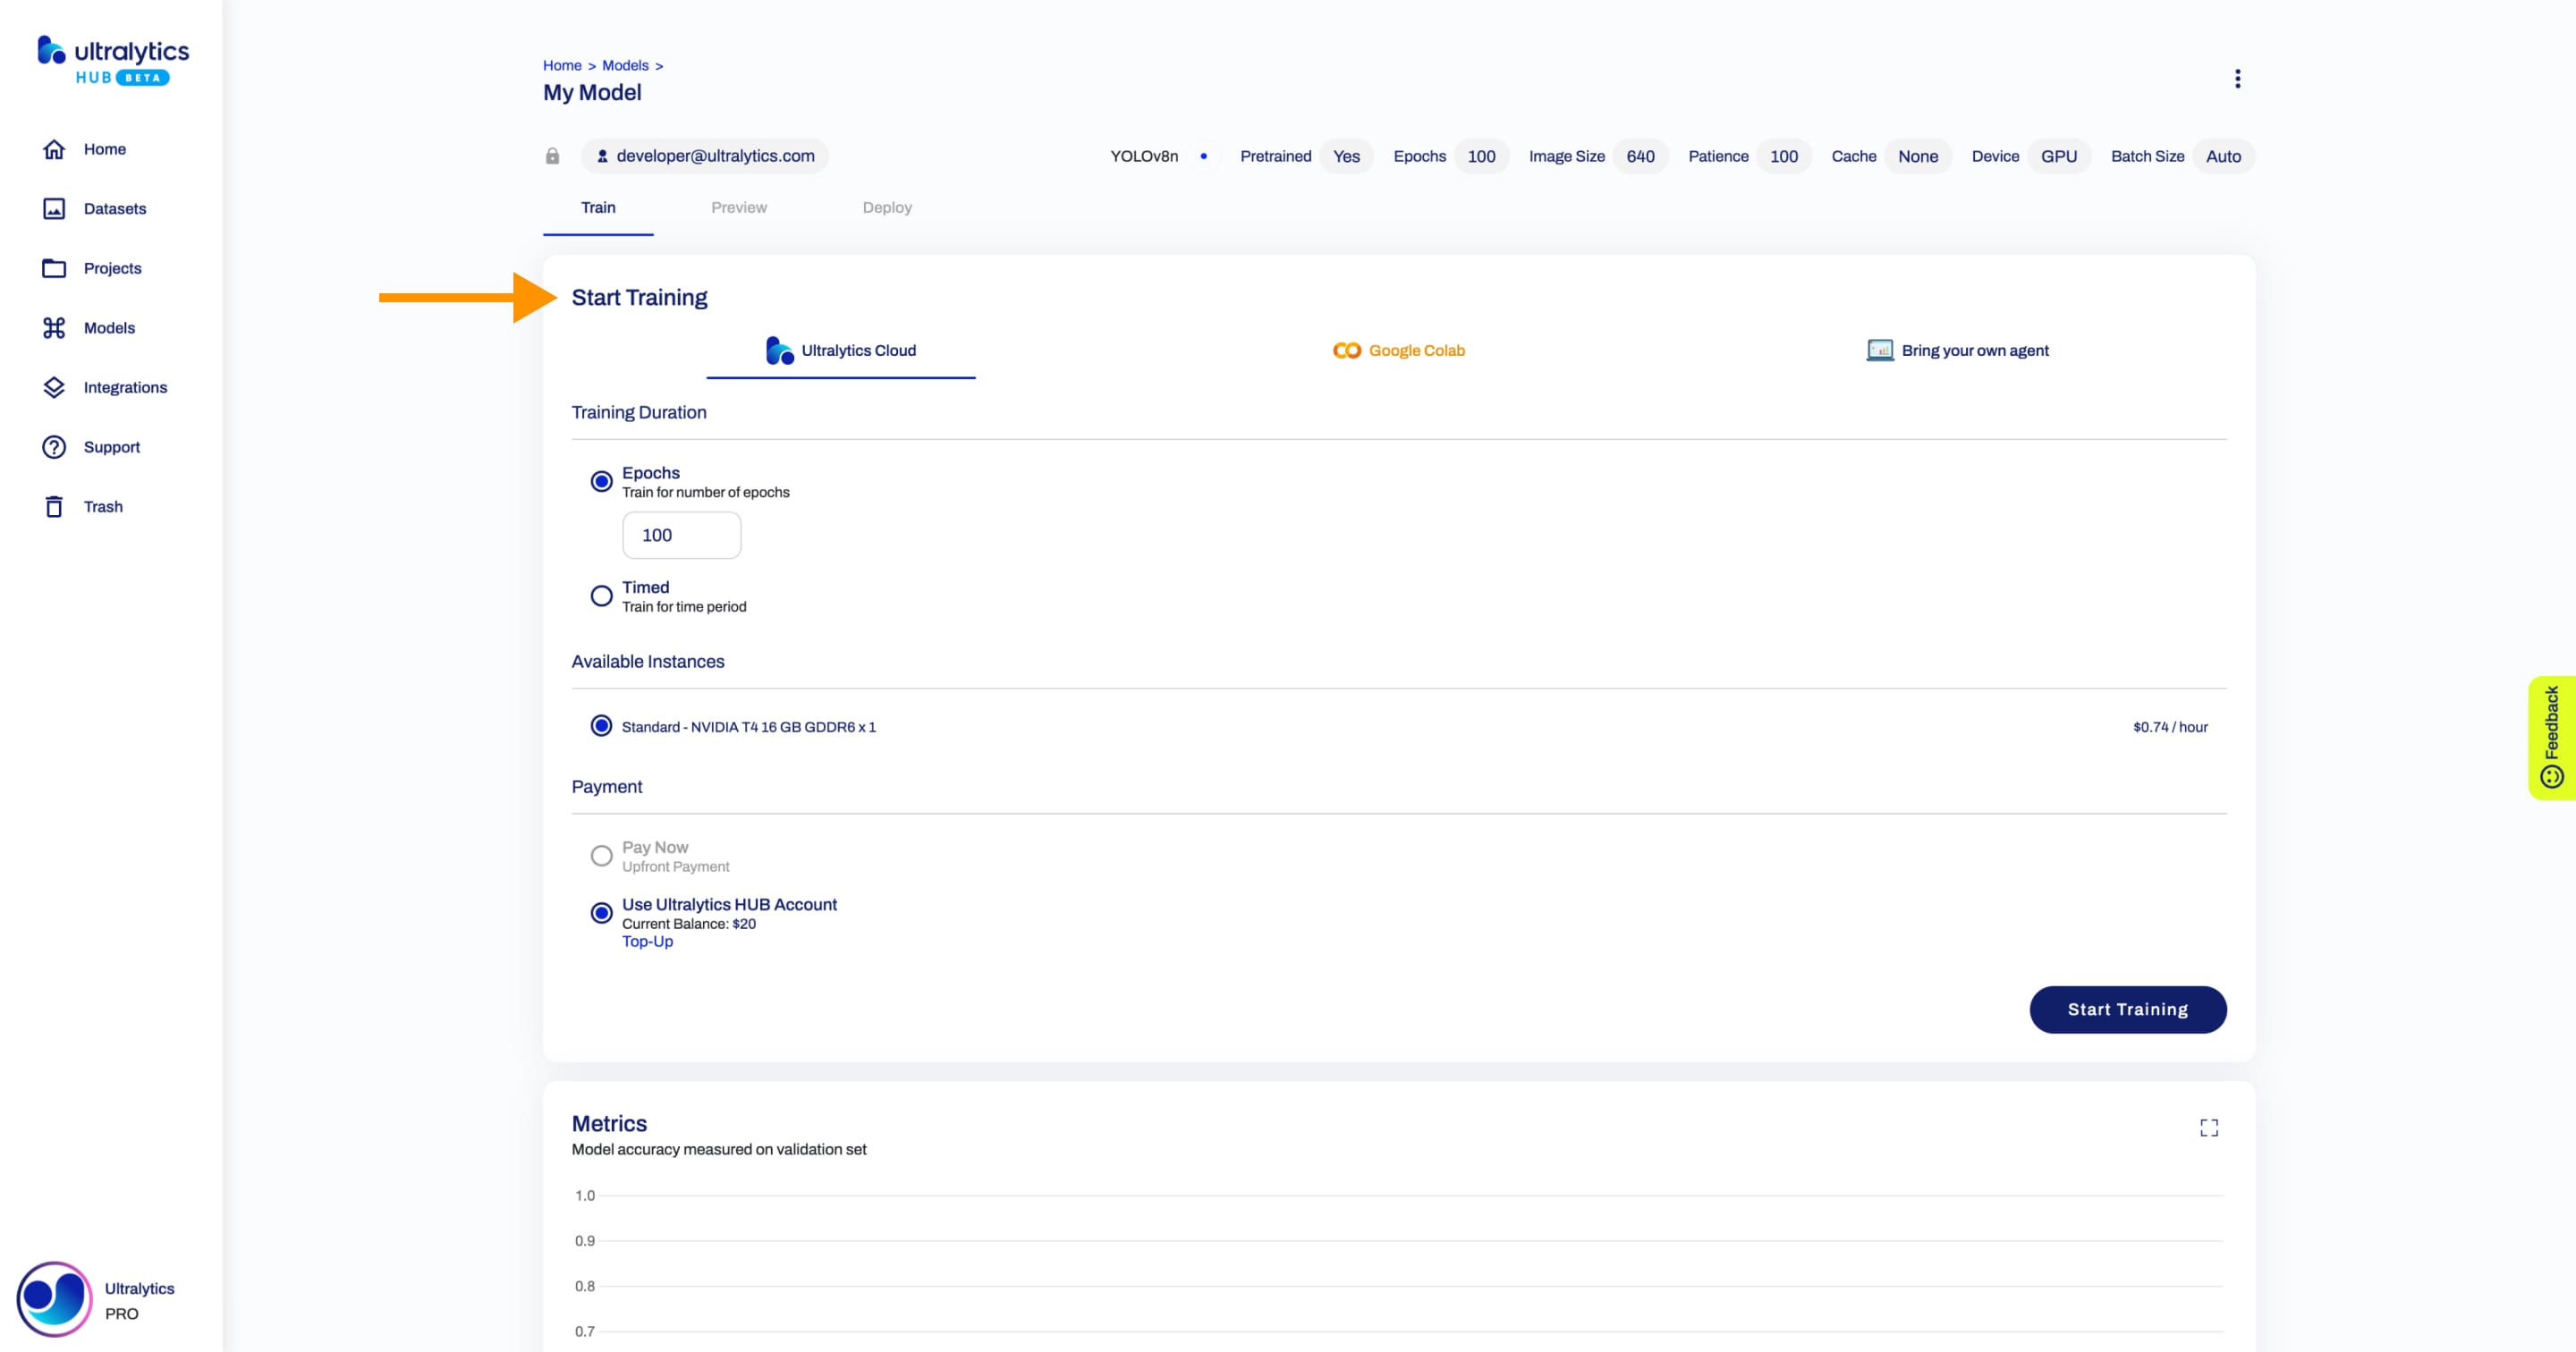
Ultralytics HUB offers three training options:
- Ultralytics Cloud
- Google Colab
- Bring your own agent
a. Ultralytics Cloud
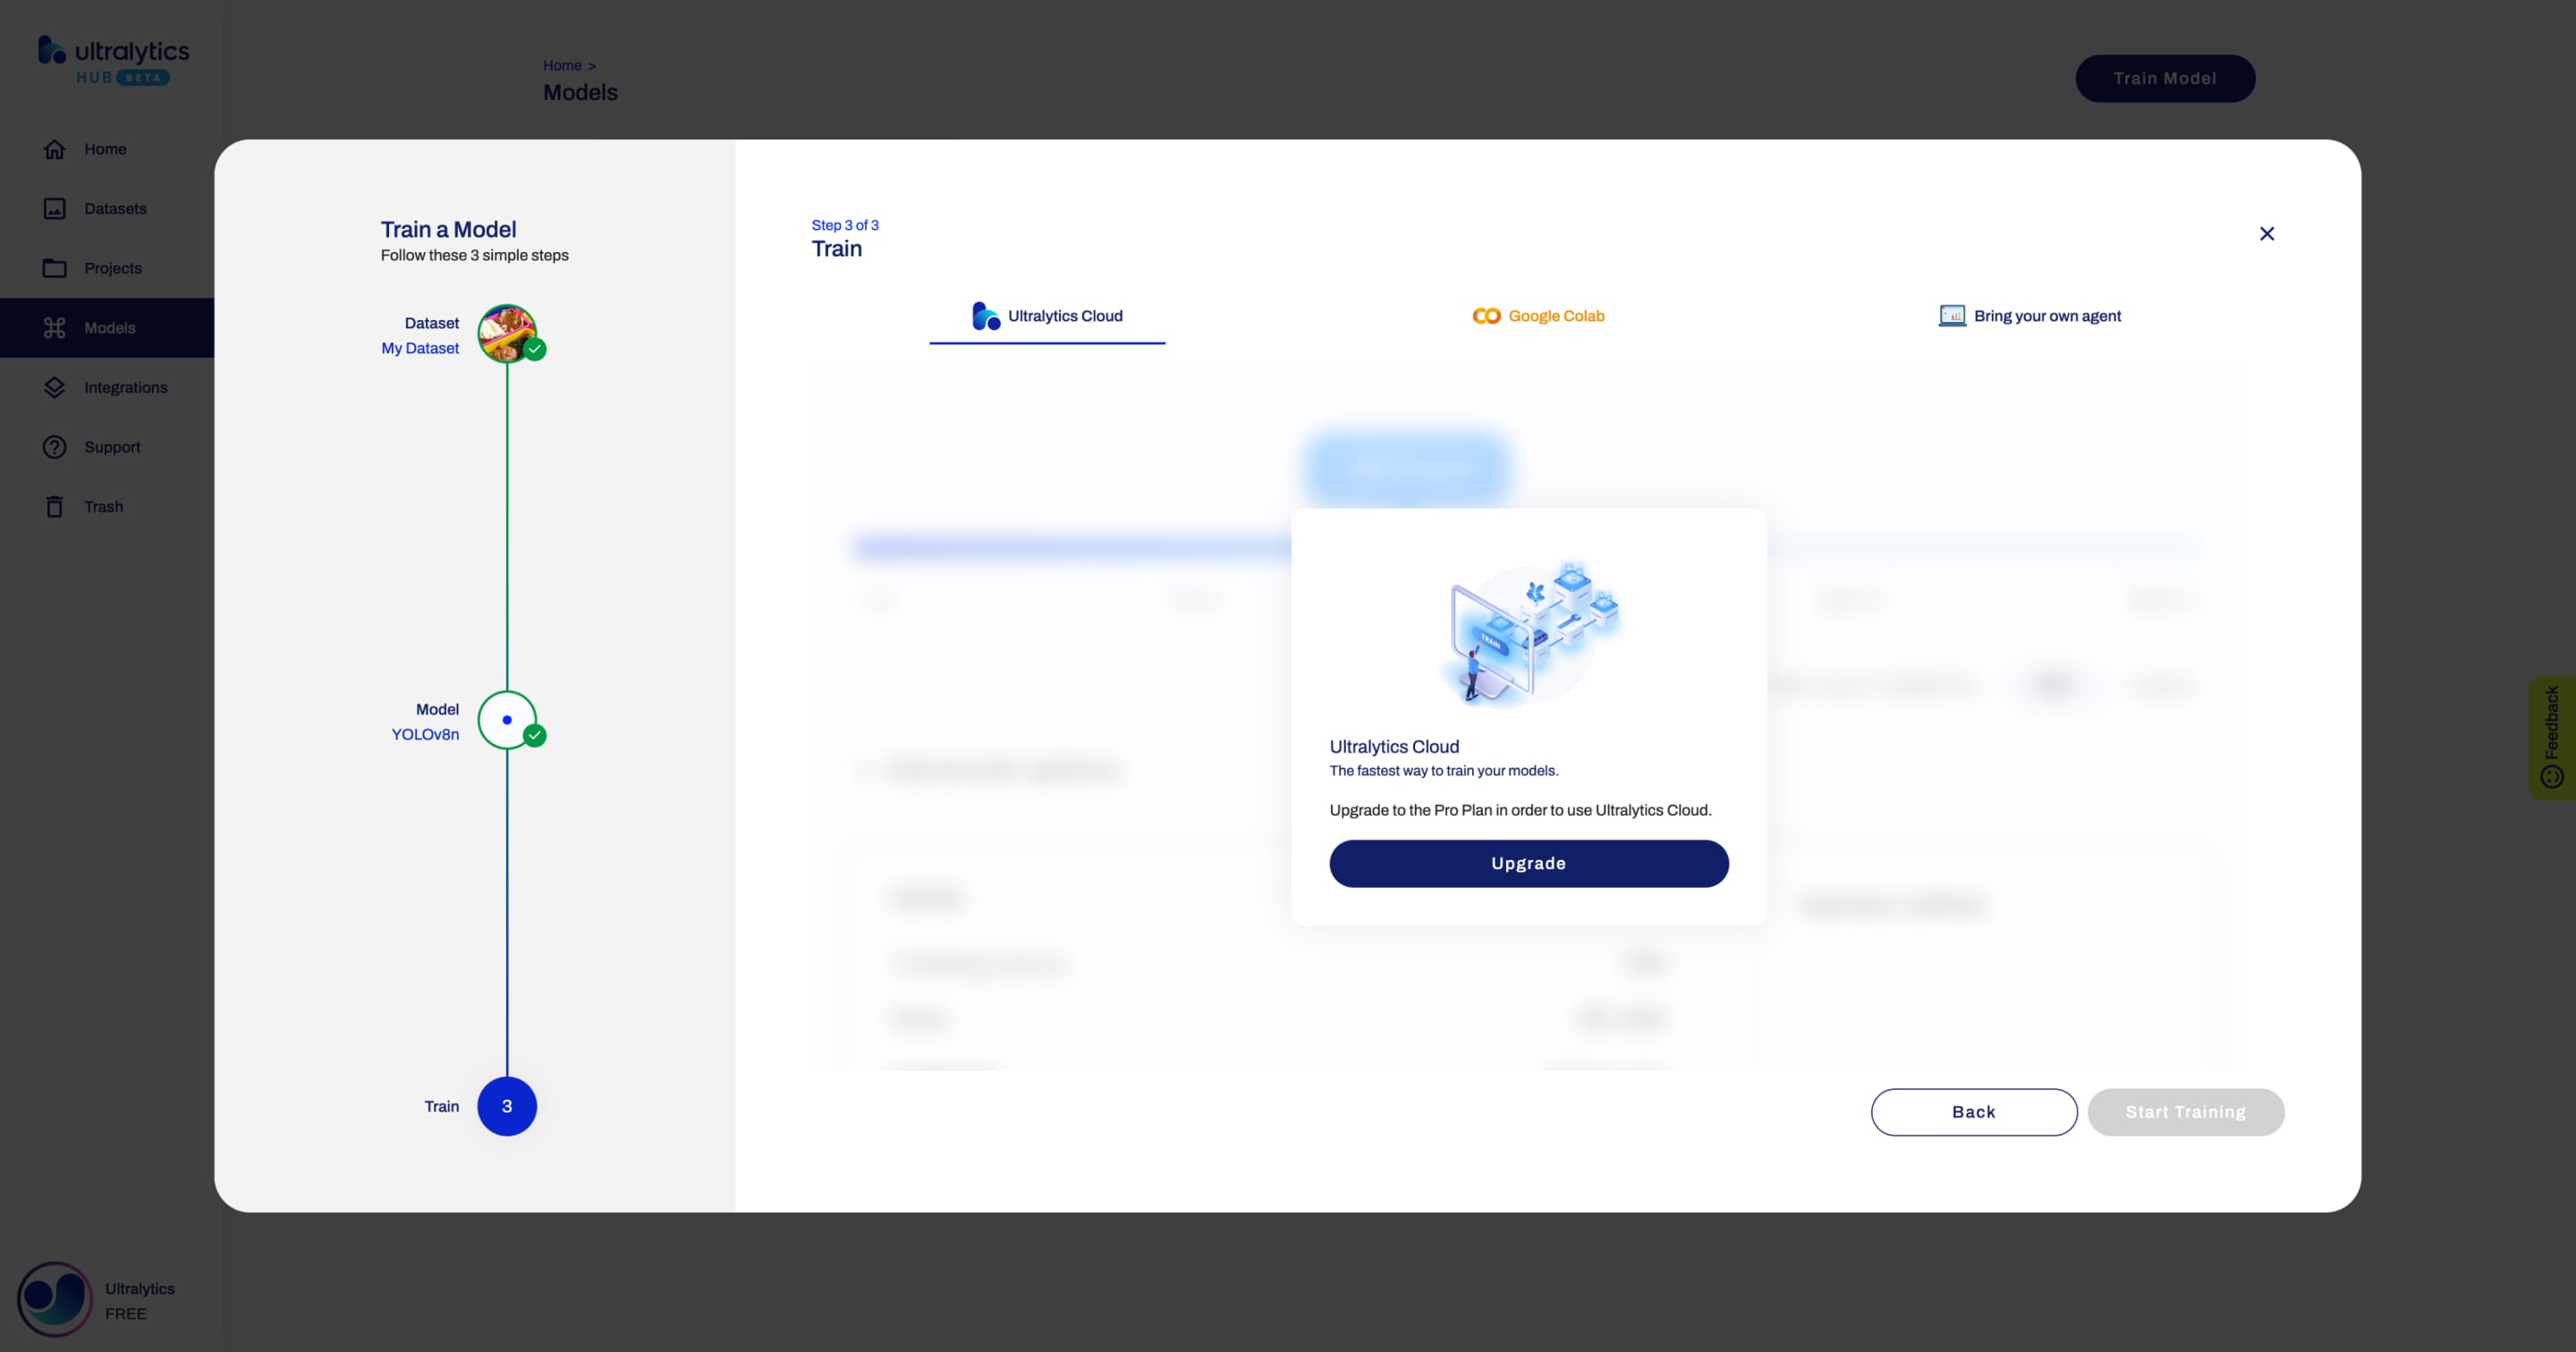
You need to upgrade to the Pro Plan in order to access Ultralytics Cloud.
To train models using our Cloud Training solution, read the Ultralytics Cloud Training documentation.
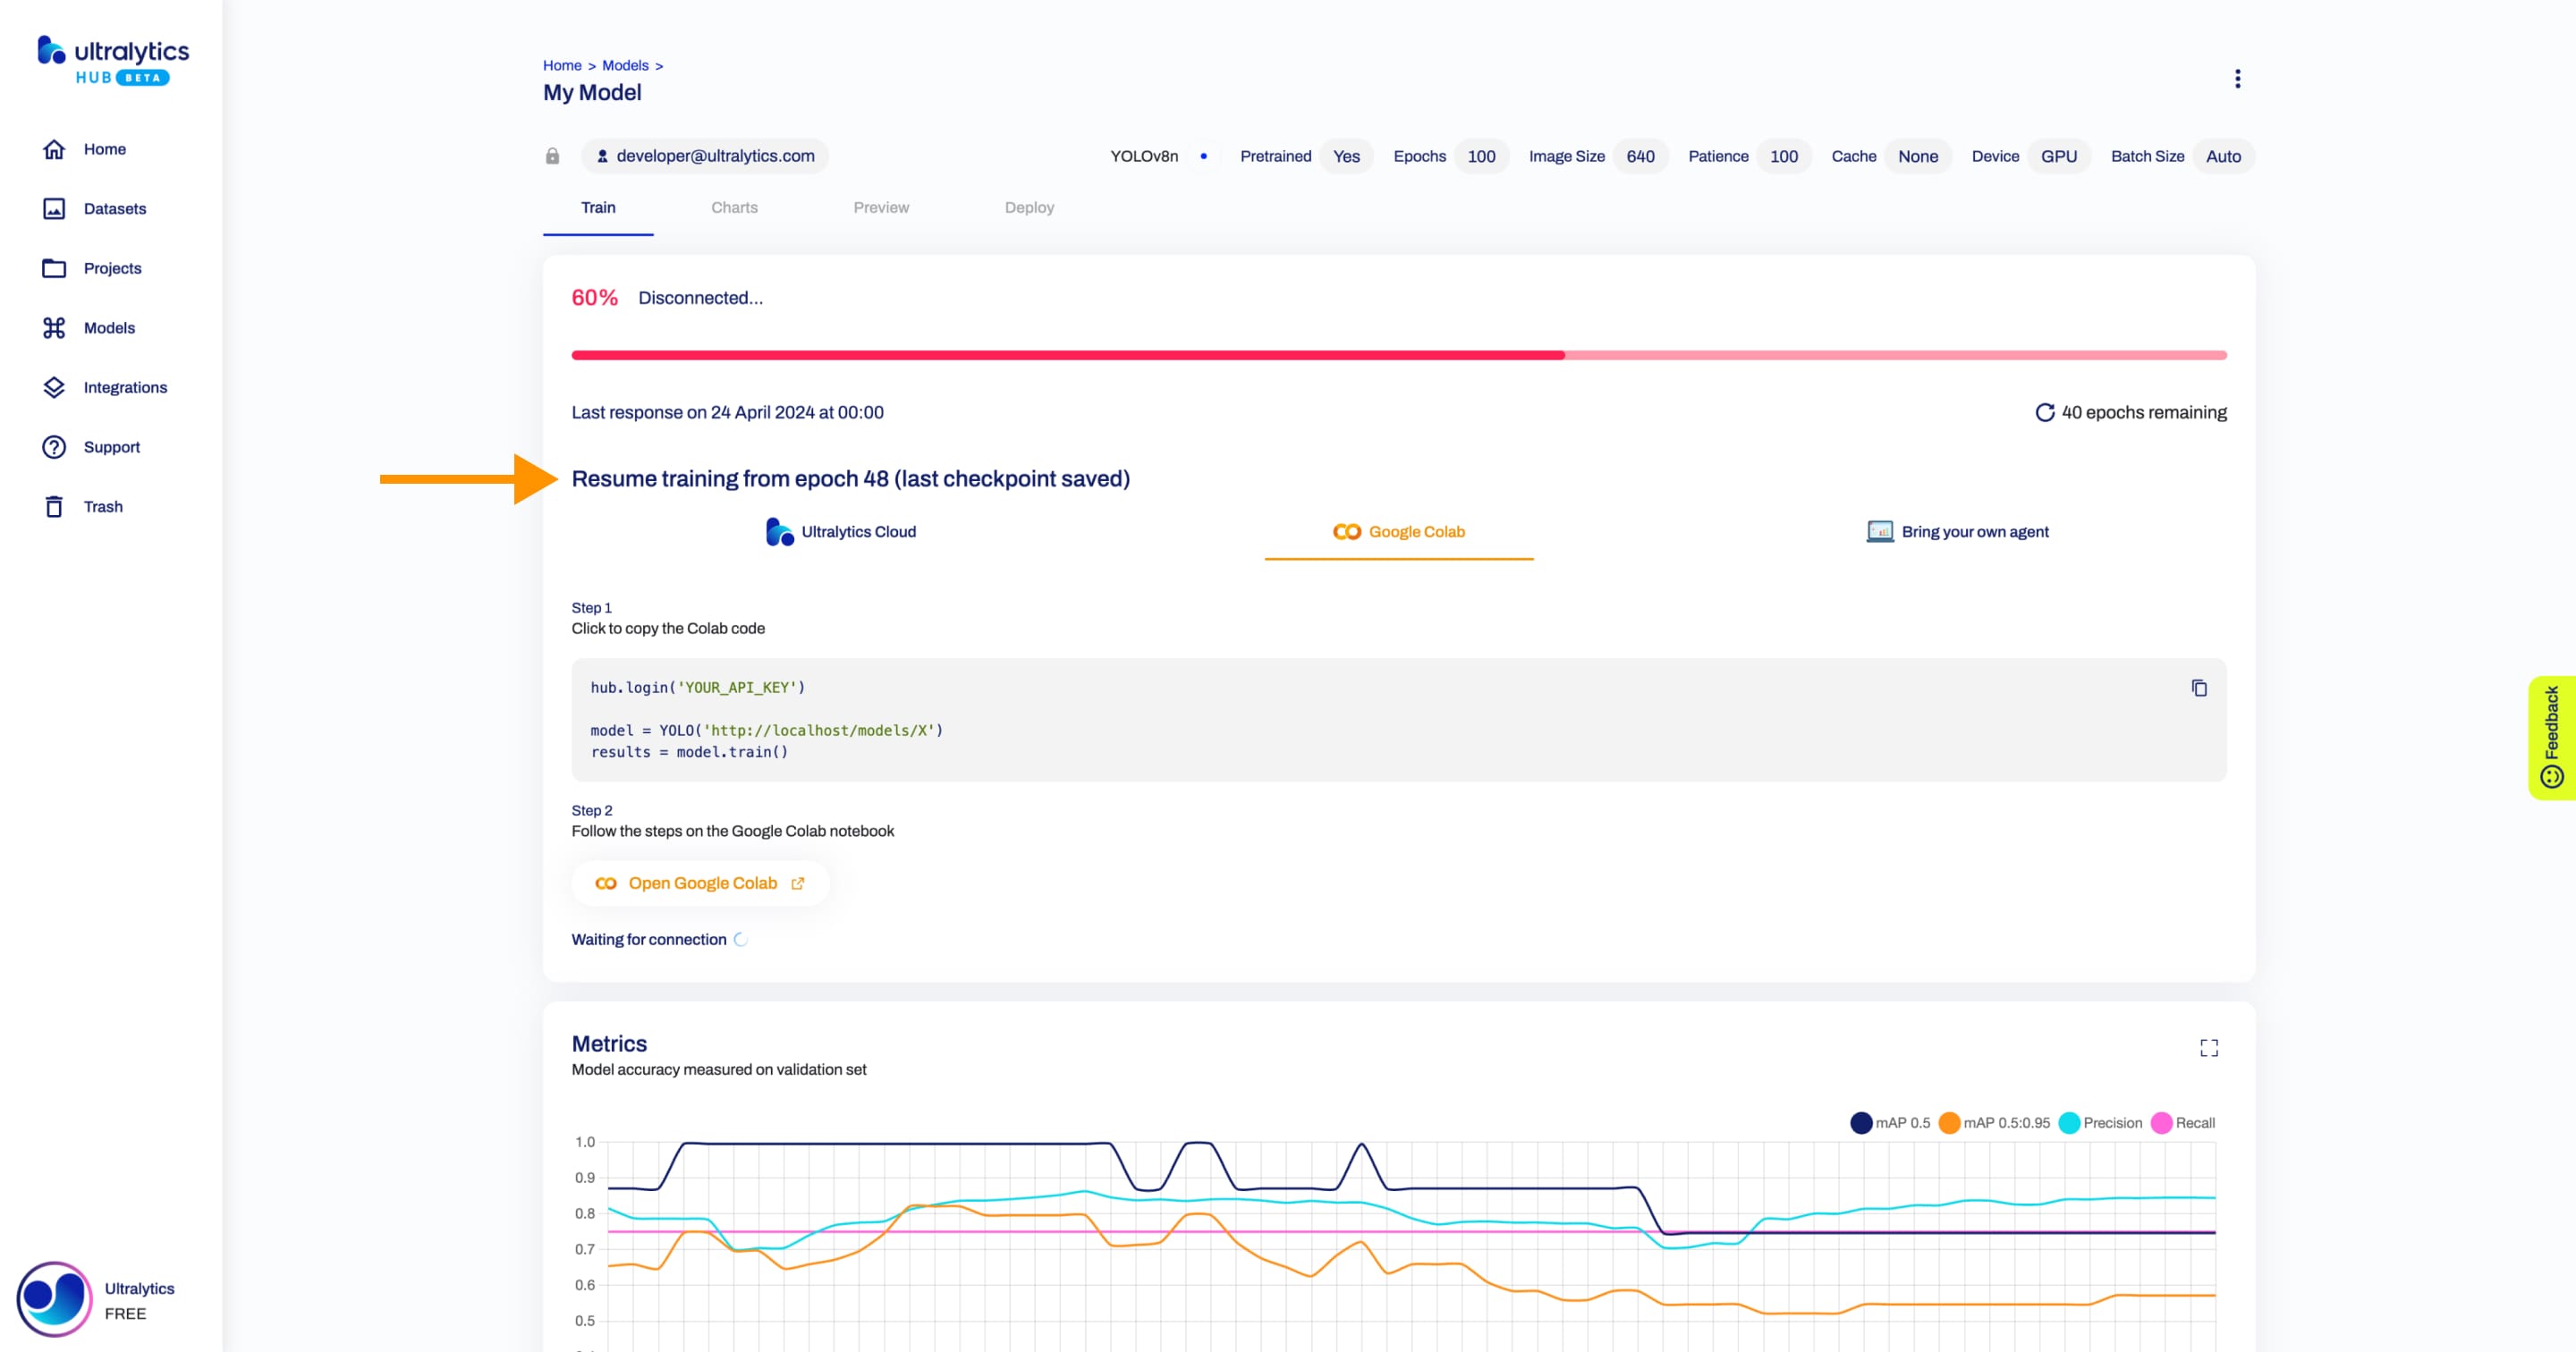
b. Google Colab
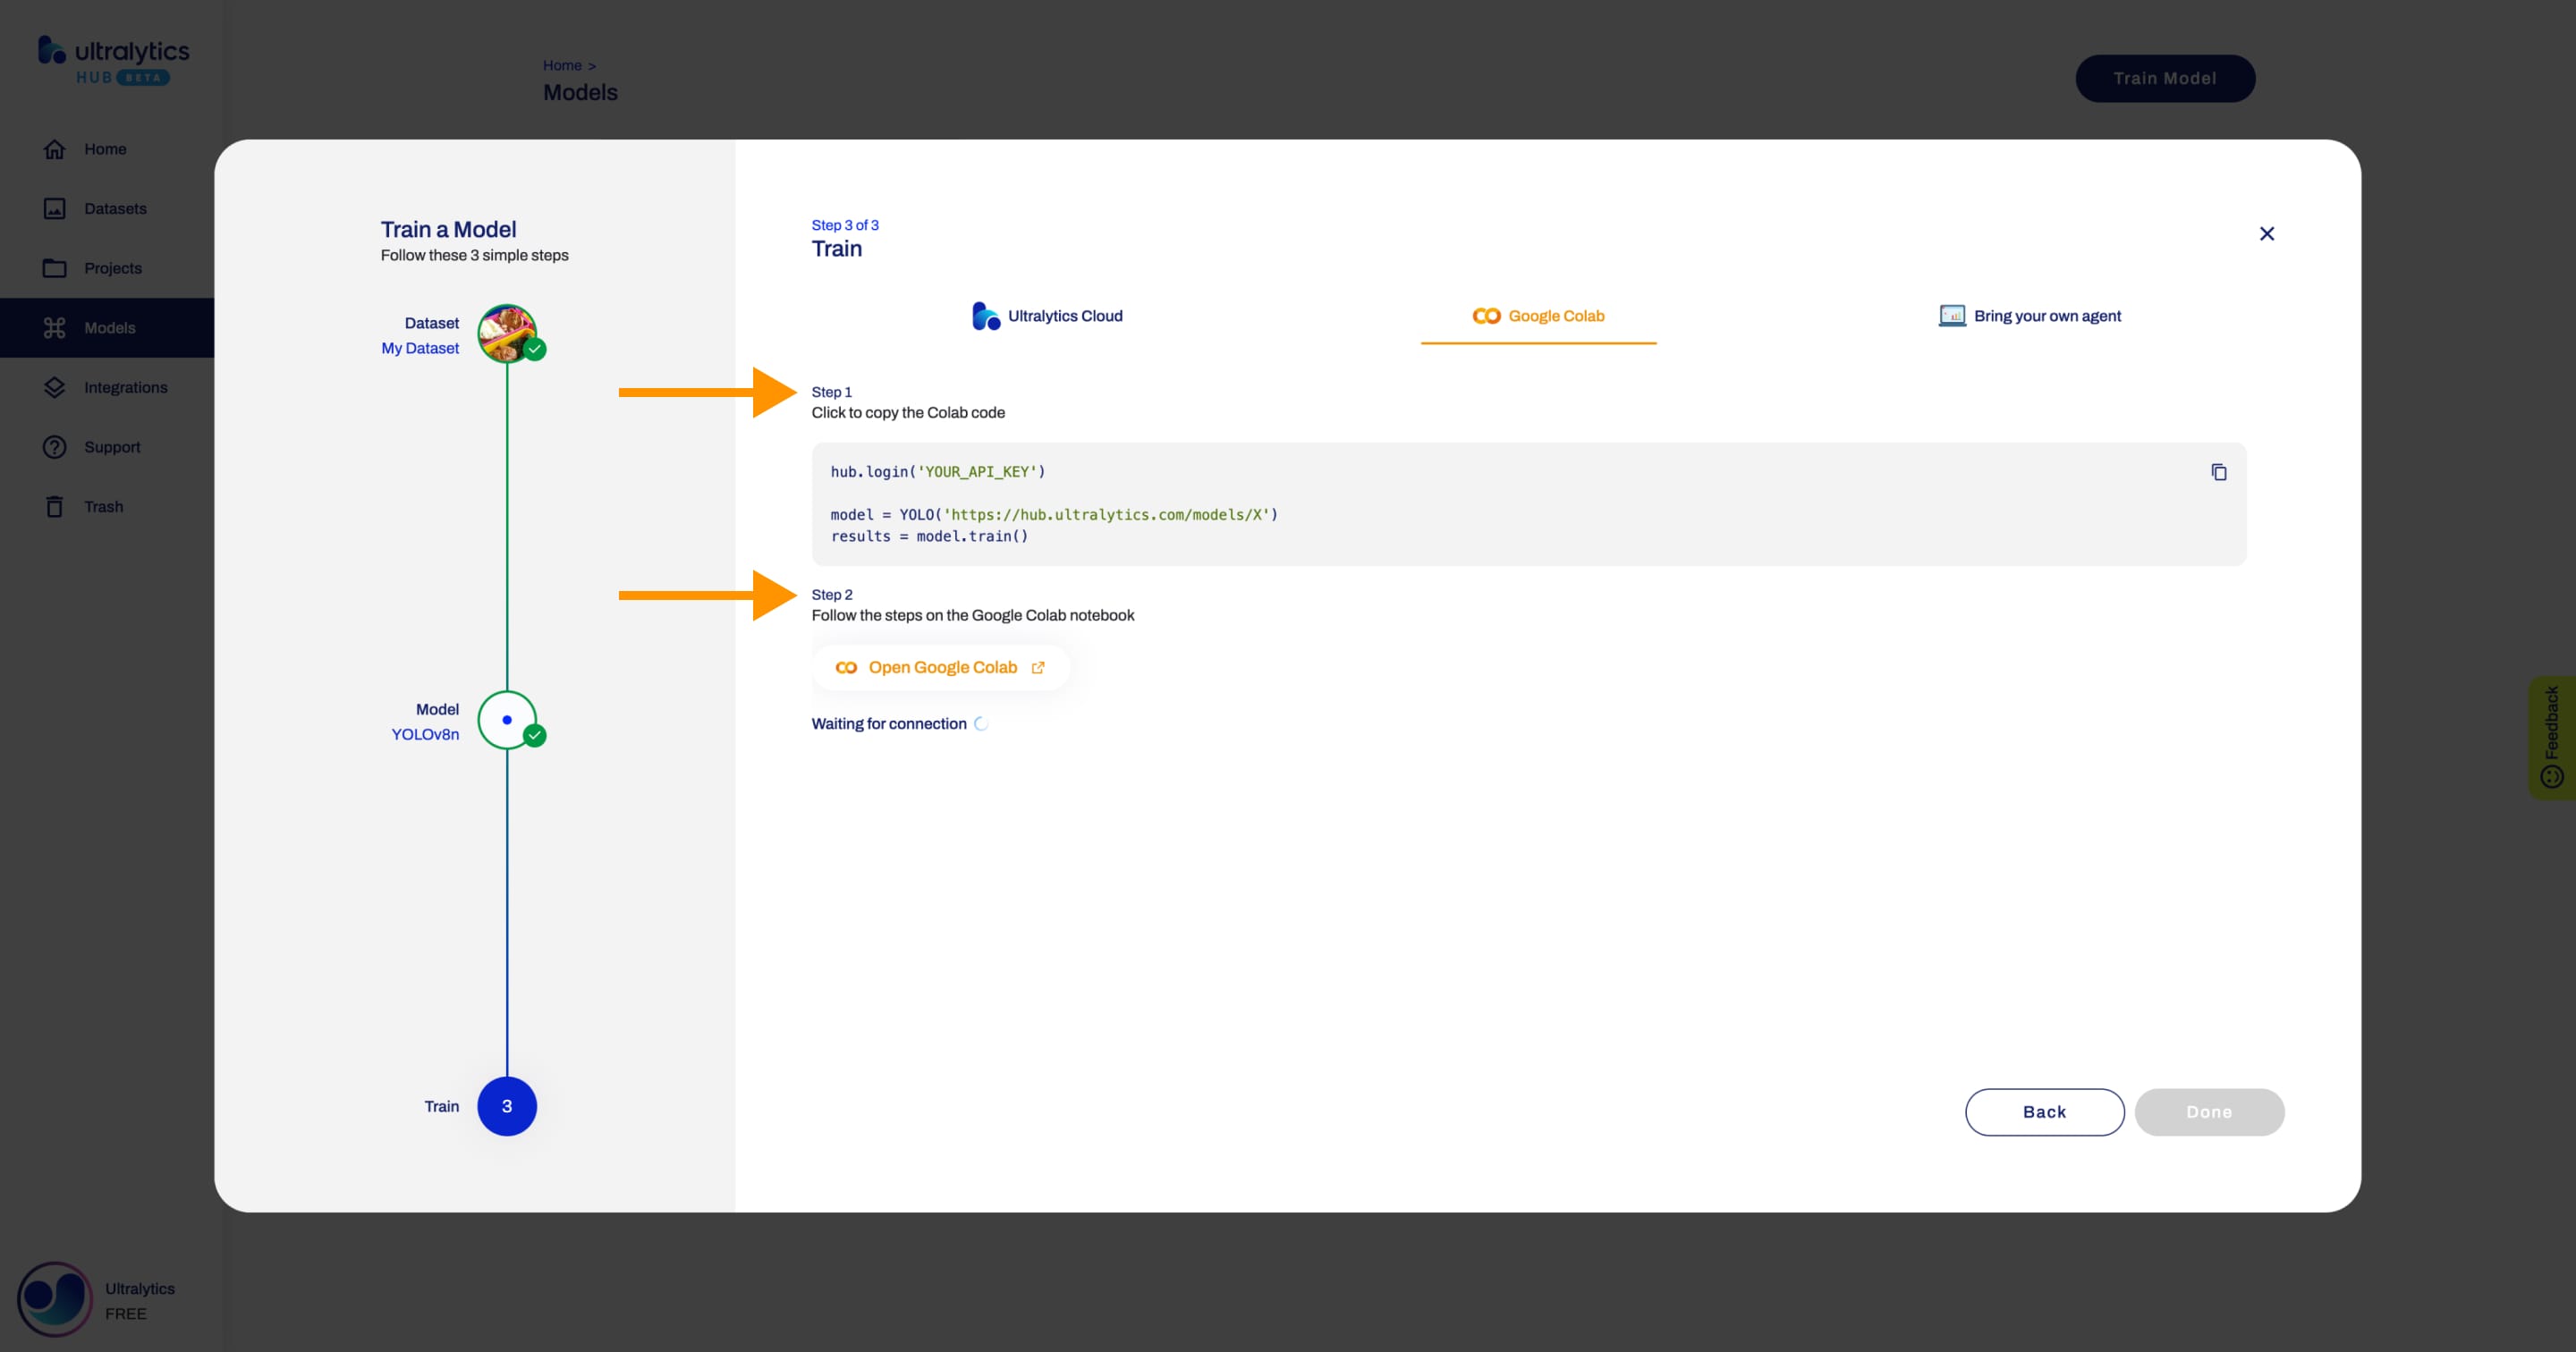
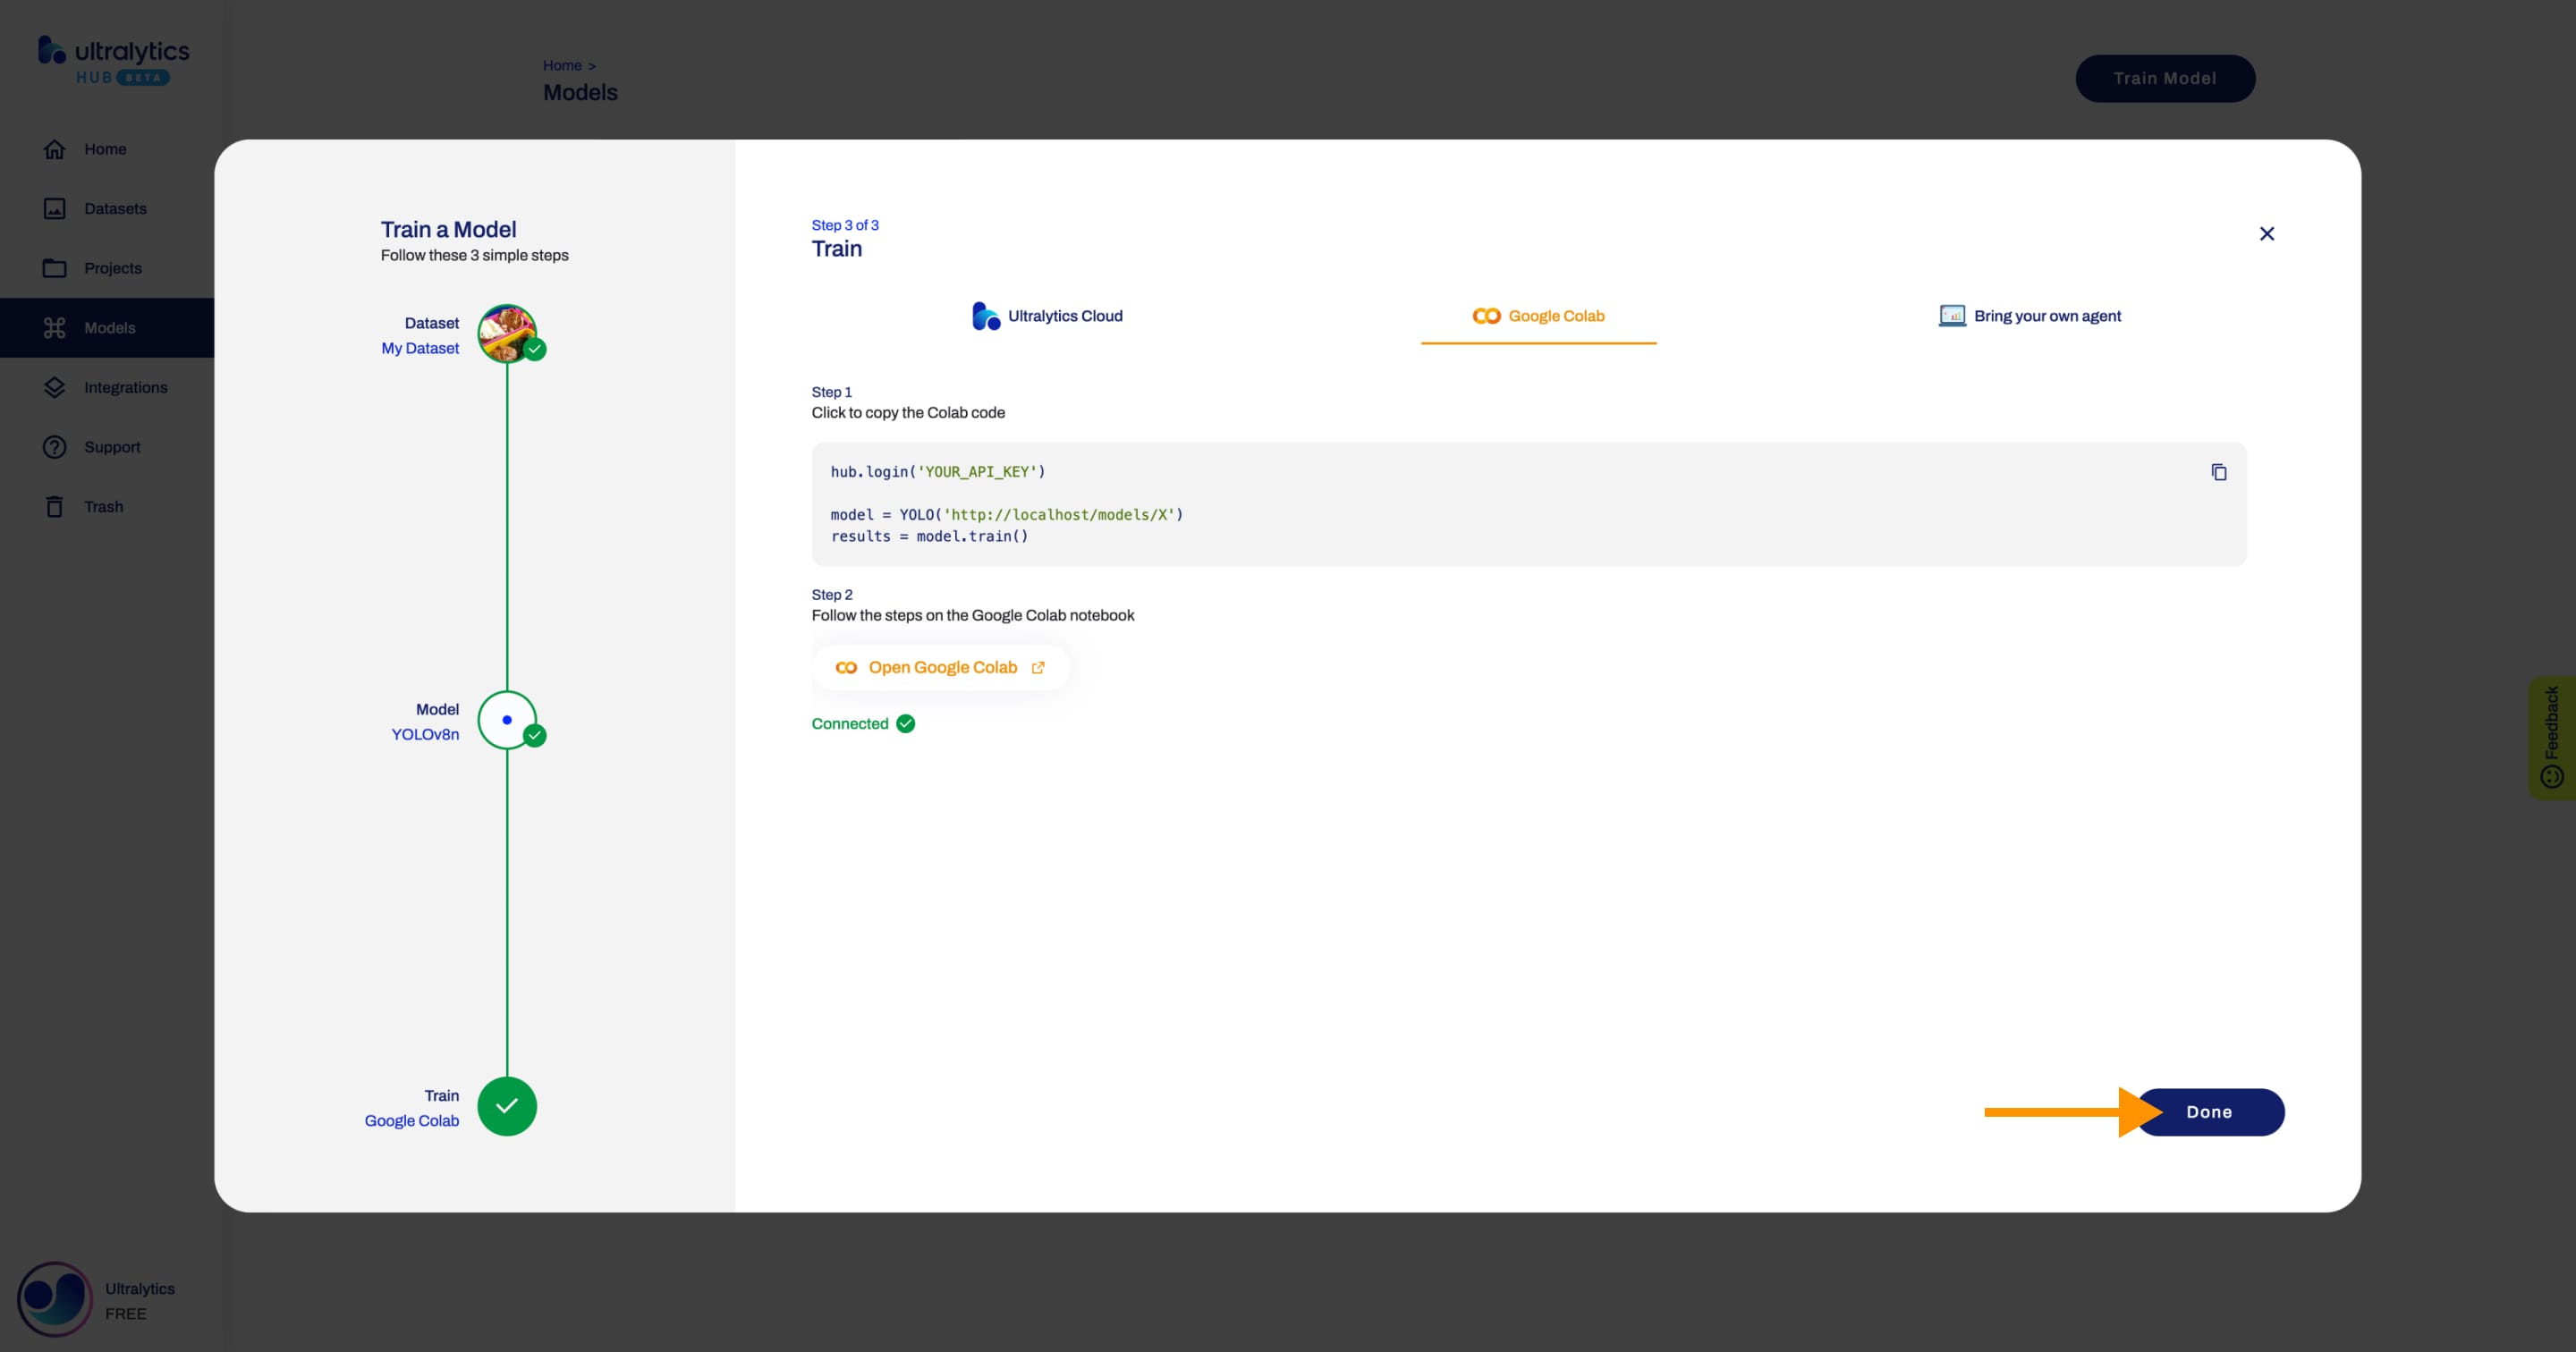
To start training your model using Google Colab, follow the instructions shown in the Ultralytics HUB Train Model dialog or on the Google Colab notebook.
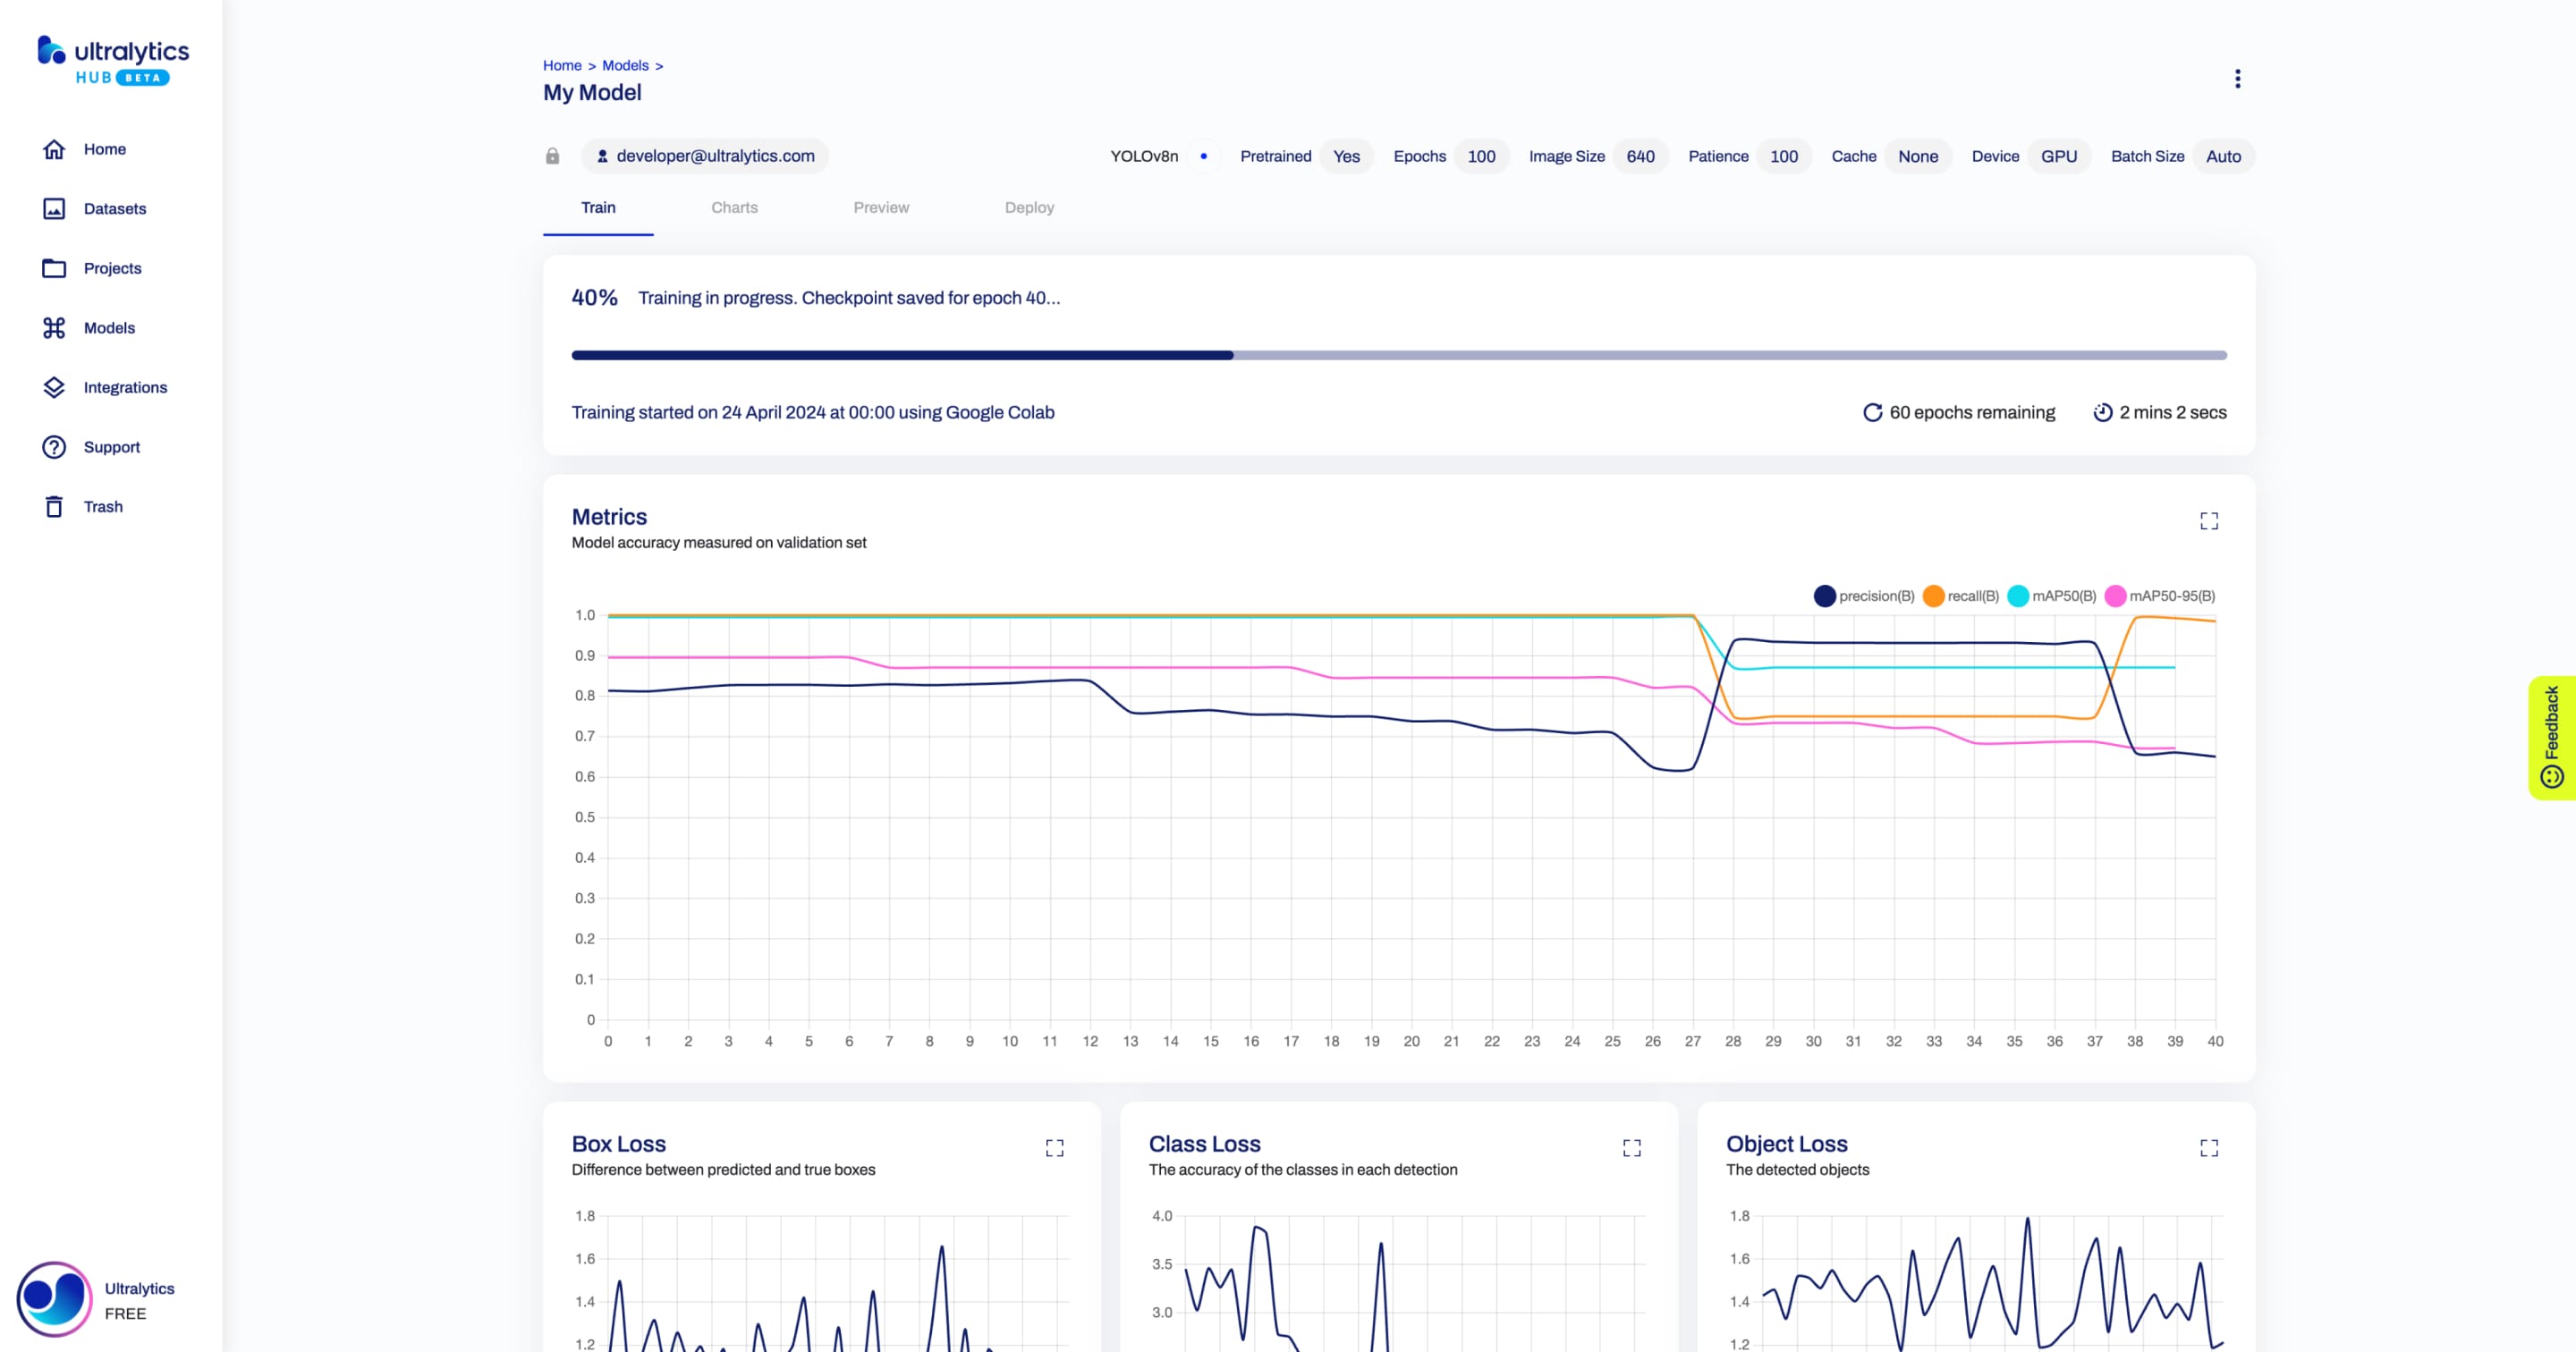
When the training starts, you can click Done and monitor the training progress on the Model page.
!!! note "Note"
In case the training stops and a checkpoint was saved, you can resume training your model from the Model page.
c. Bring your own agent
Watch: Bring your Own Agent model training using Ultralytics HUB
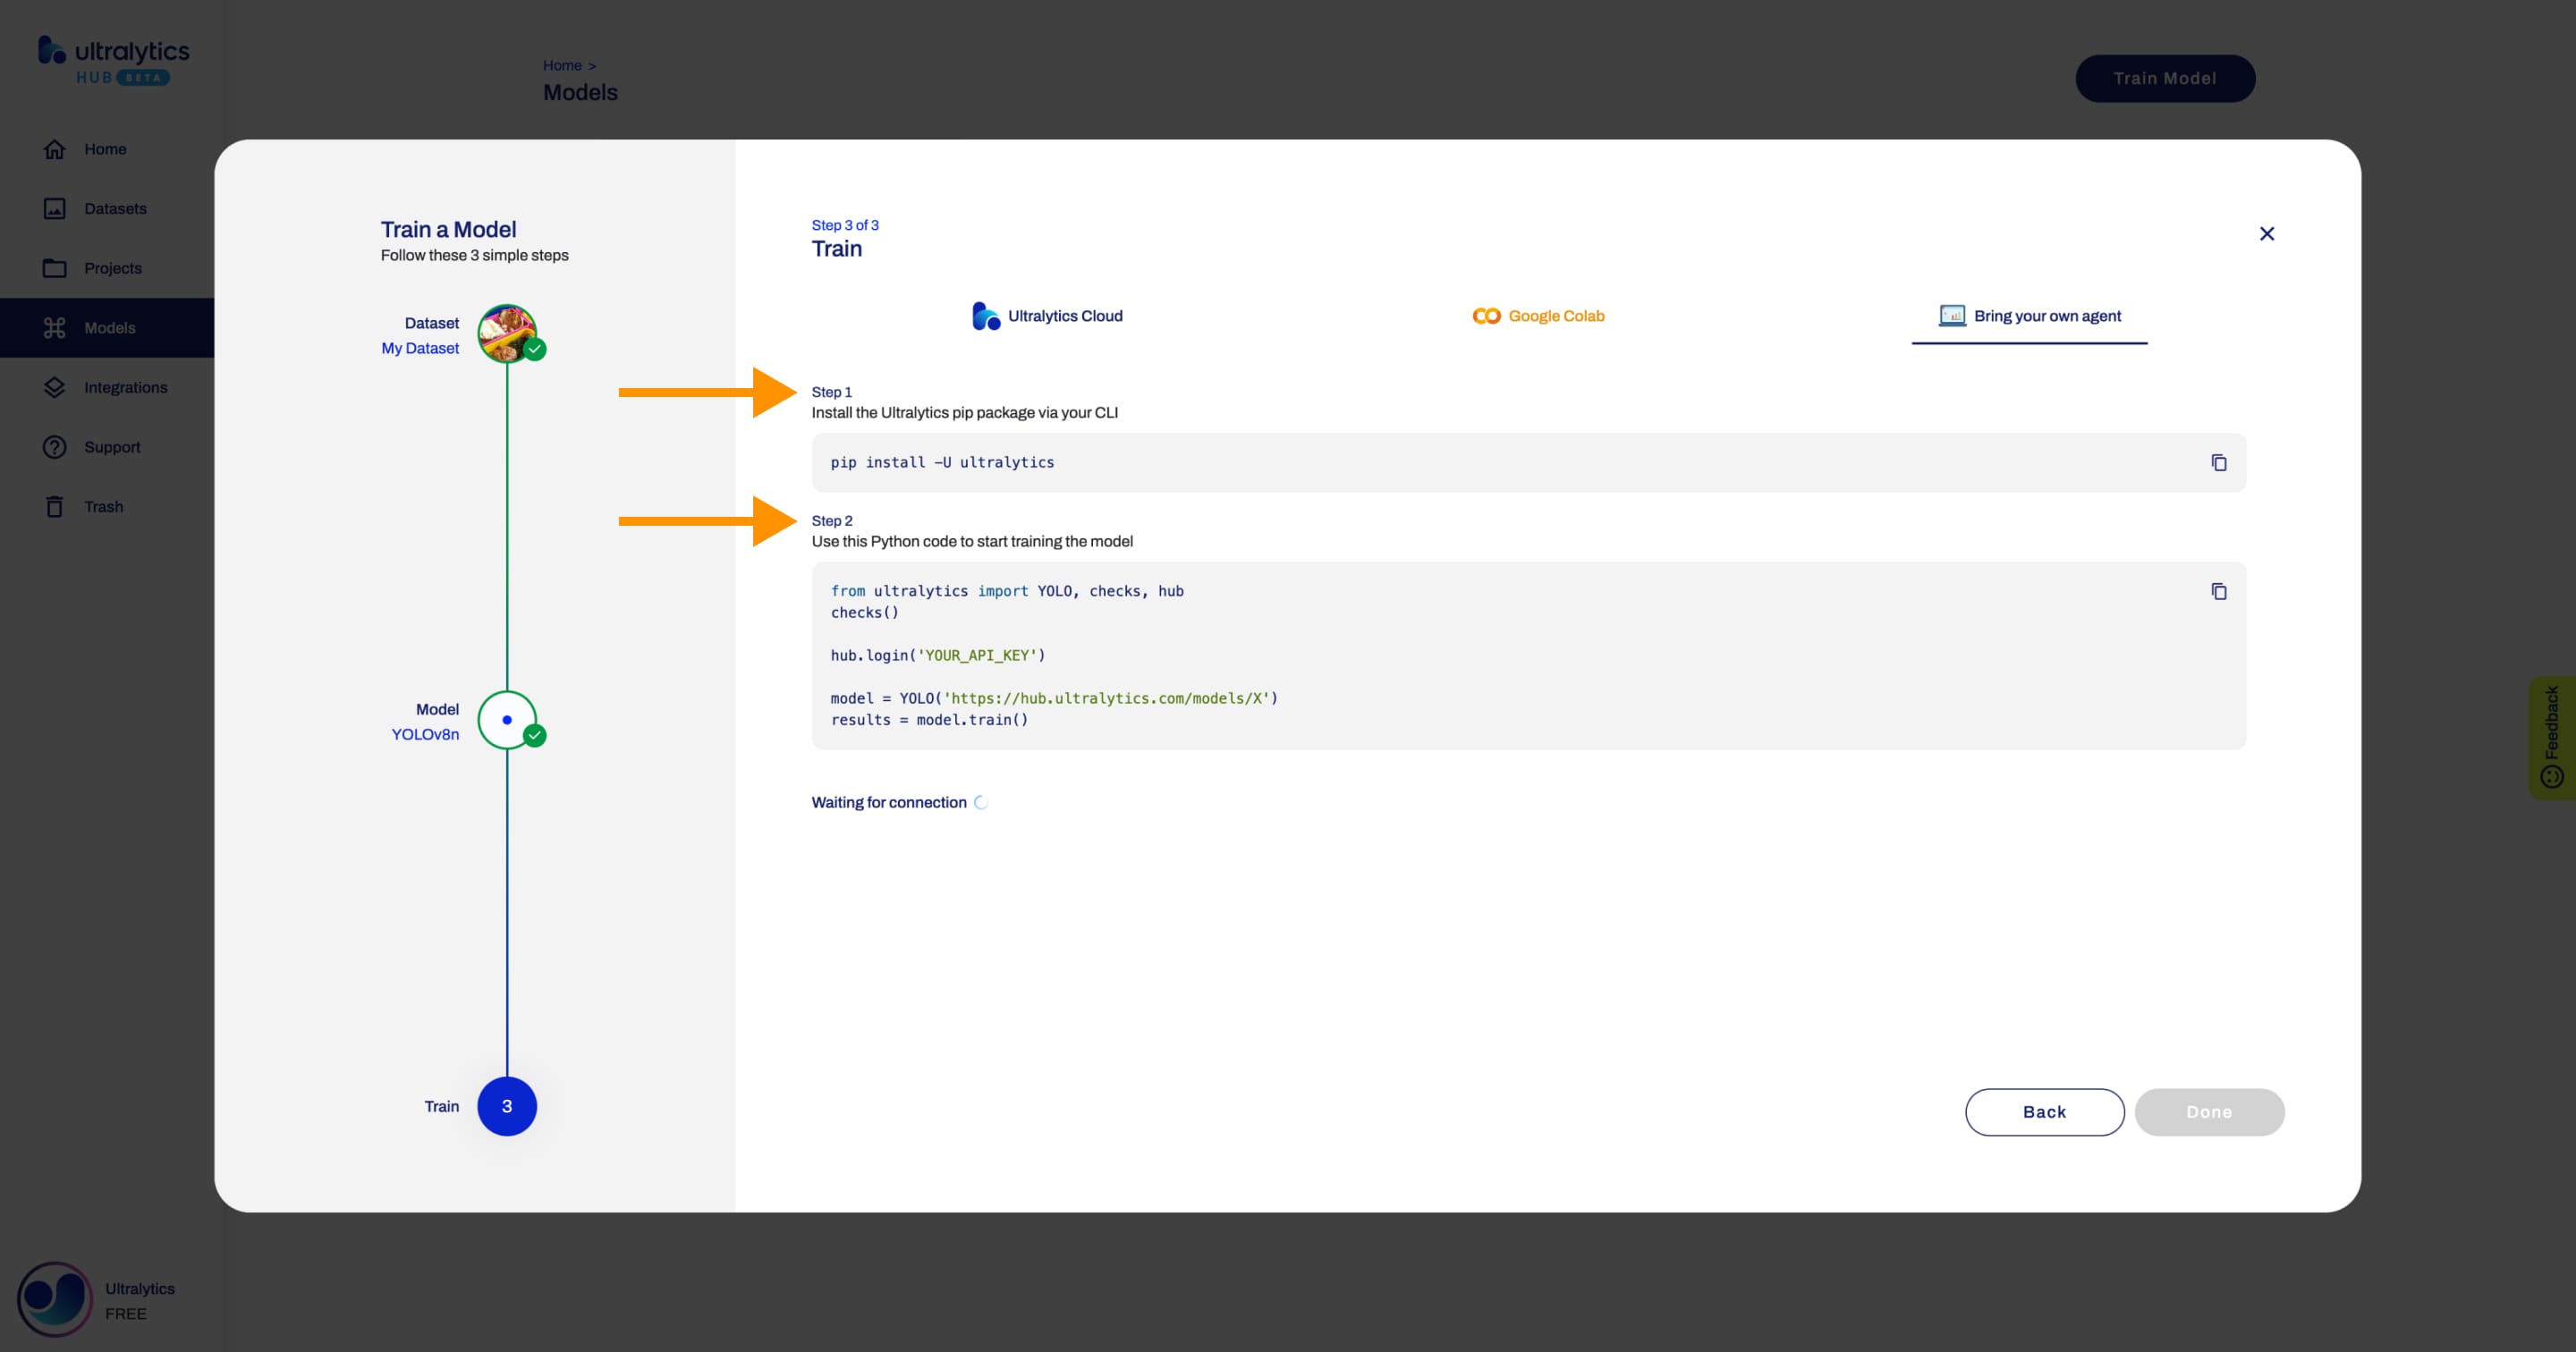
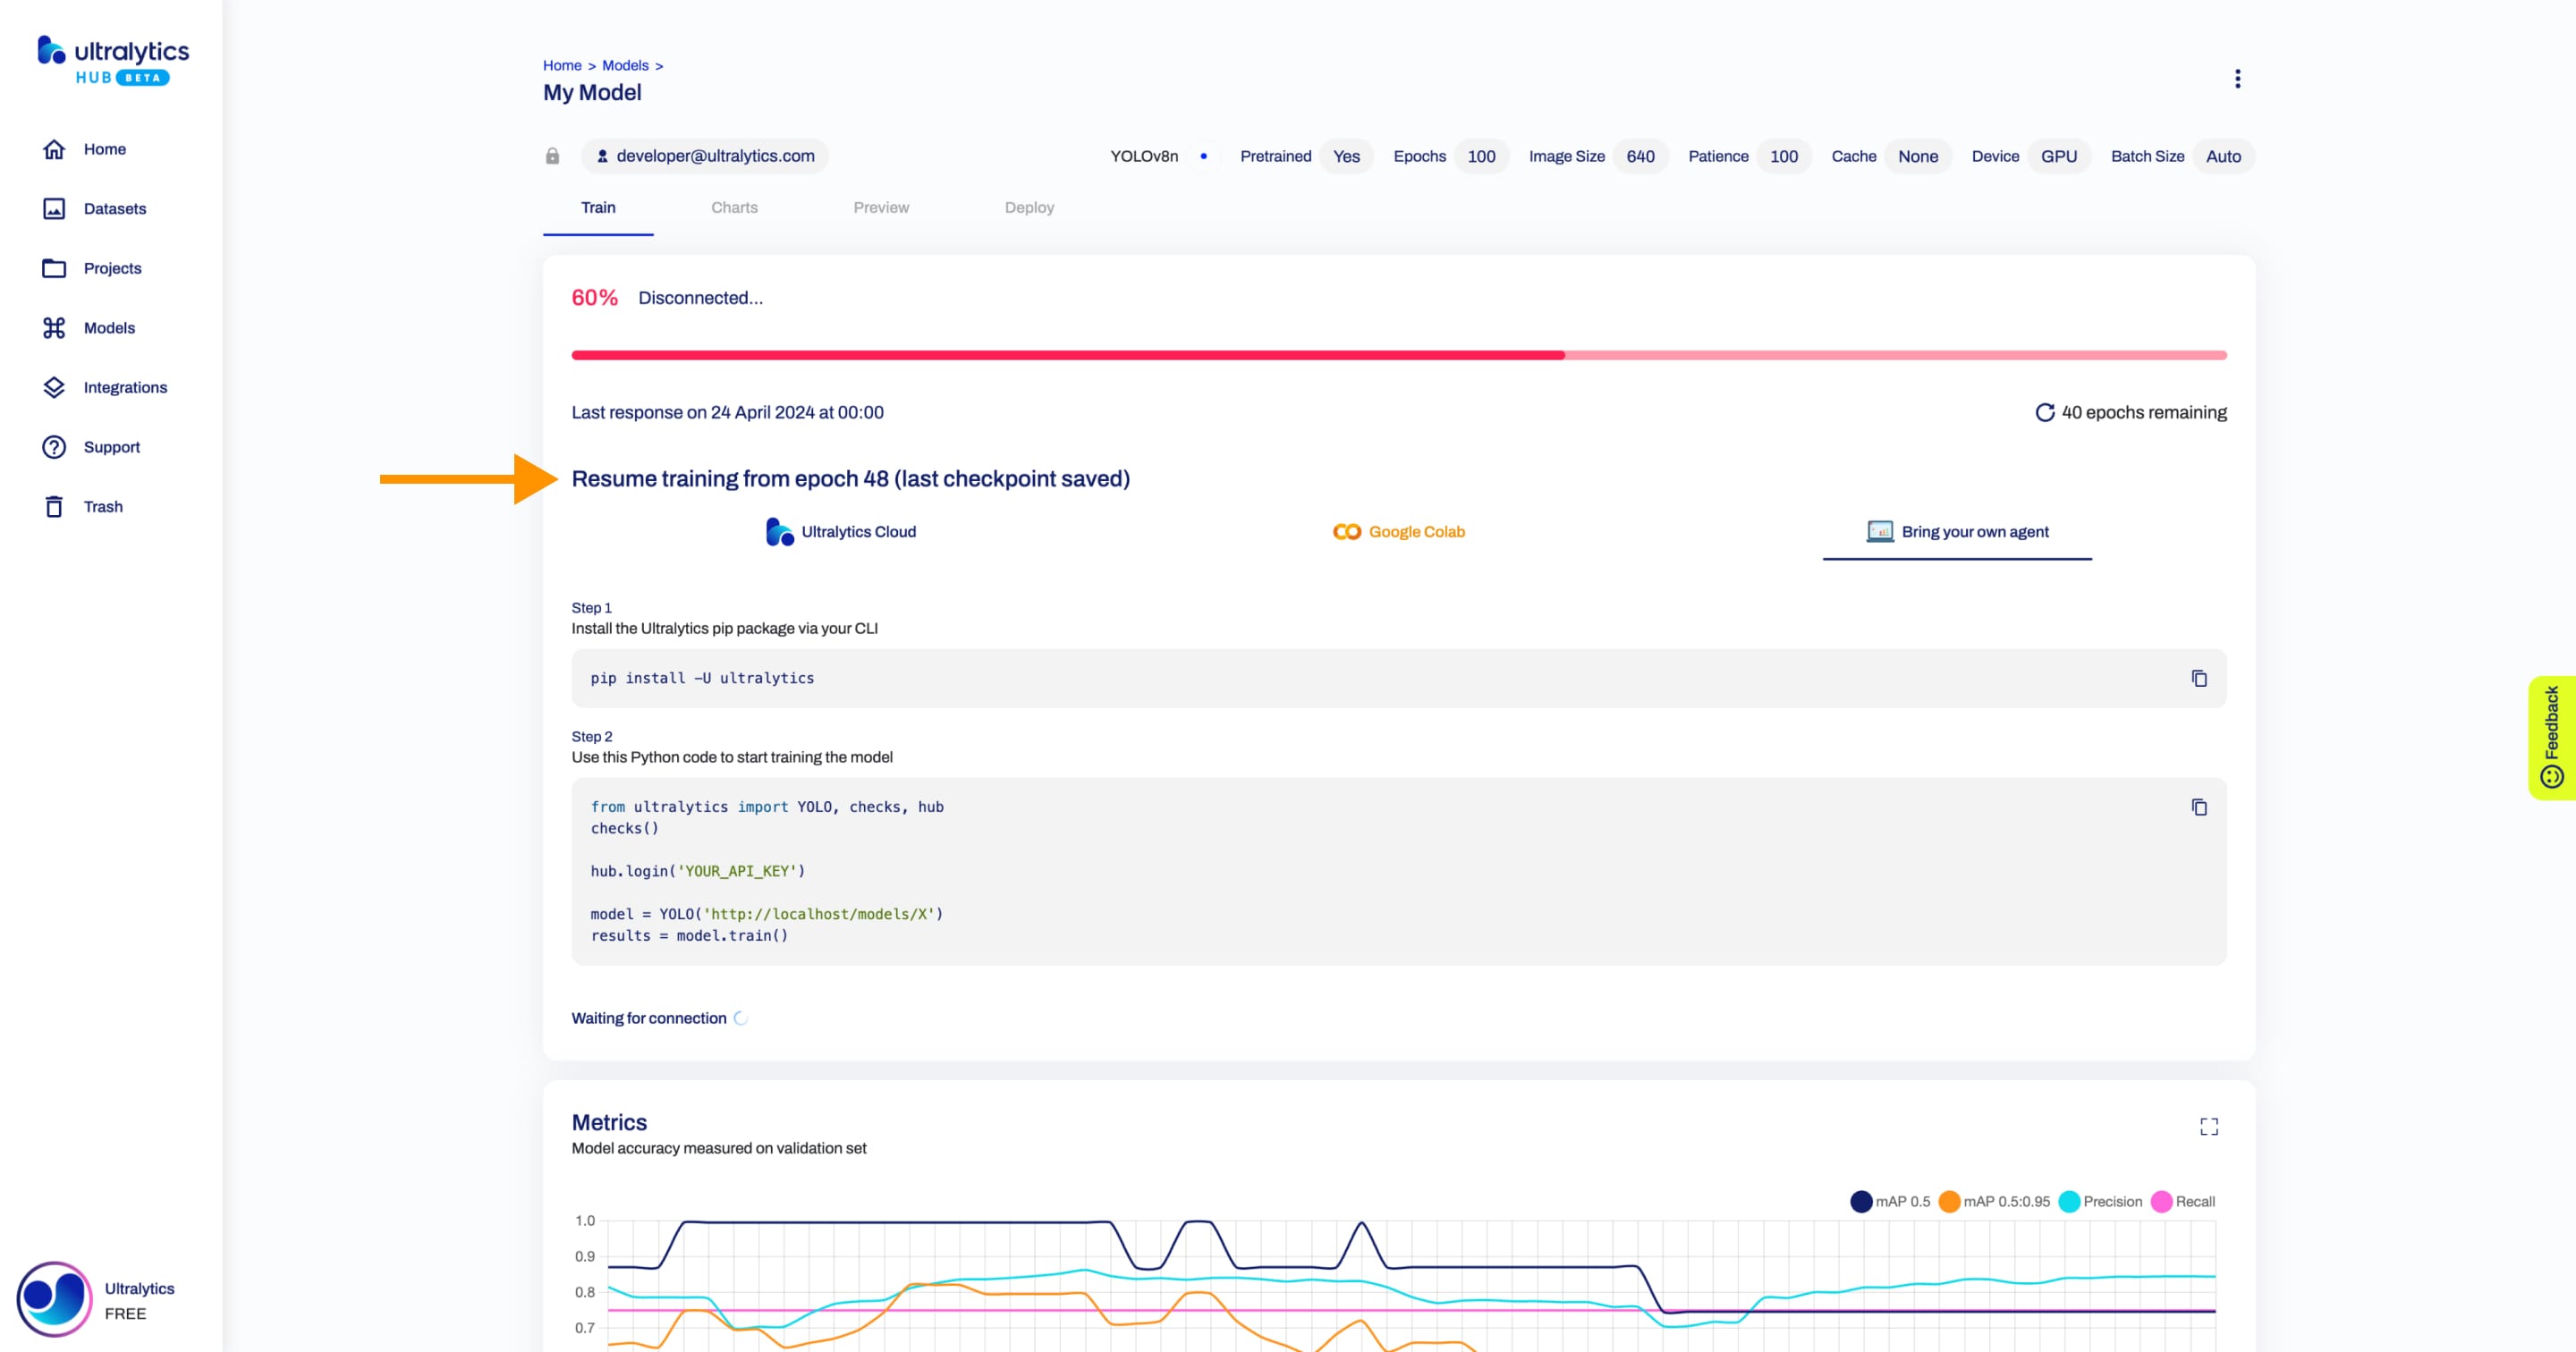
To start training your model using your own agent, follow the instructions shown in the Ultralytics HUB Train Model dialog.
Install the ultralytics package from PyPI.
pip install -U ultralytics
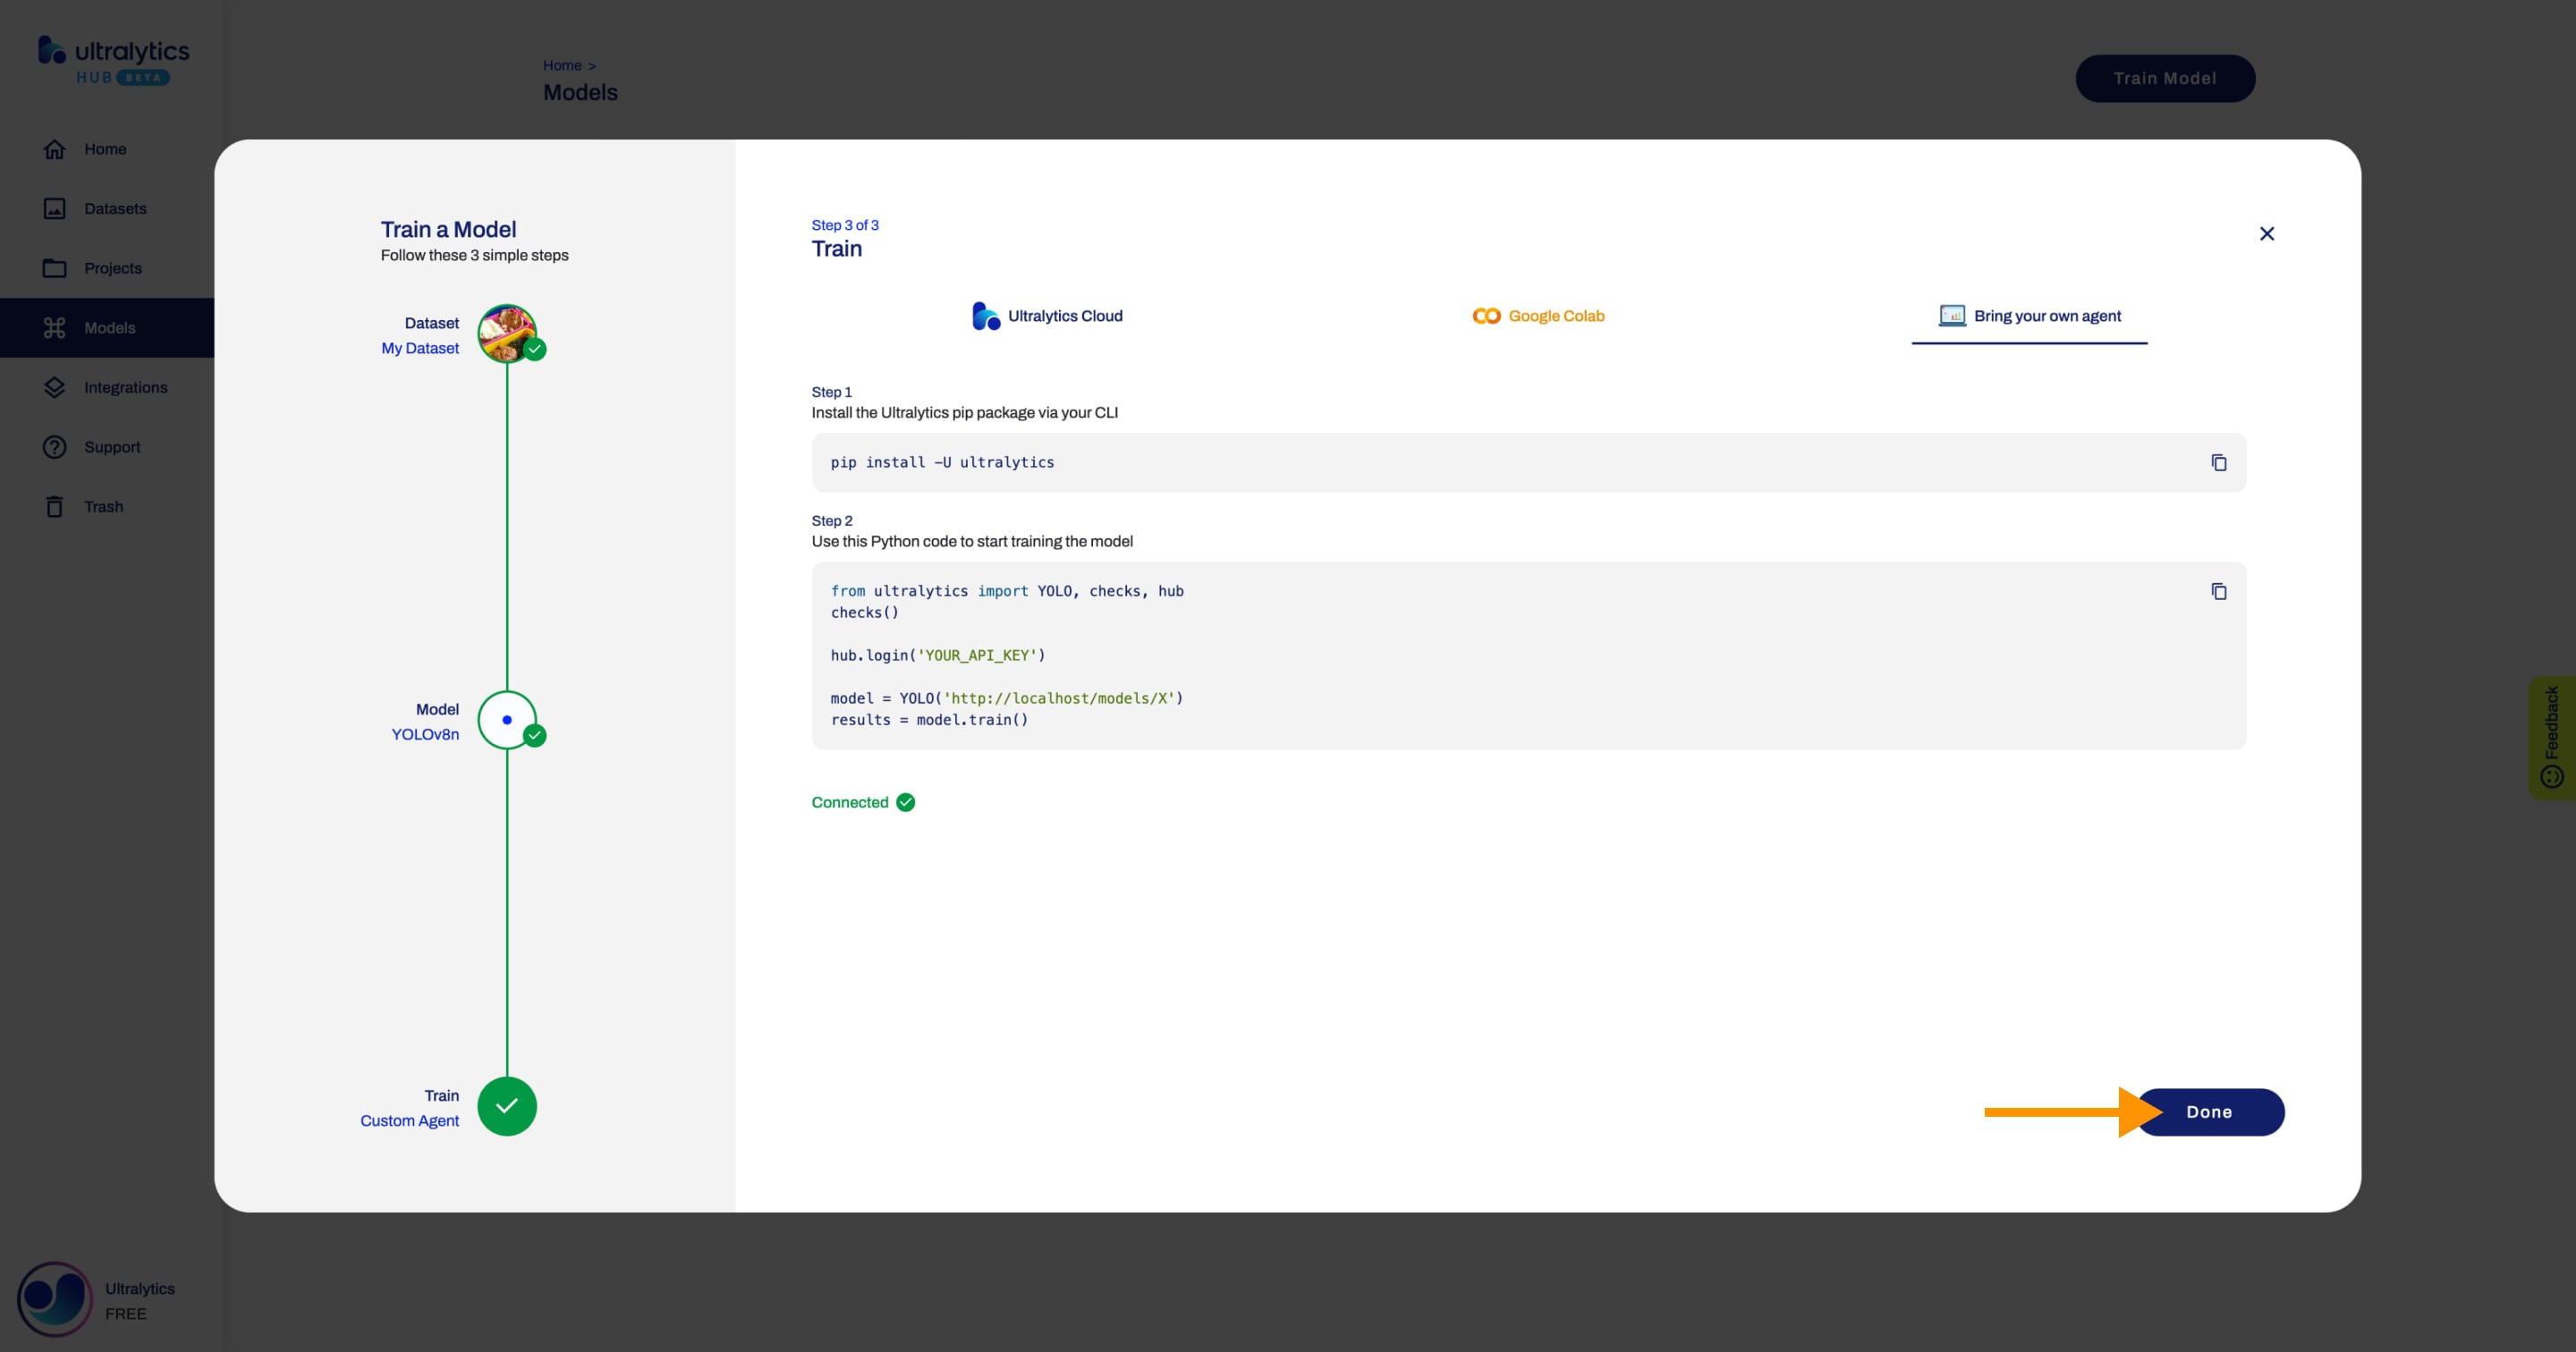
Next, use the Python code provided to start training the model.
When the training starts, you can click Done and monitor the training progress on the Model page.
!!! note "Note"
In case the training stops and a checkpoint was saved, you can resume training your model from the Model page.
Analyze Model
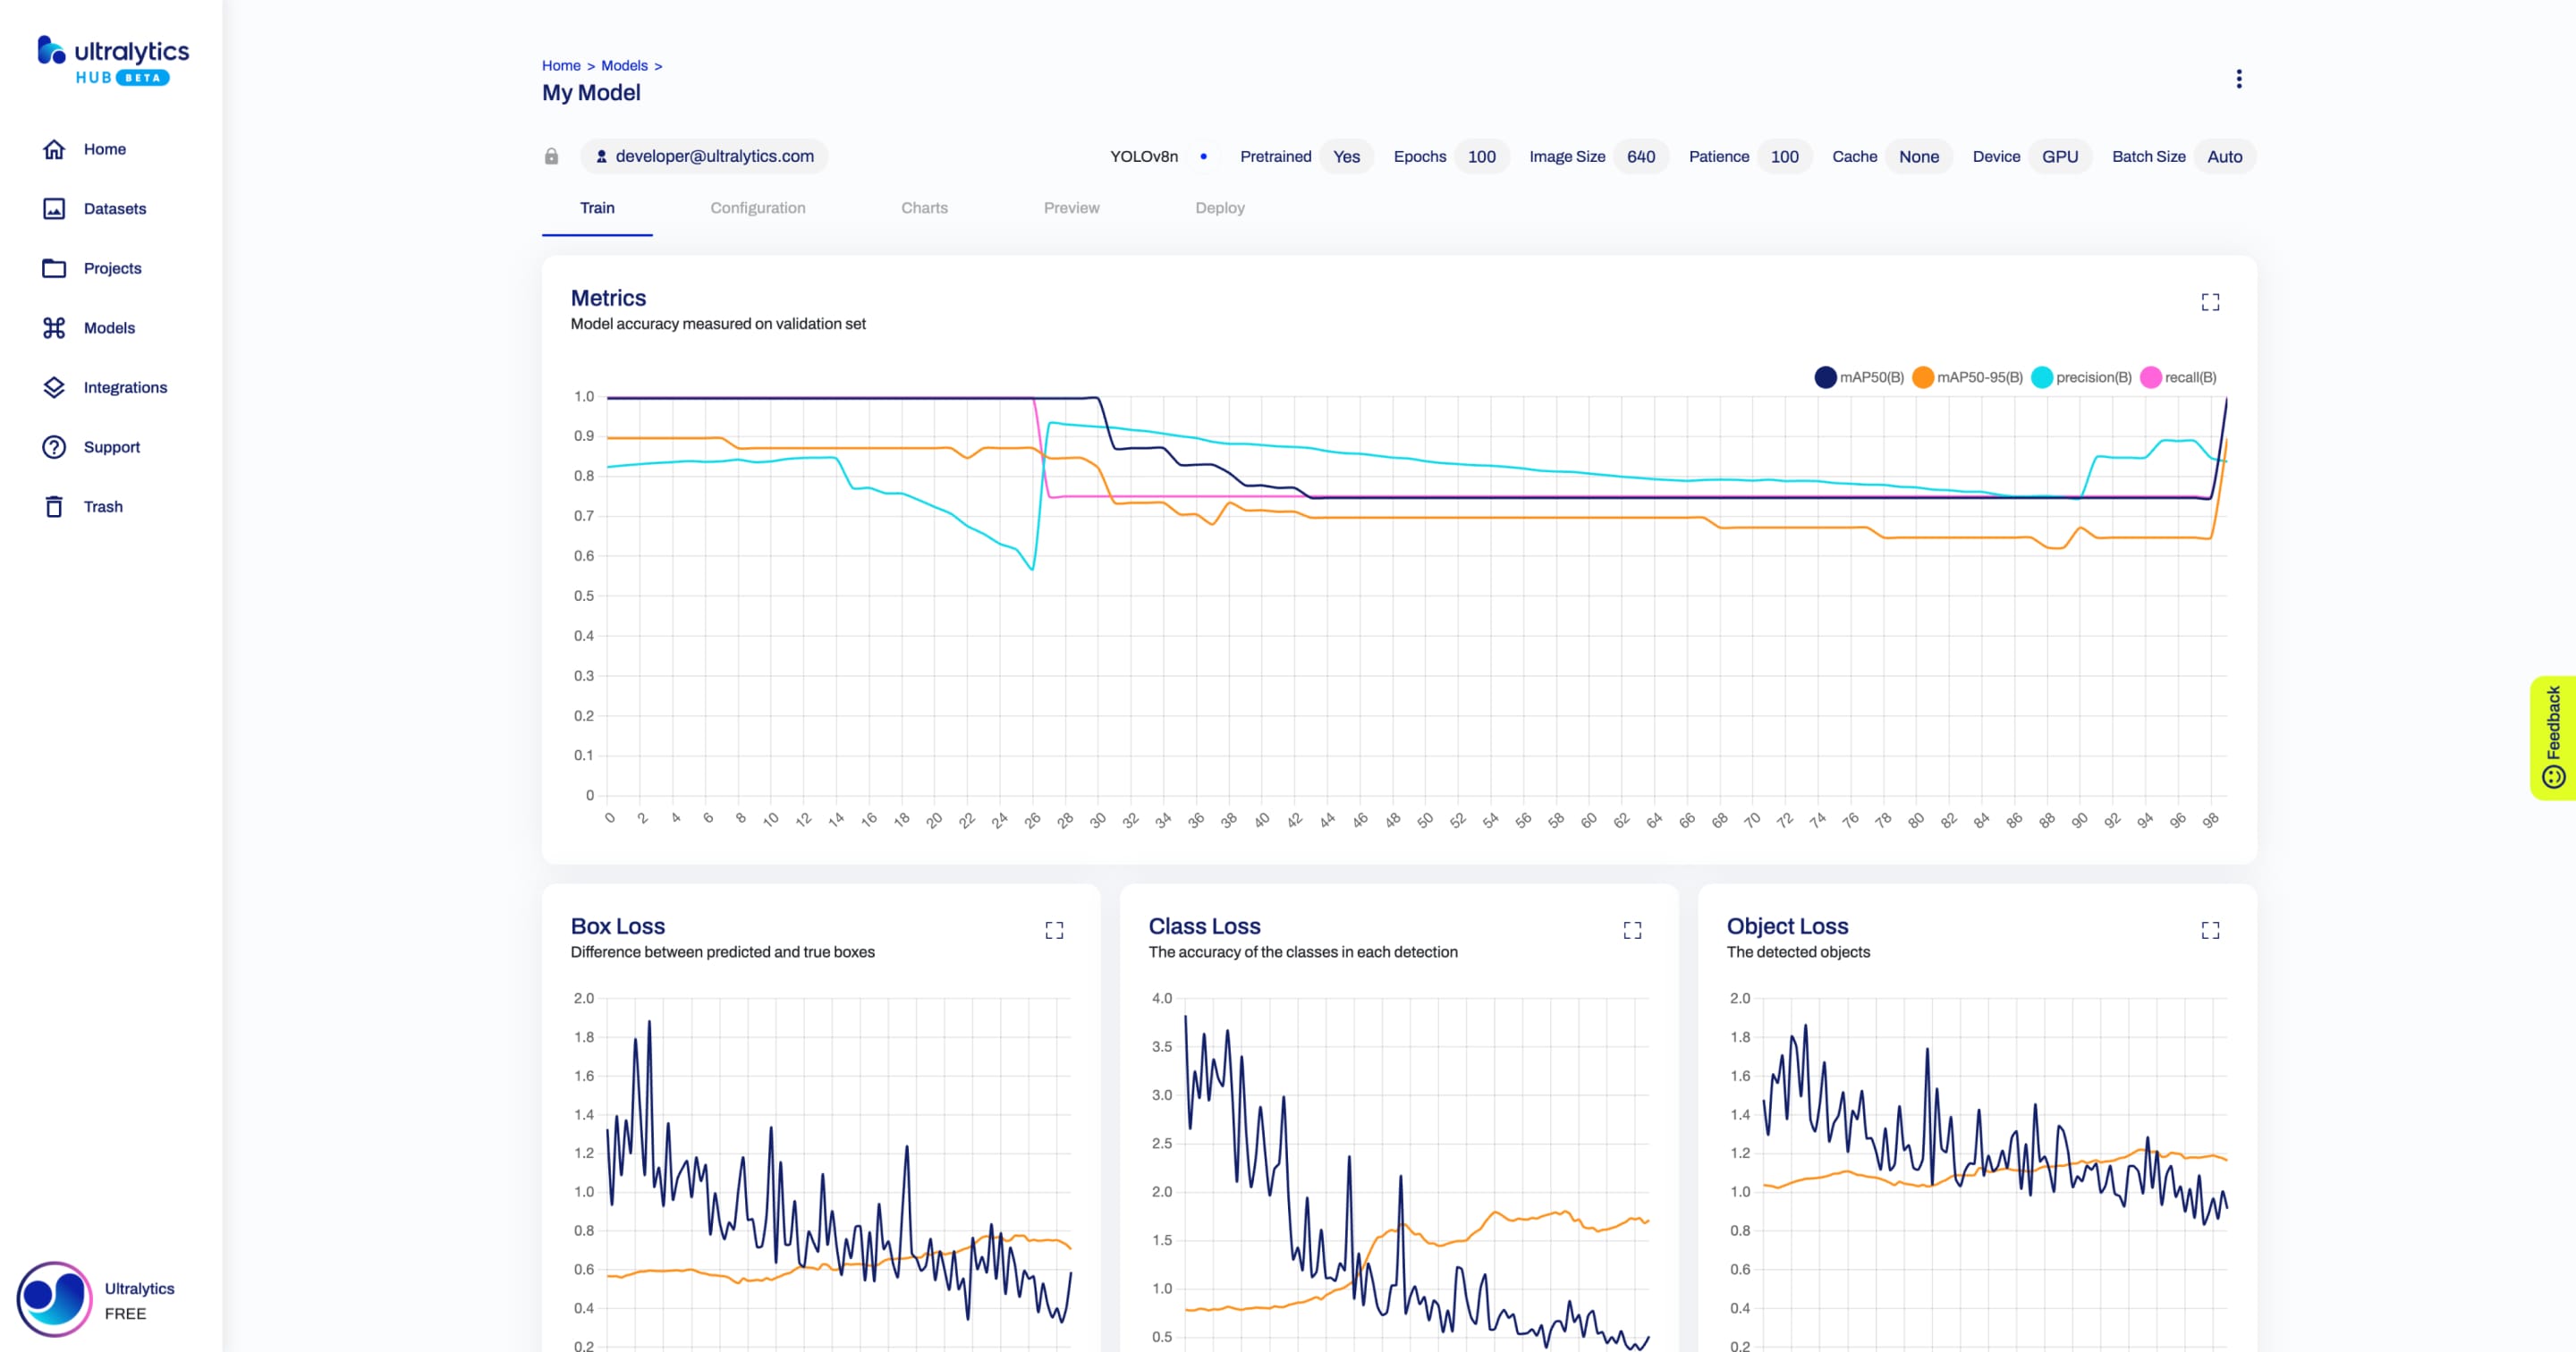
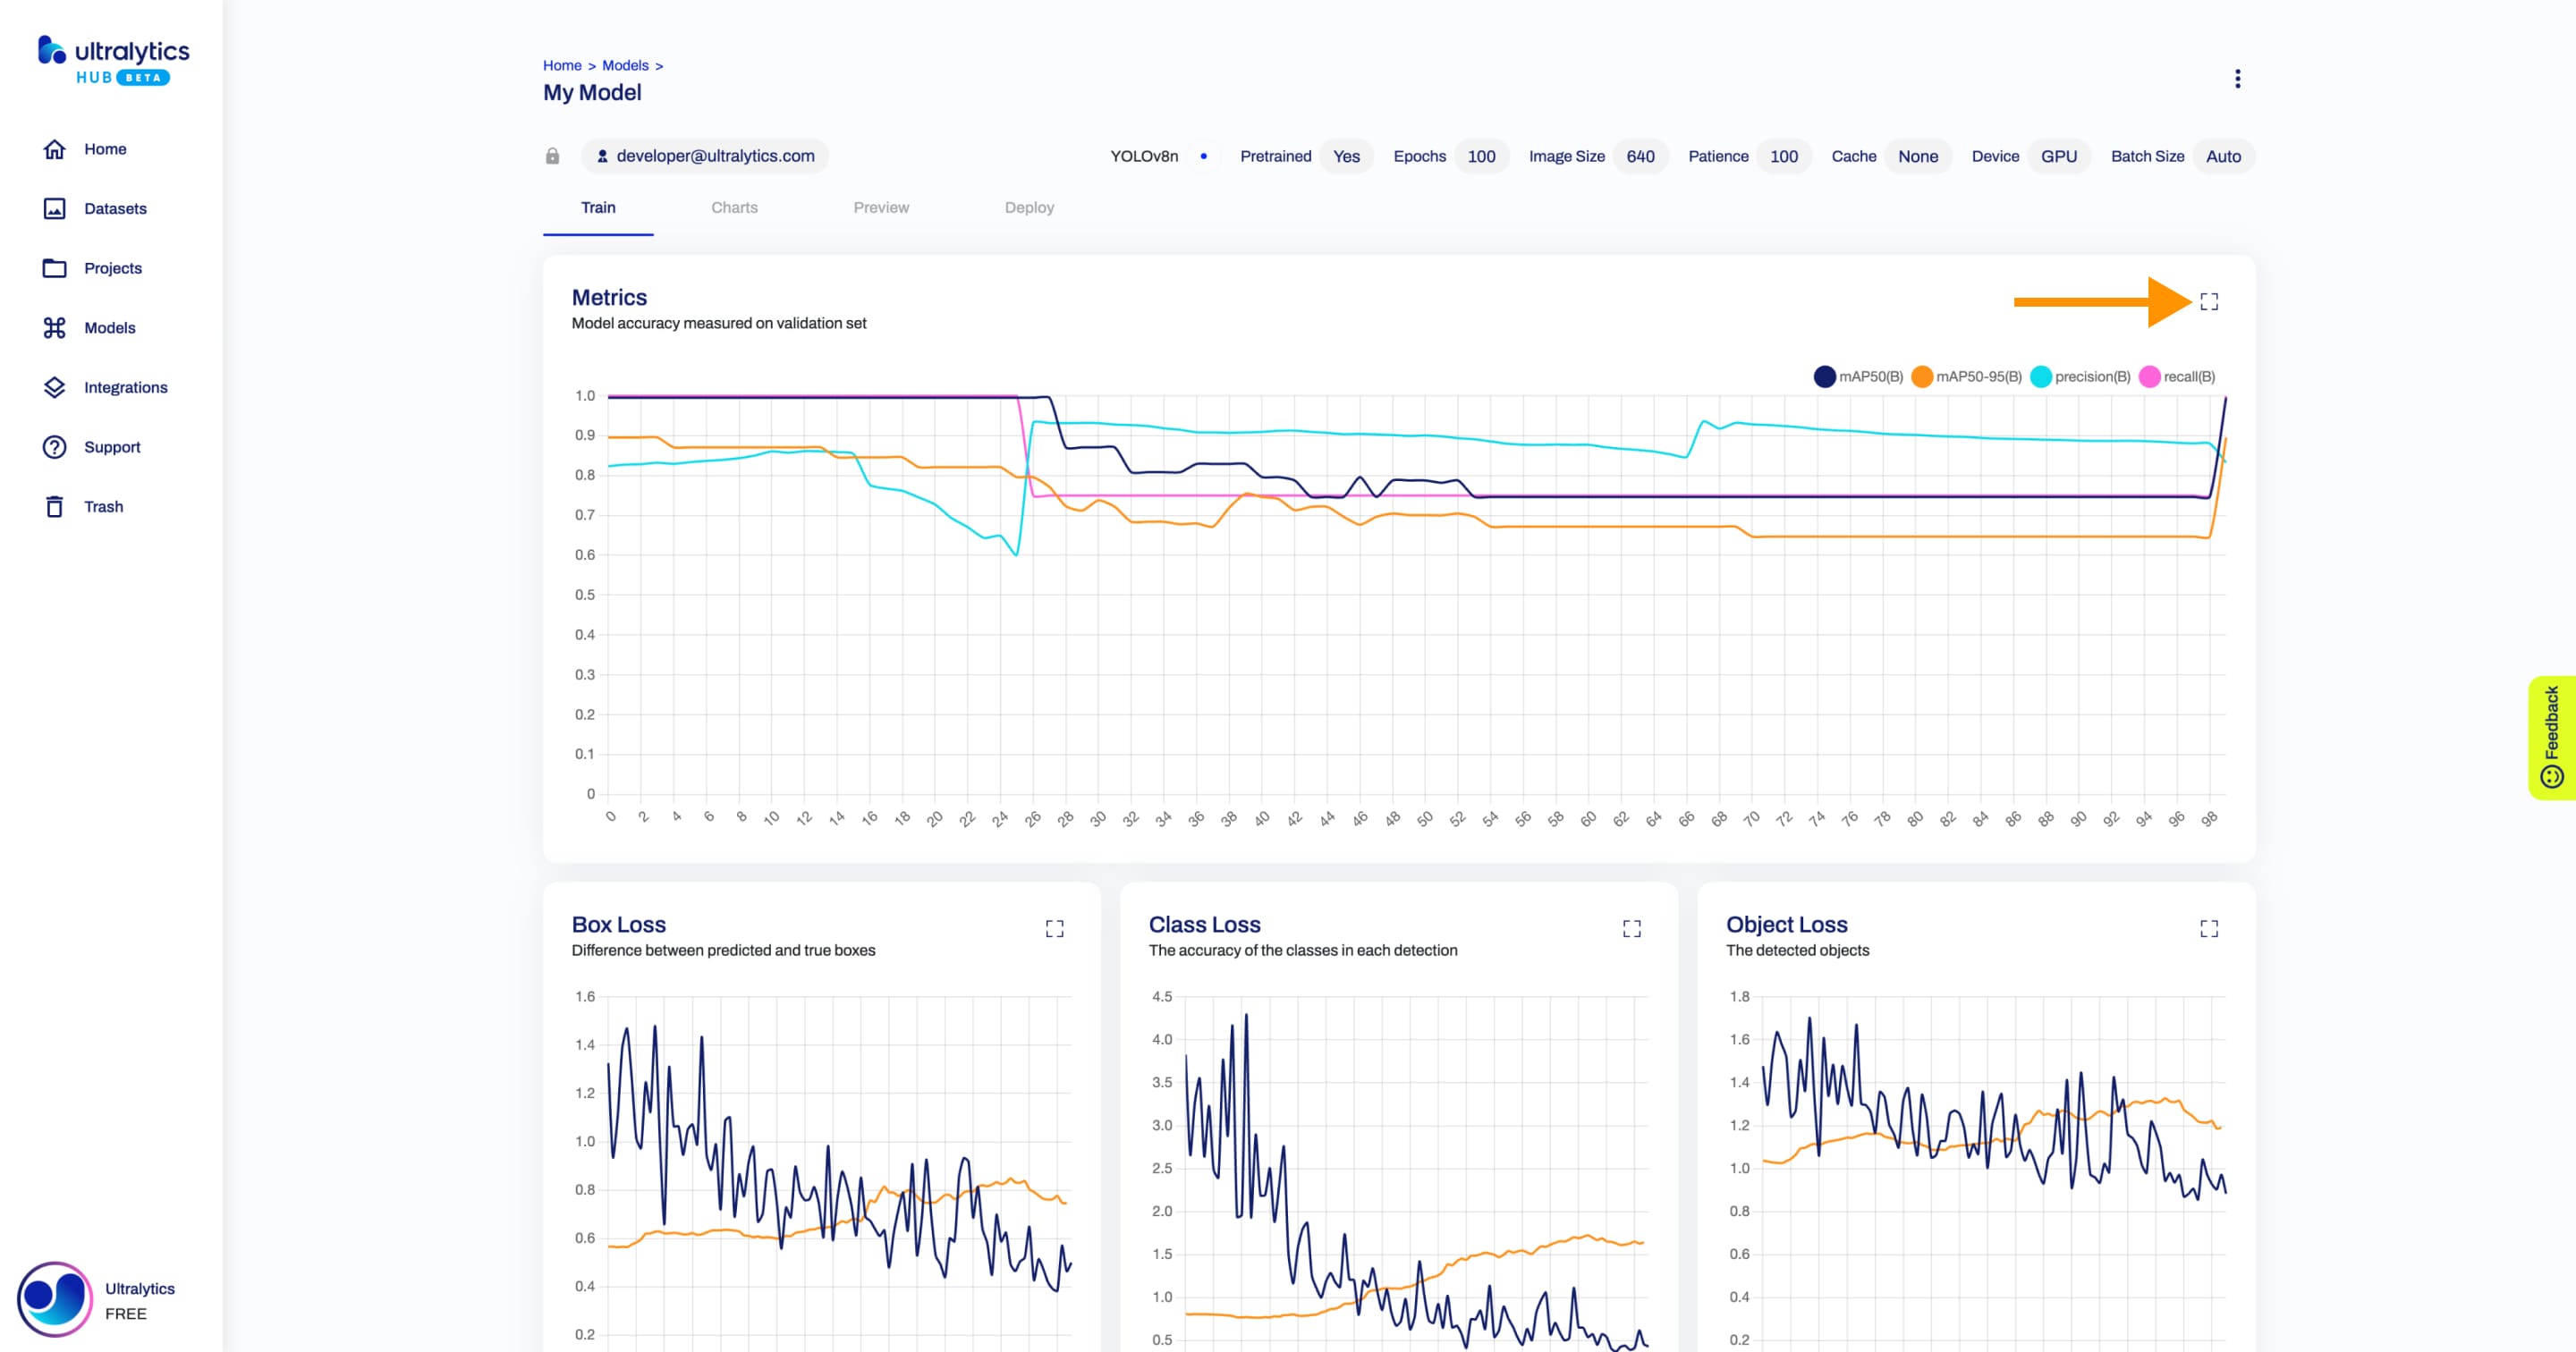
After you train a model, you can analyze the model metrics.
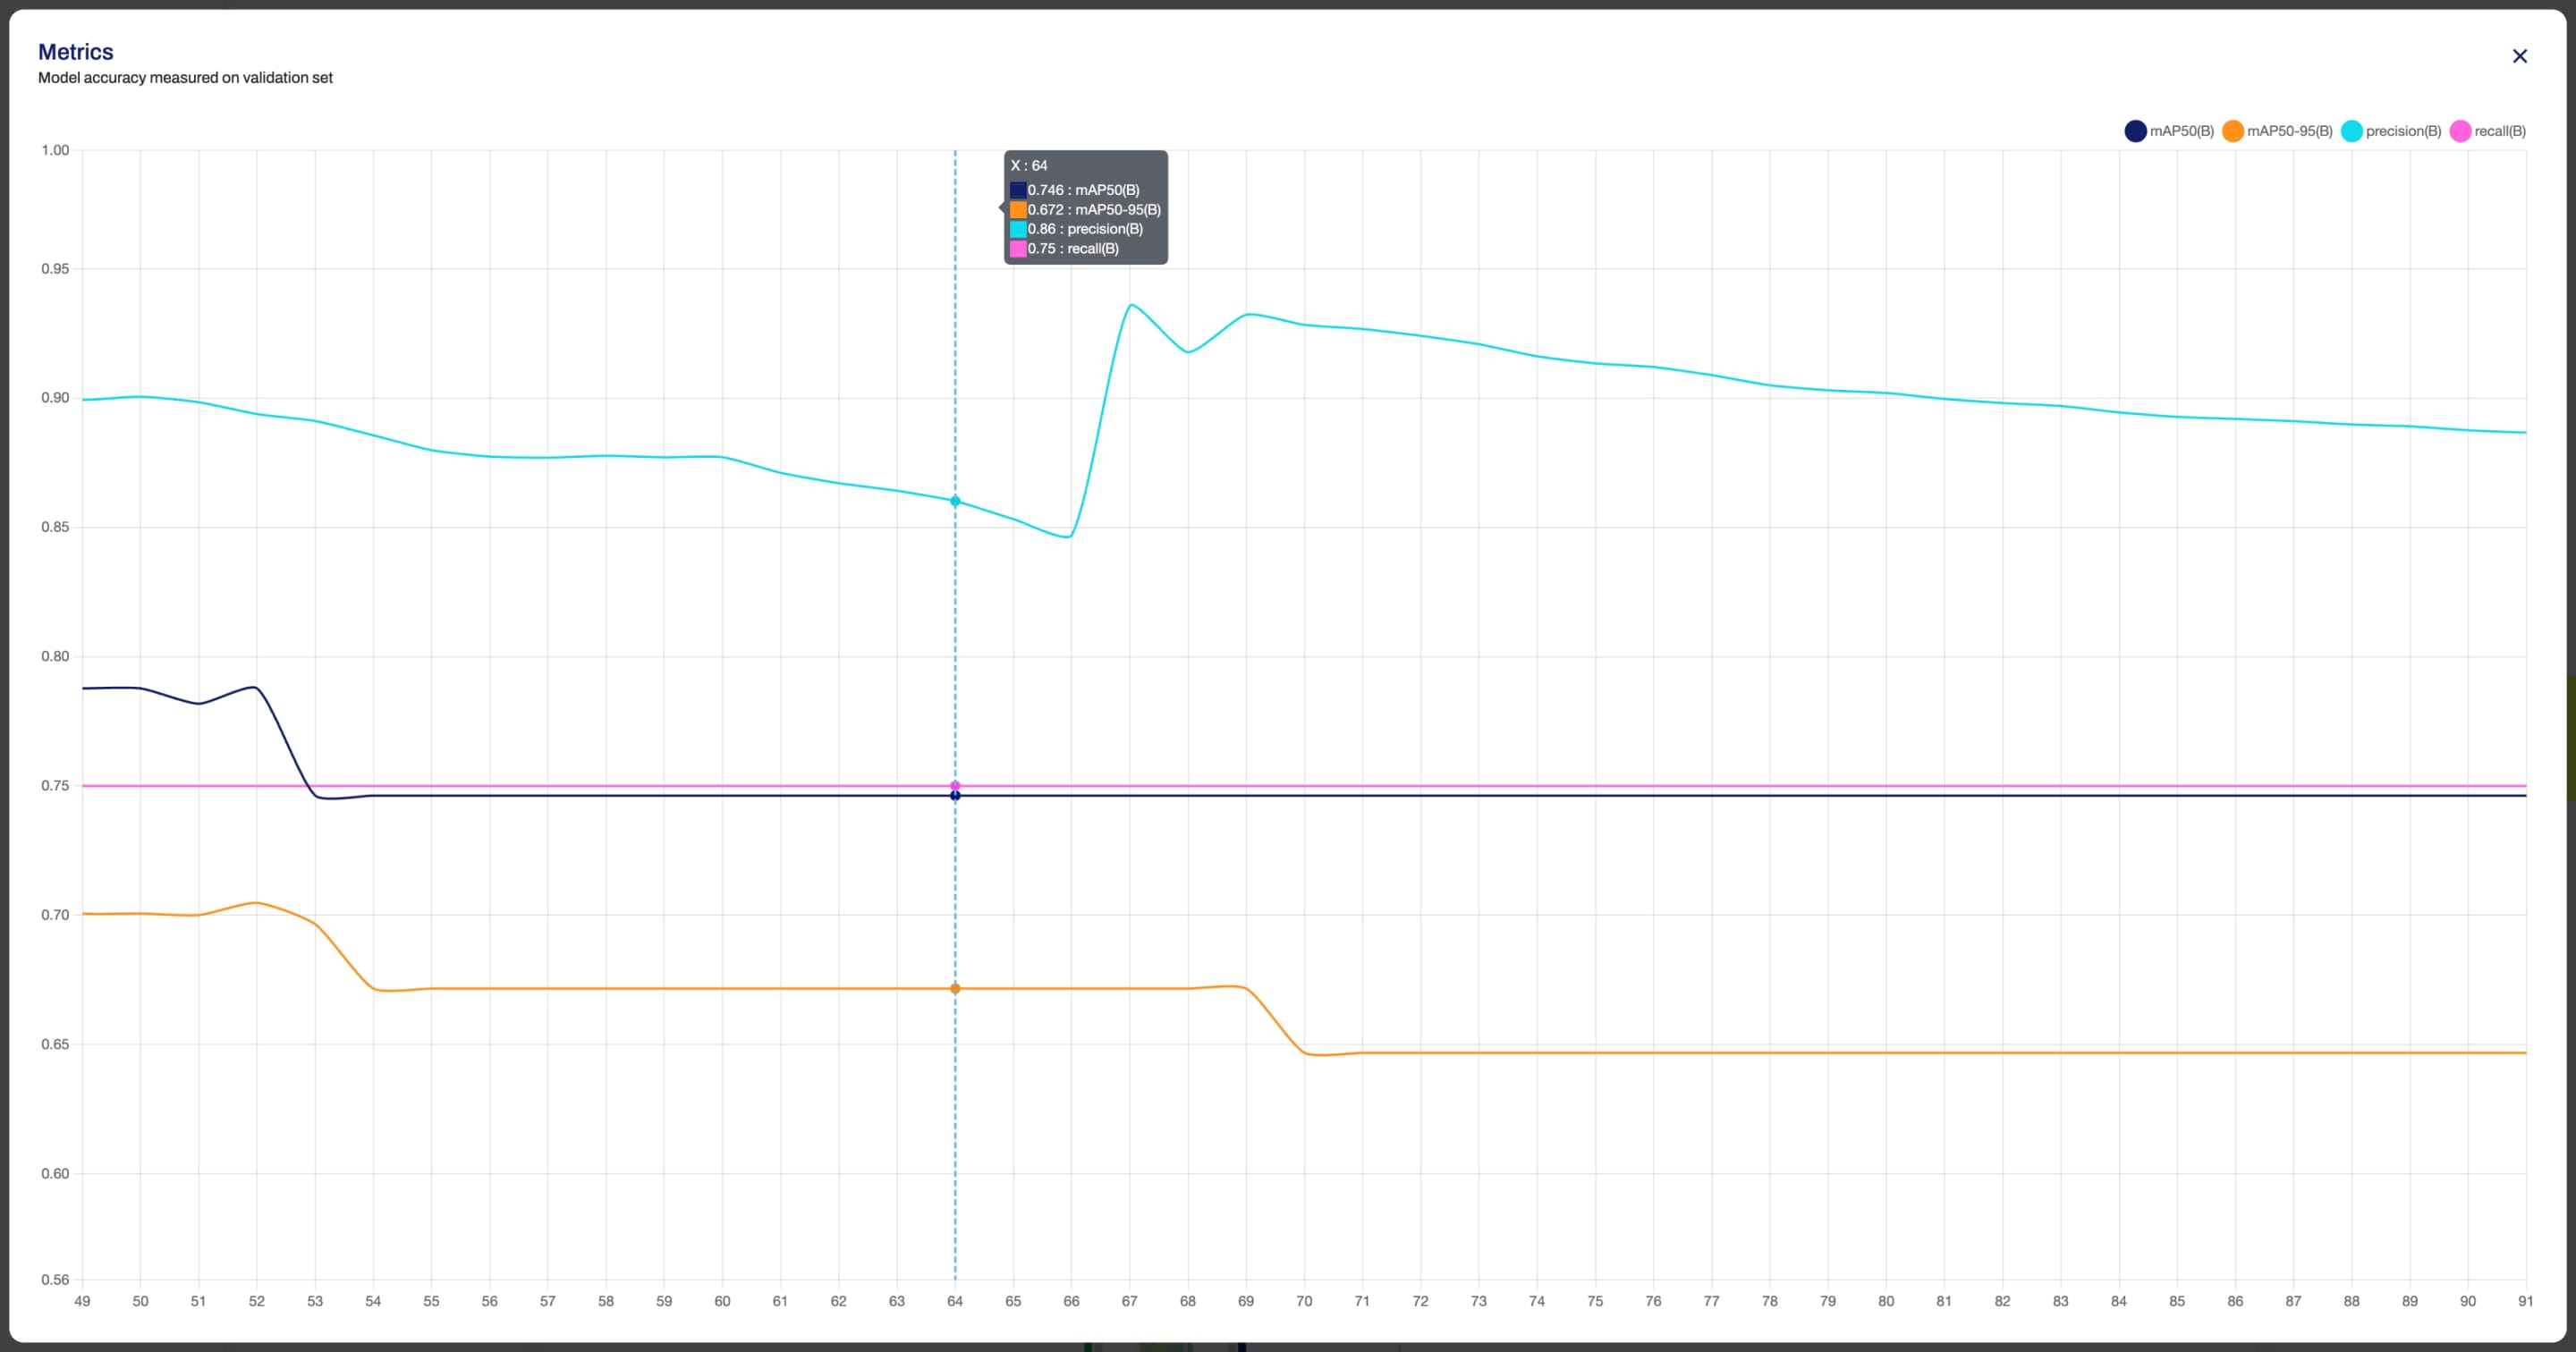
The Train tab presents the most important metrics carefully grouped based on the task.
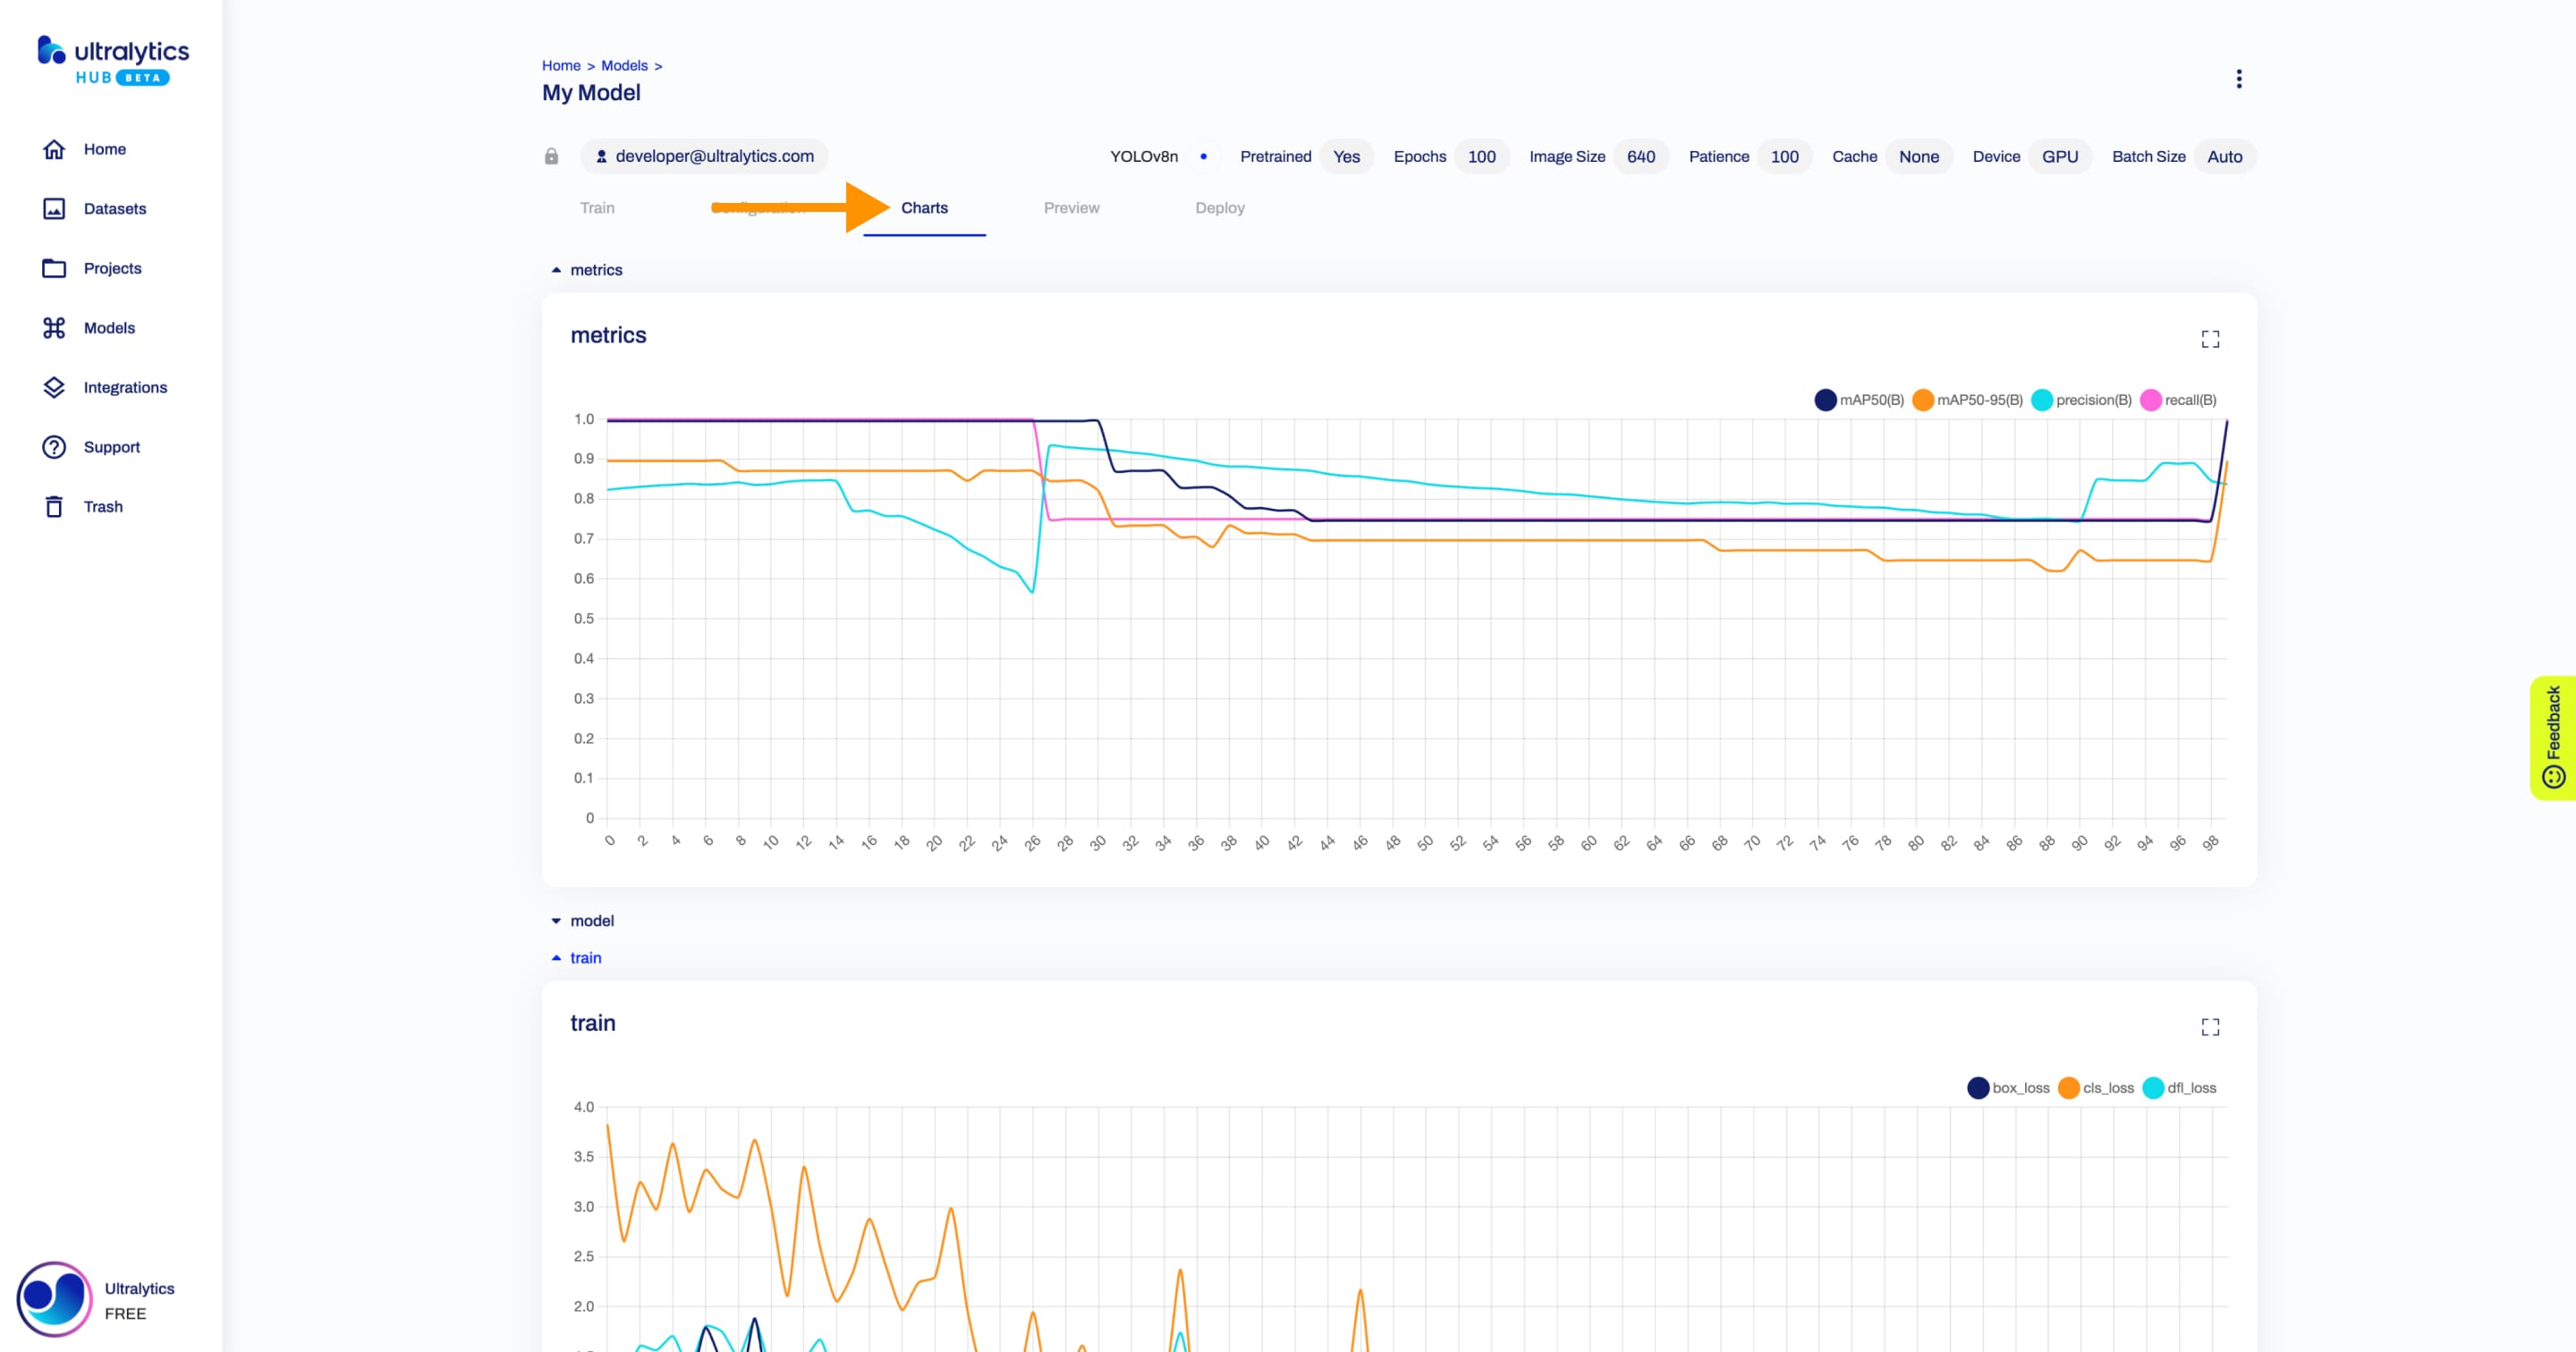
To access all model metrics, click on the Charts tab.
??? tip "Tip"
Each chart can be enlarged for better visualization.
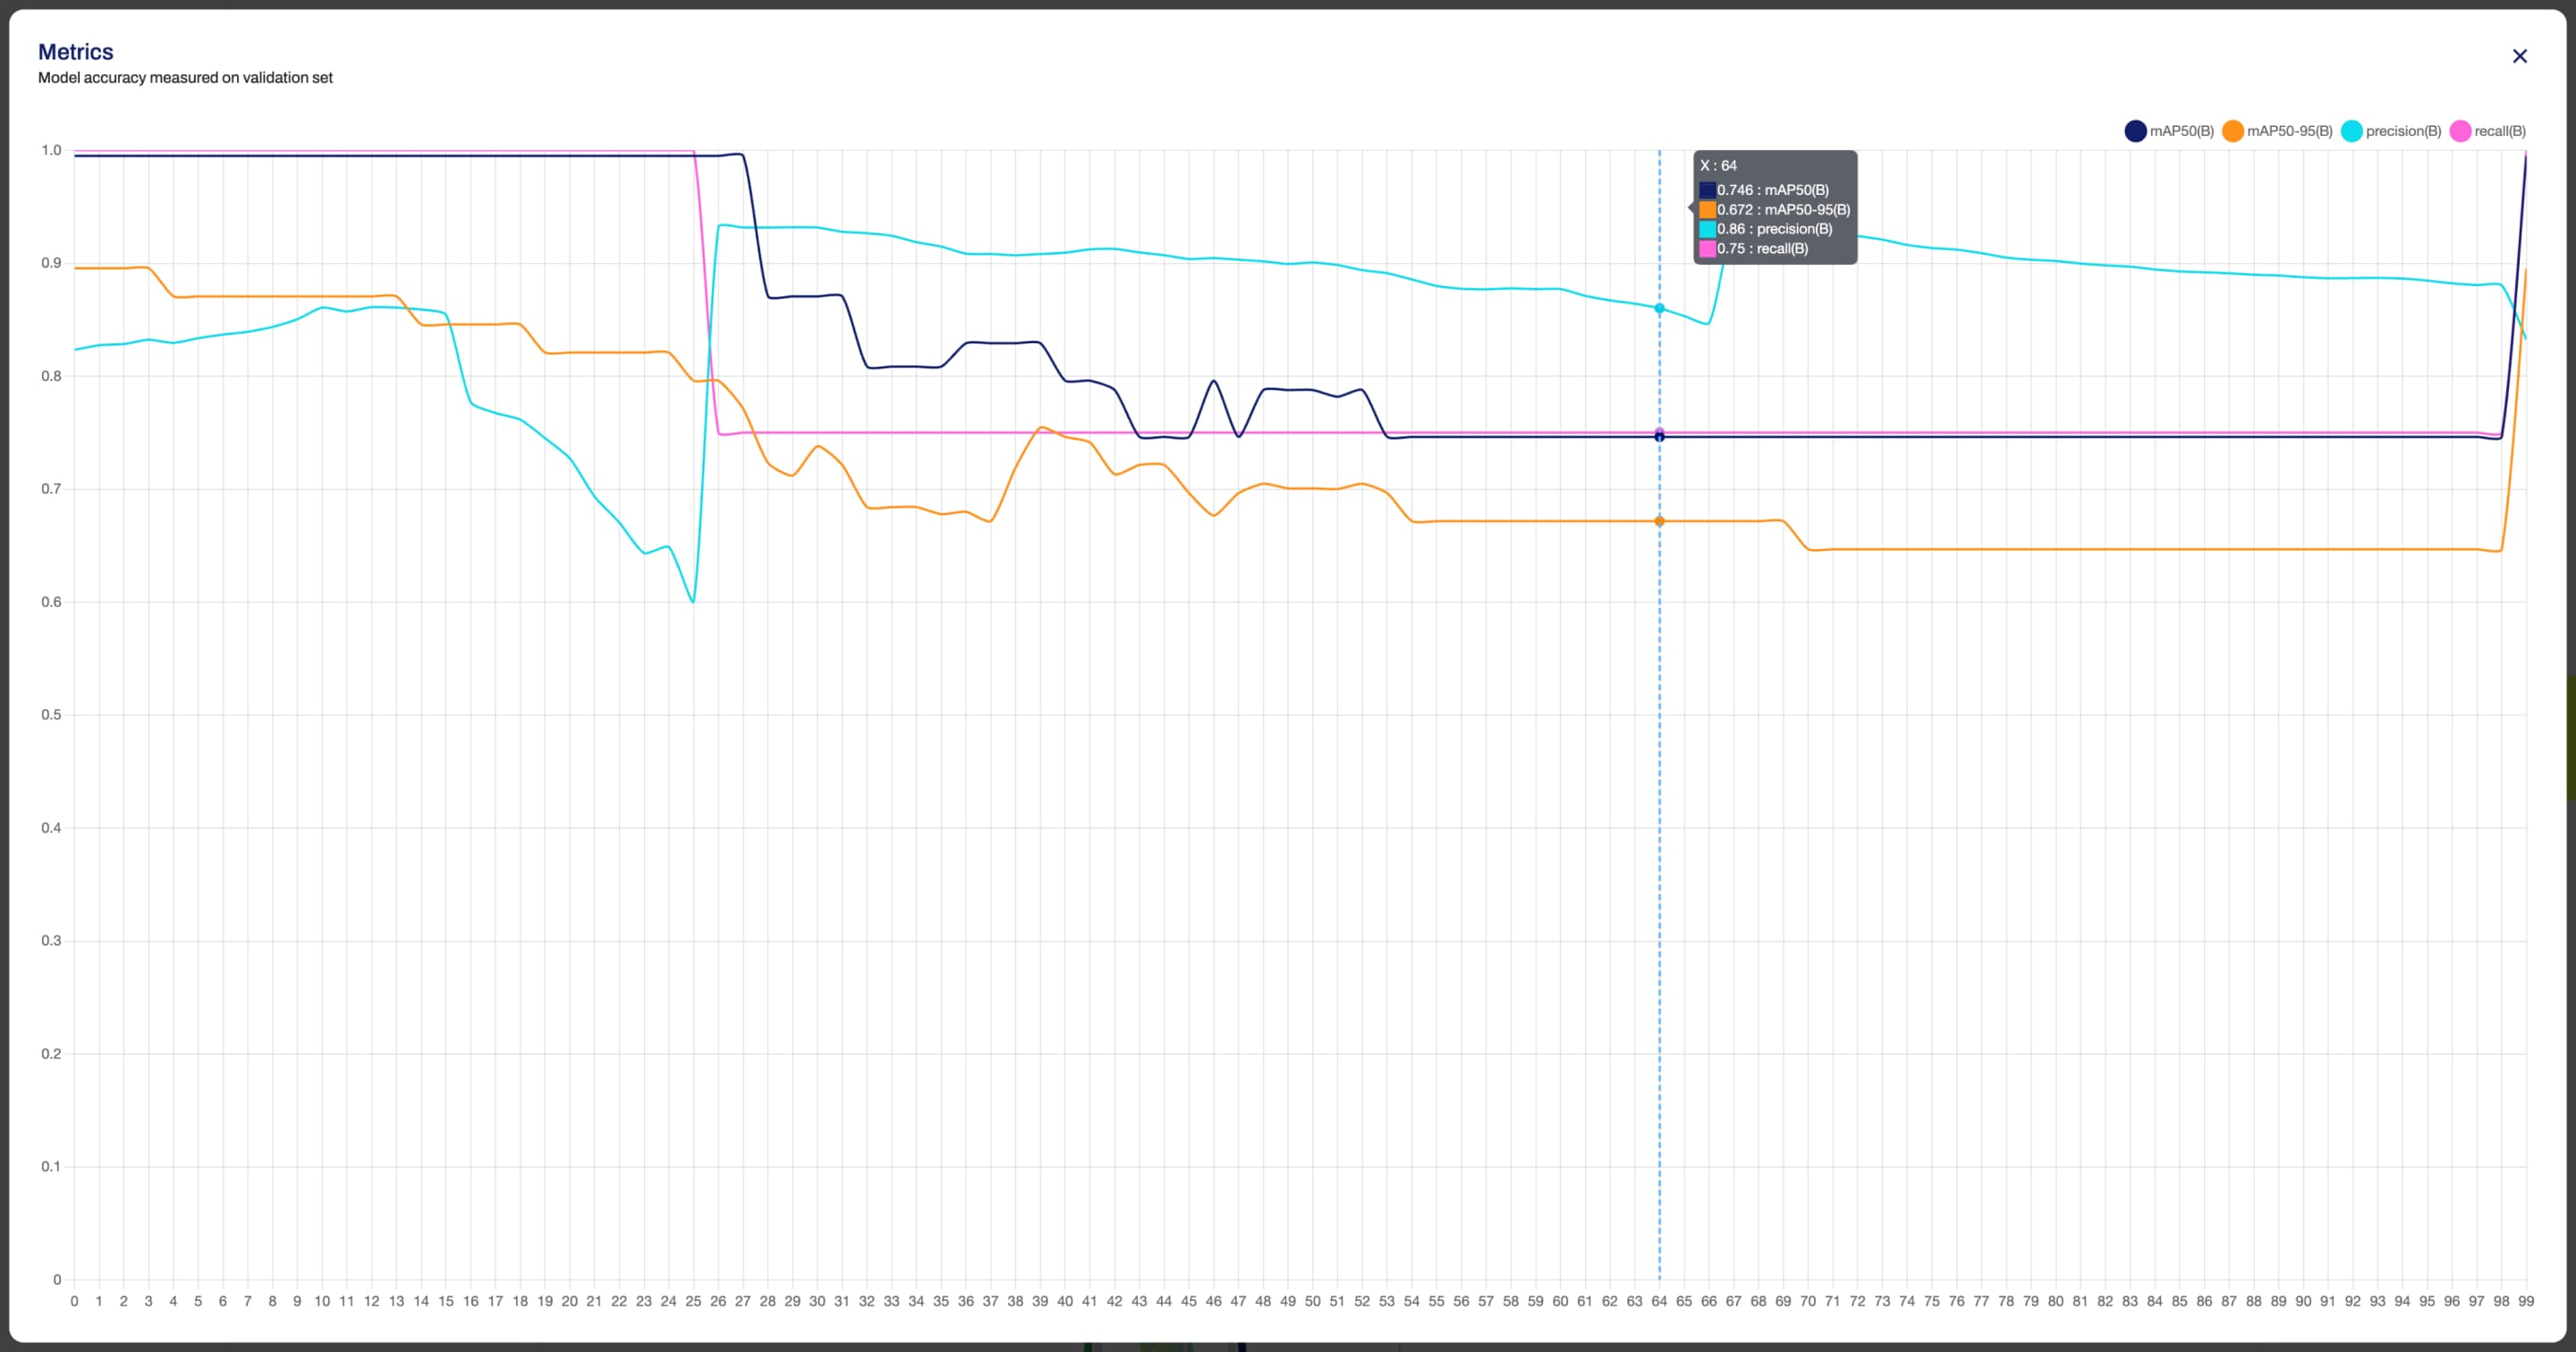
Furthermore, to properly analyze the data, you can utilize the zoom feature.
Preview Model
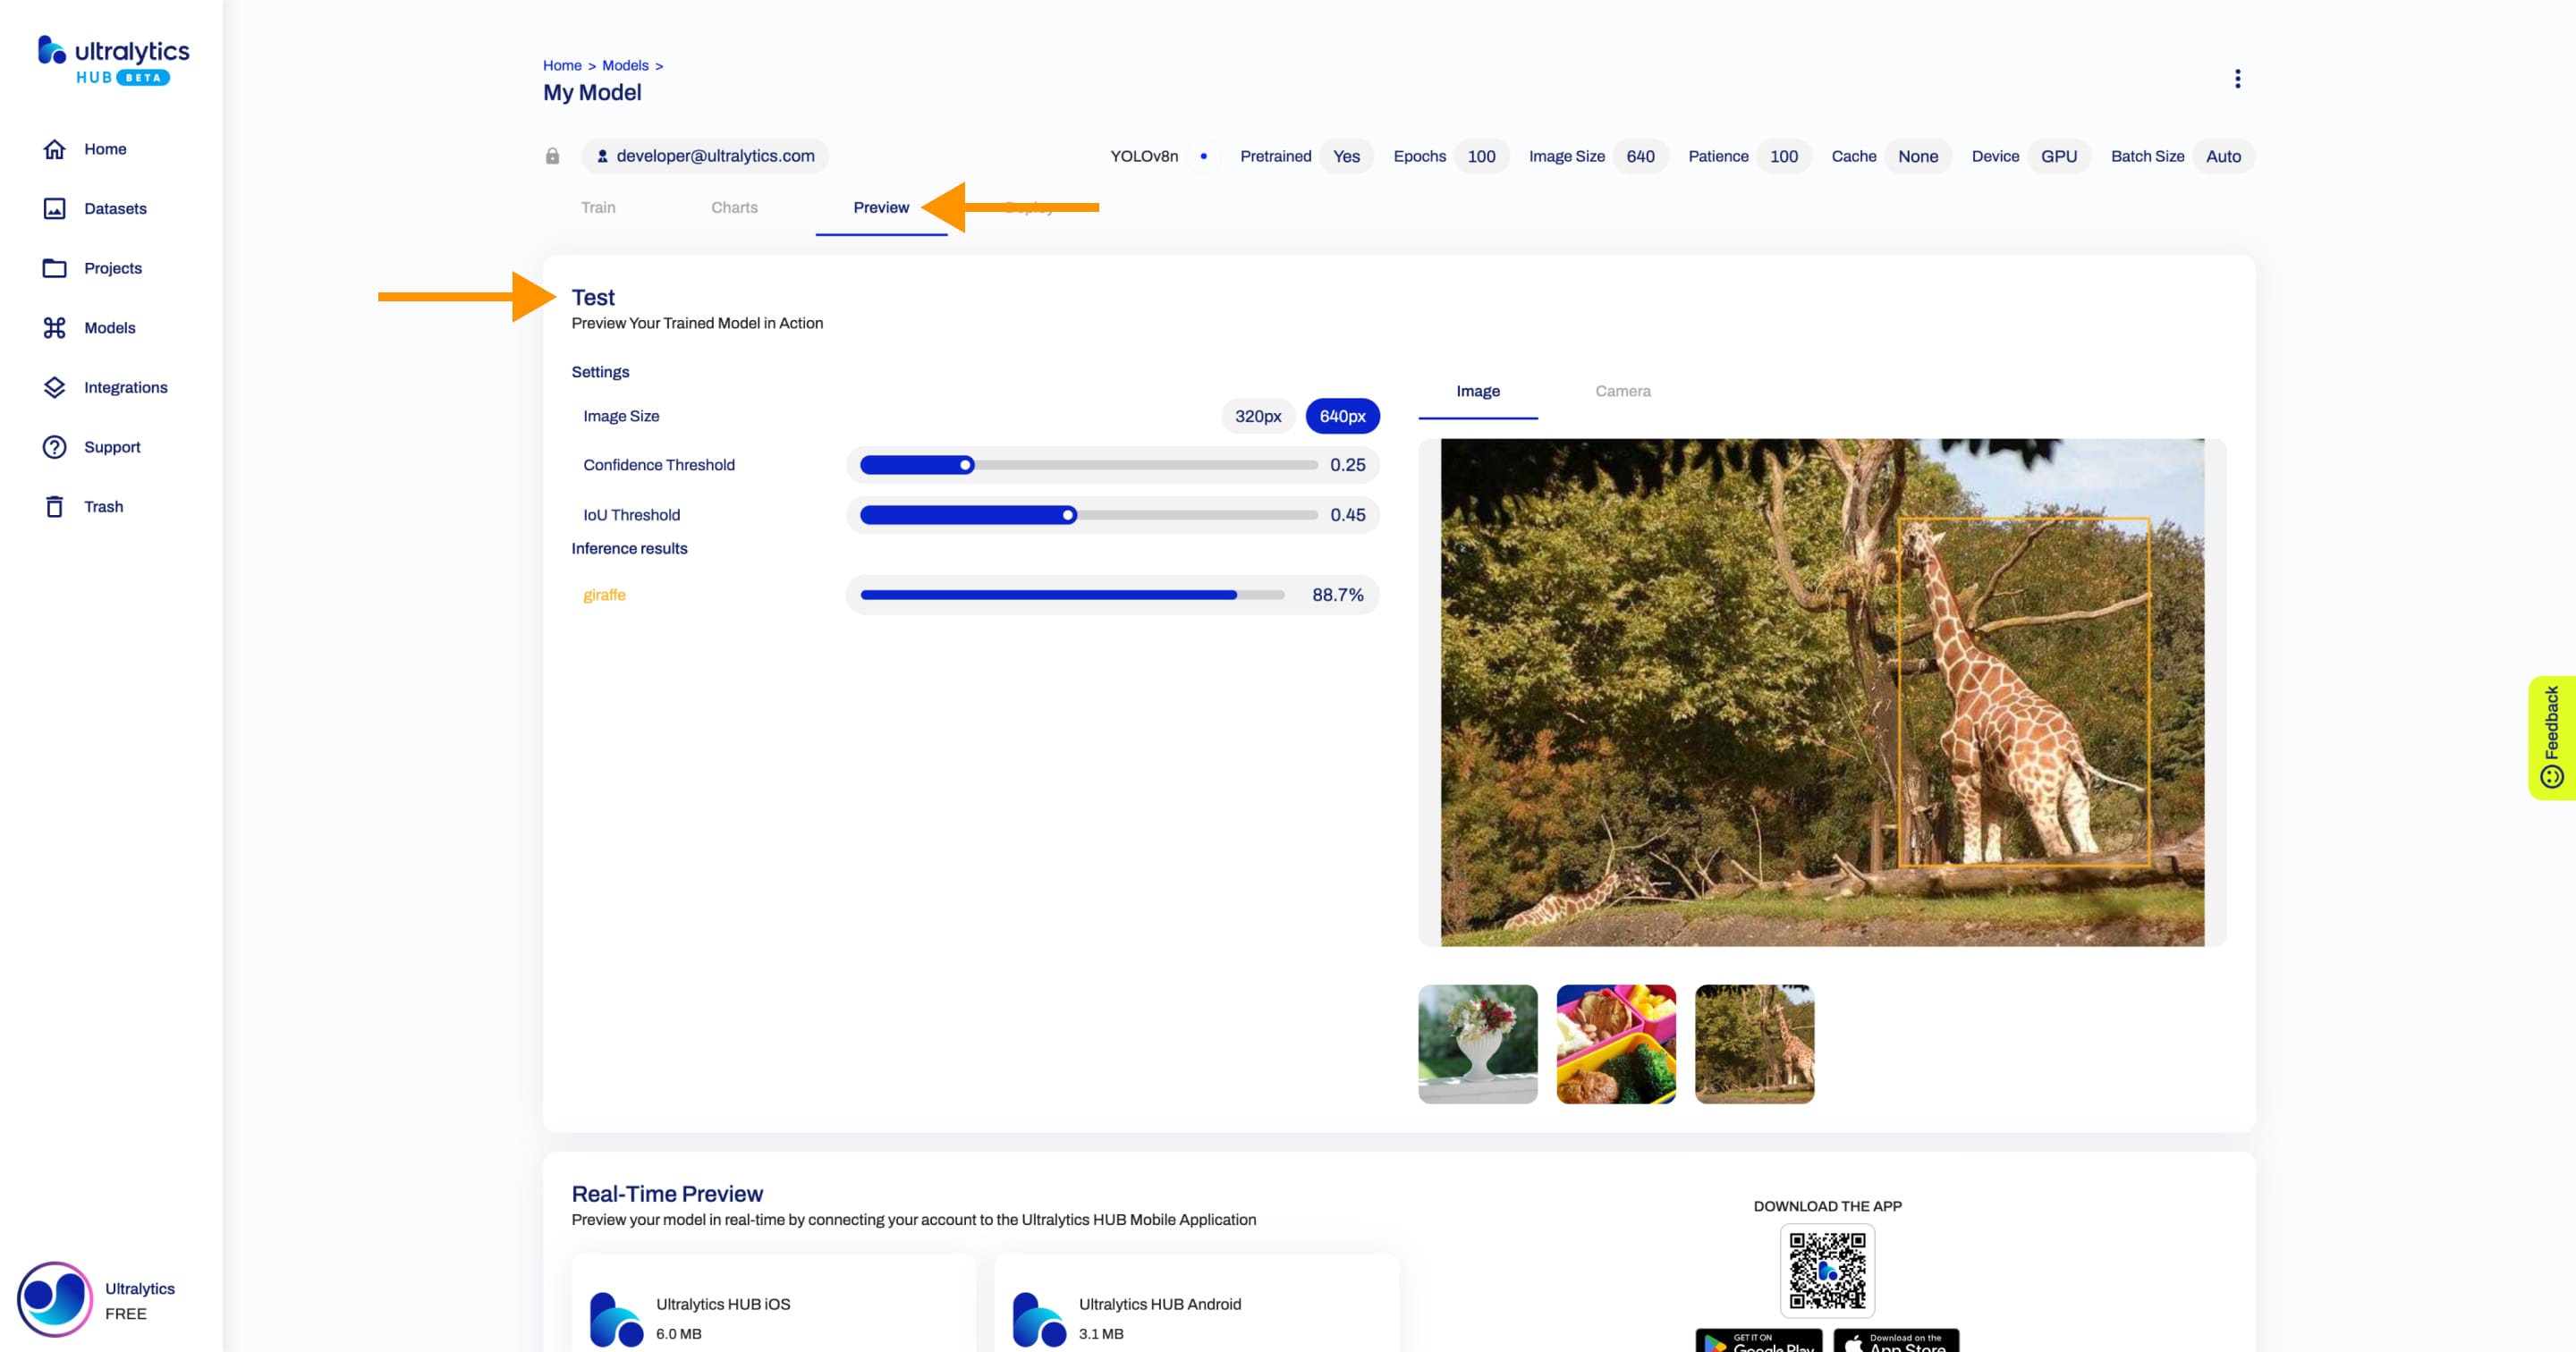
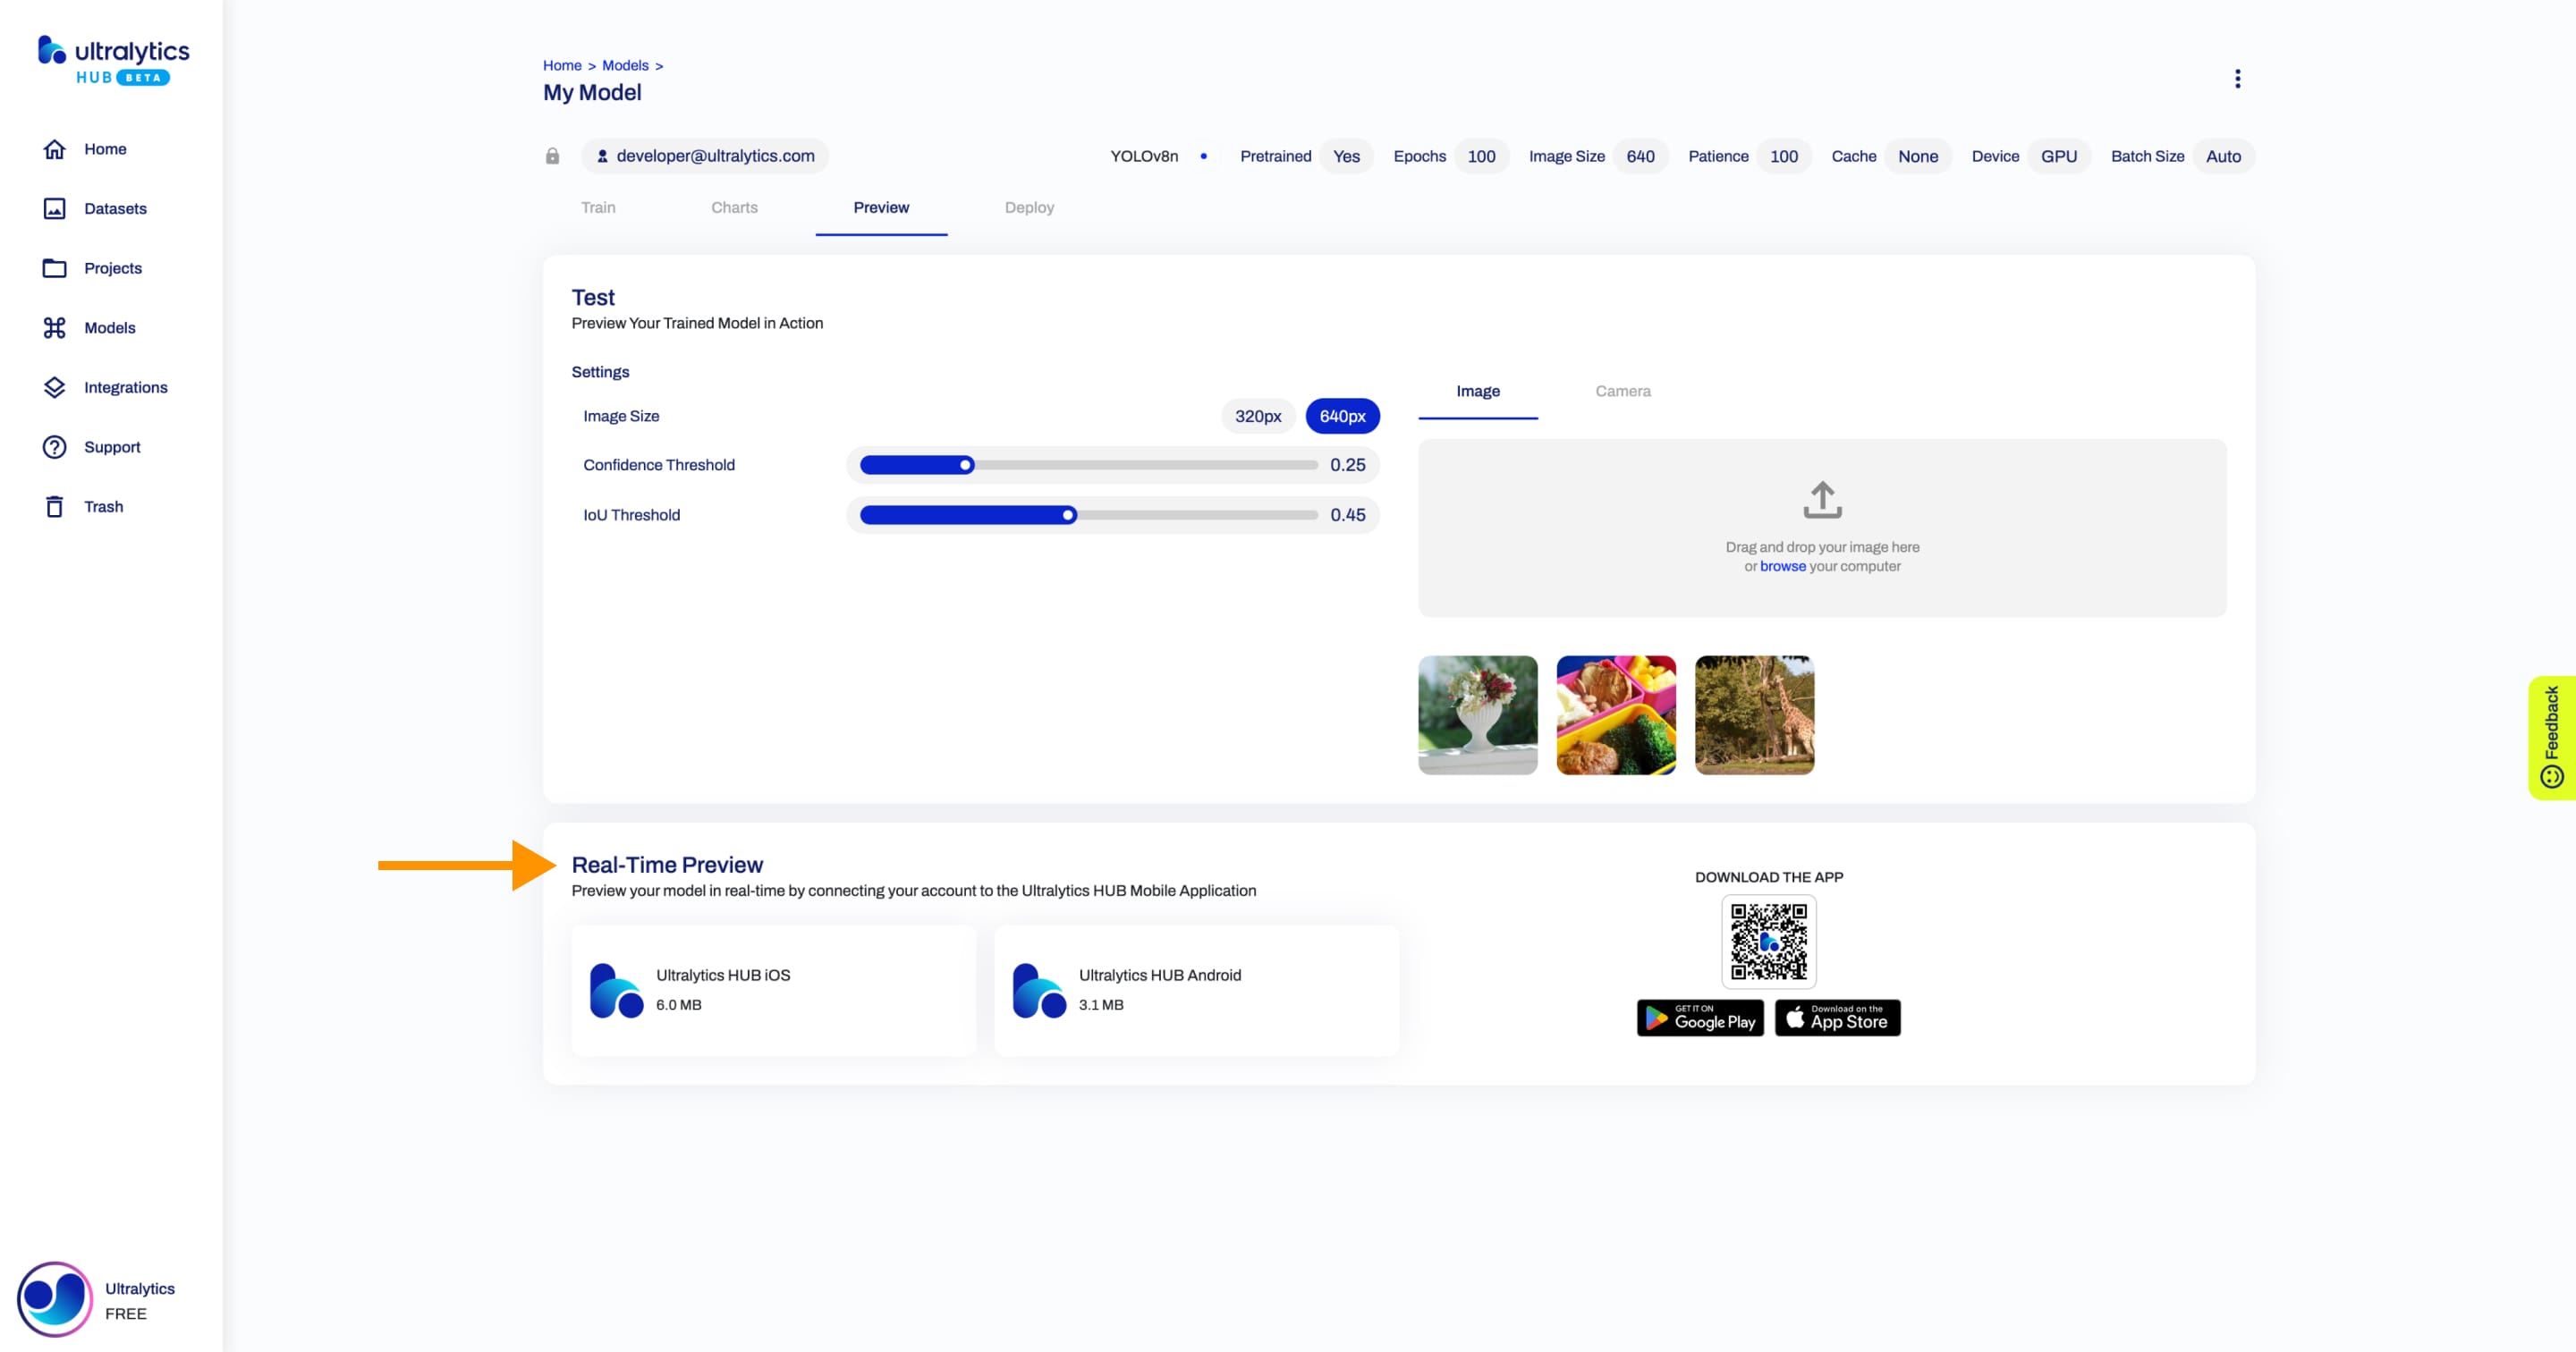
After you train a model, you can preview it by clicking on the Preview tab.
In the Test card, you can select a preview image from the dataset used during training or upload an image from your device.
!!! note "Note"
You can also use your camera to take a picture and run inference on it directly.
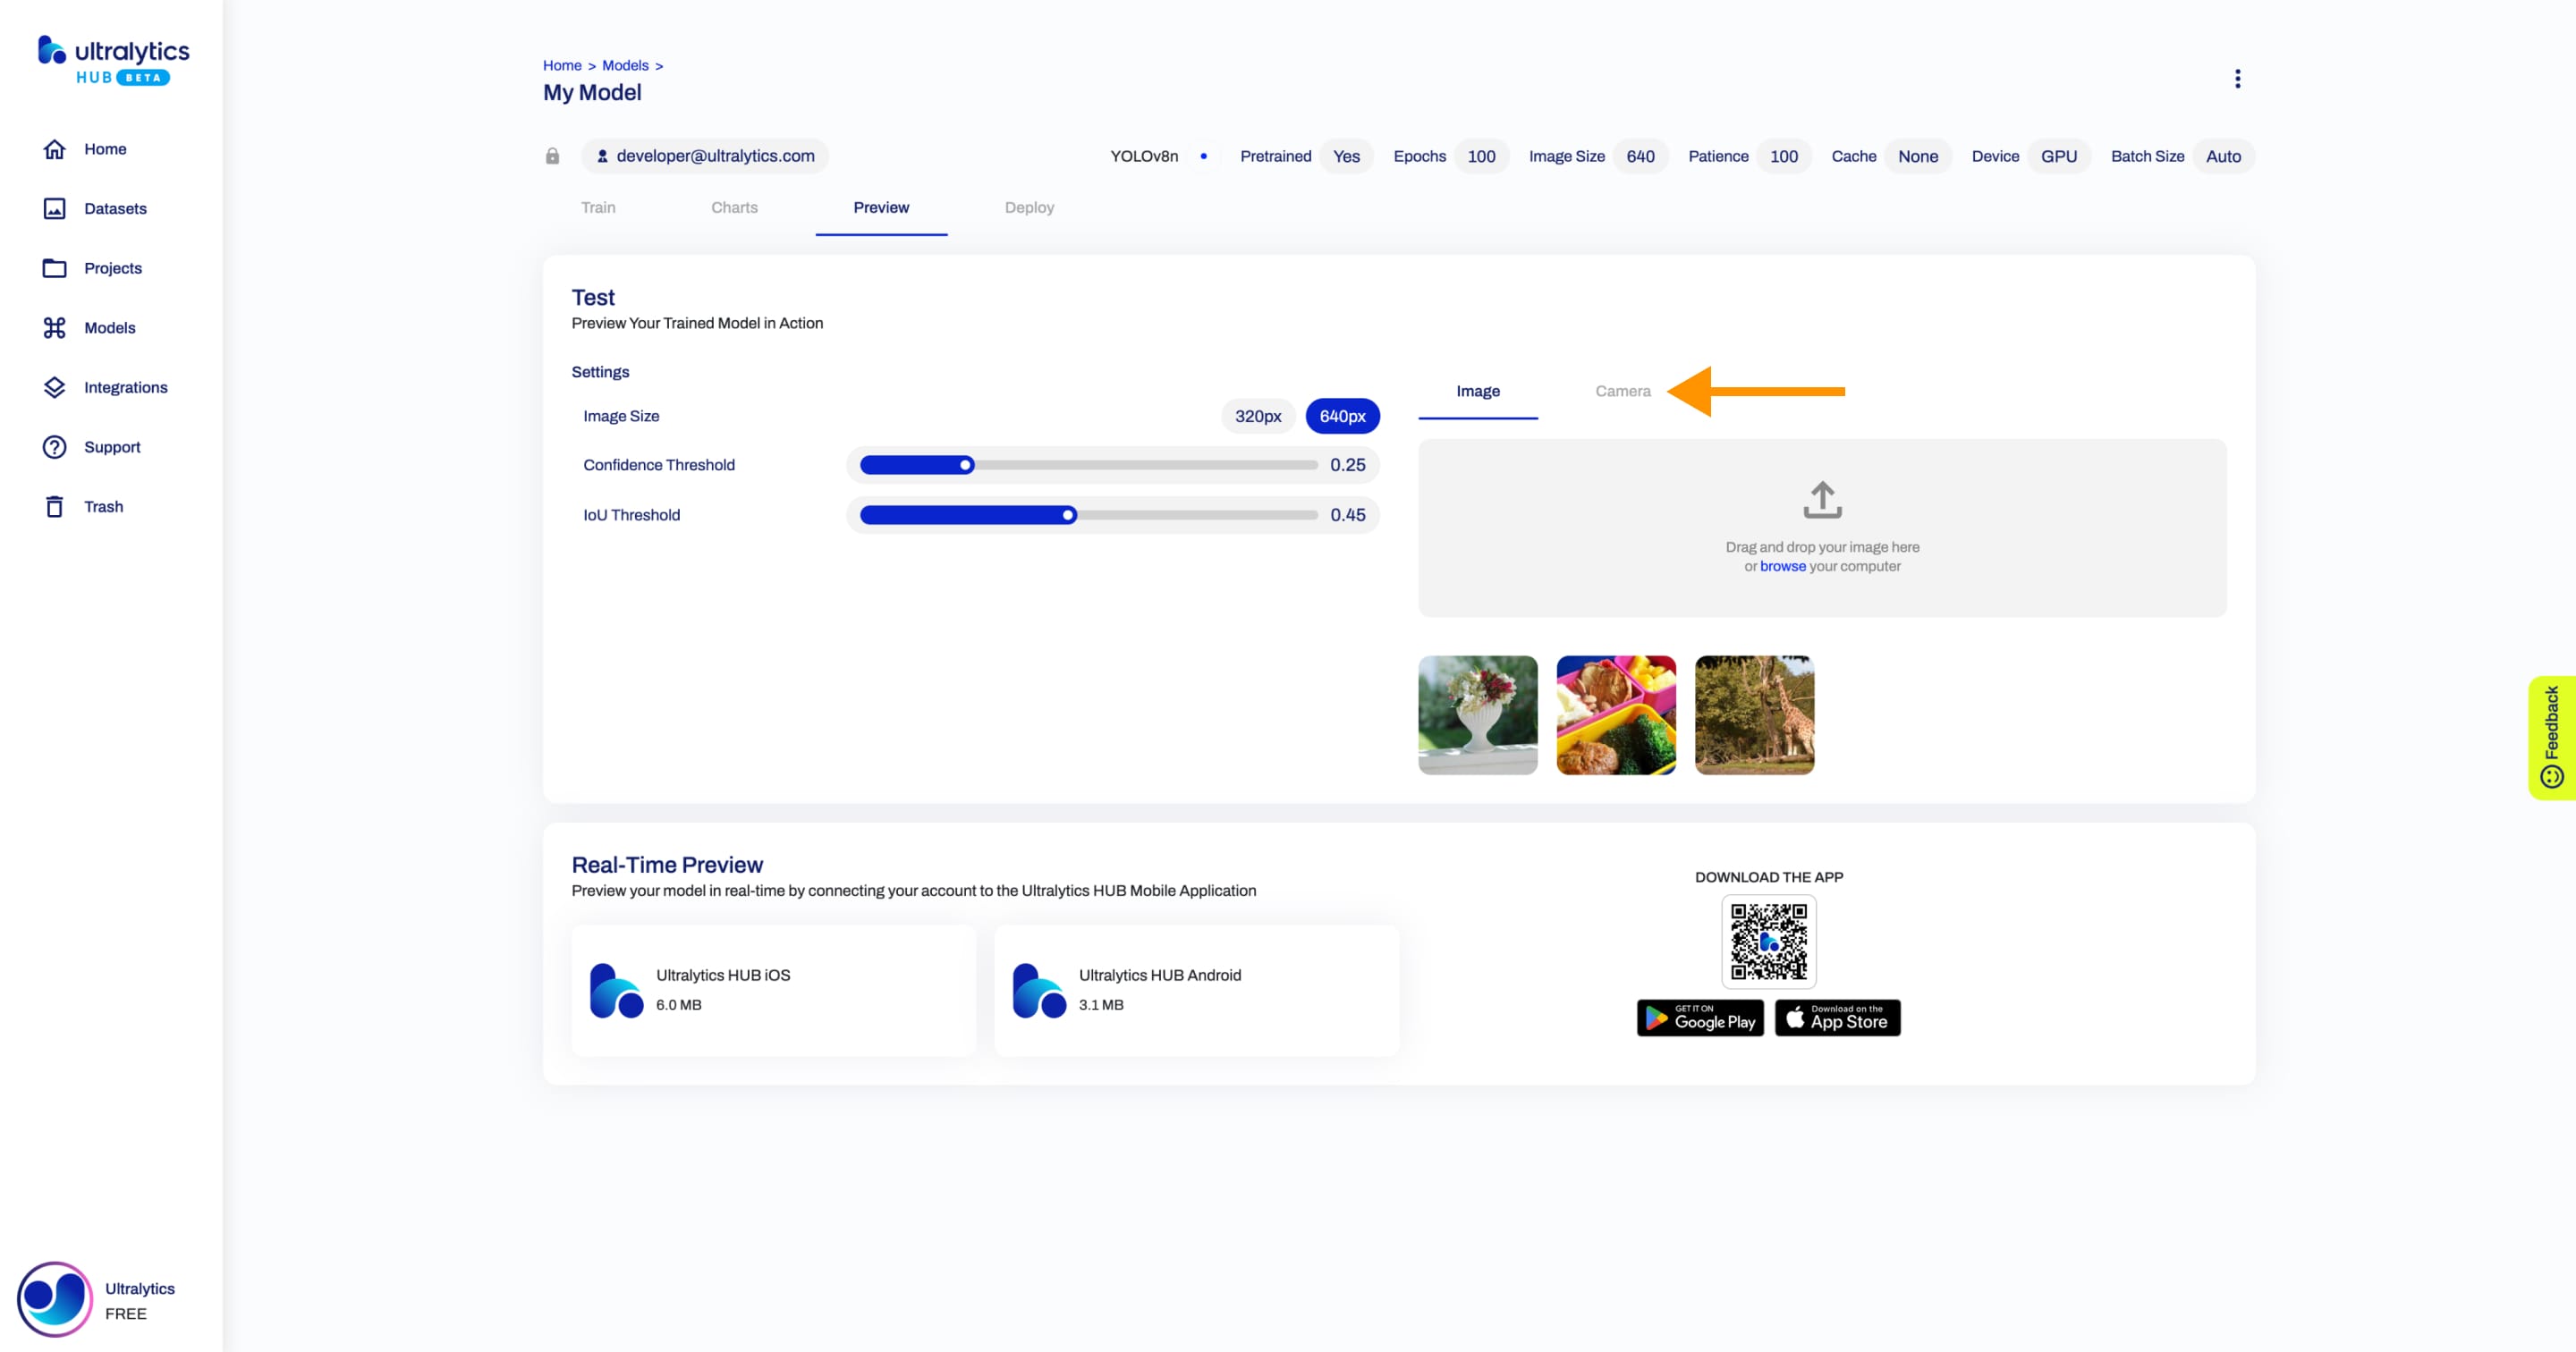
Furthermore, you can preview your model in real-time directly on your iOS or Android mobile device by downloading our Ultralytics HUB App.
Deploy Model
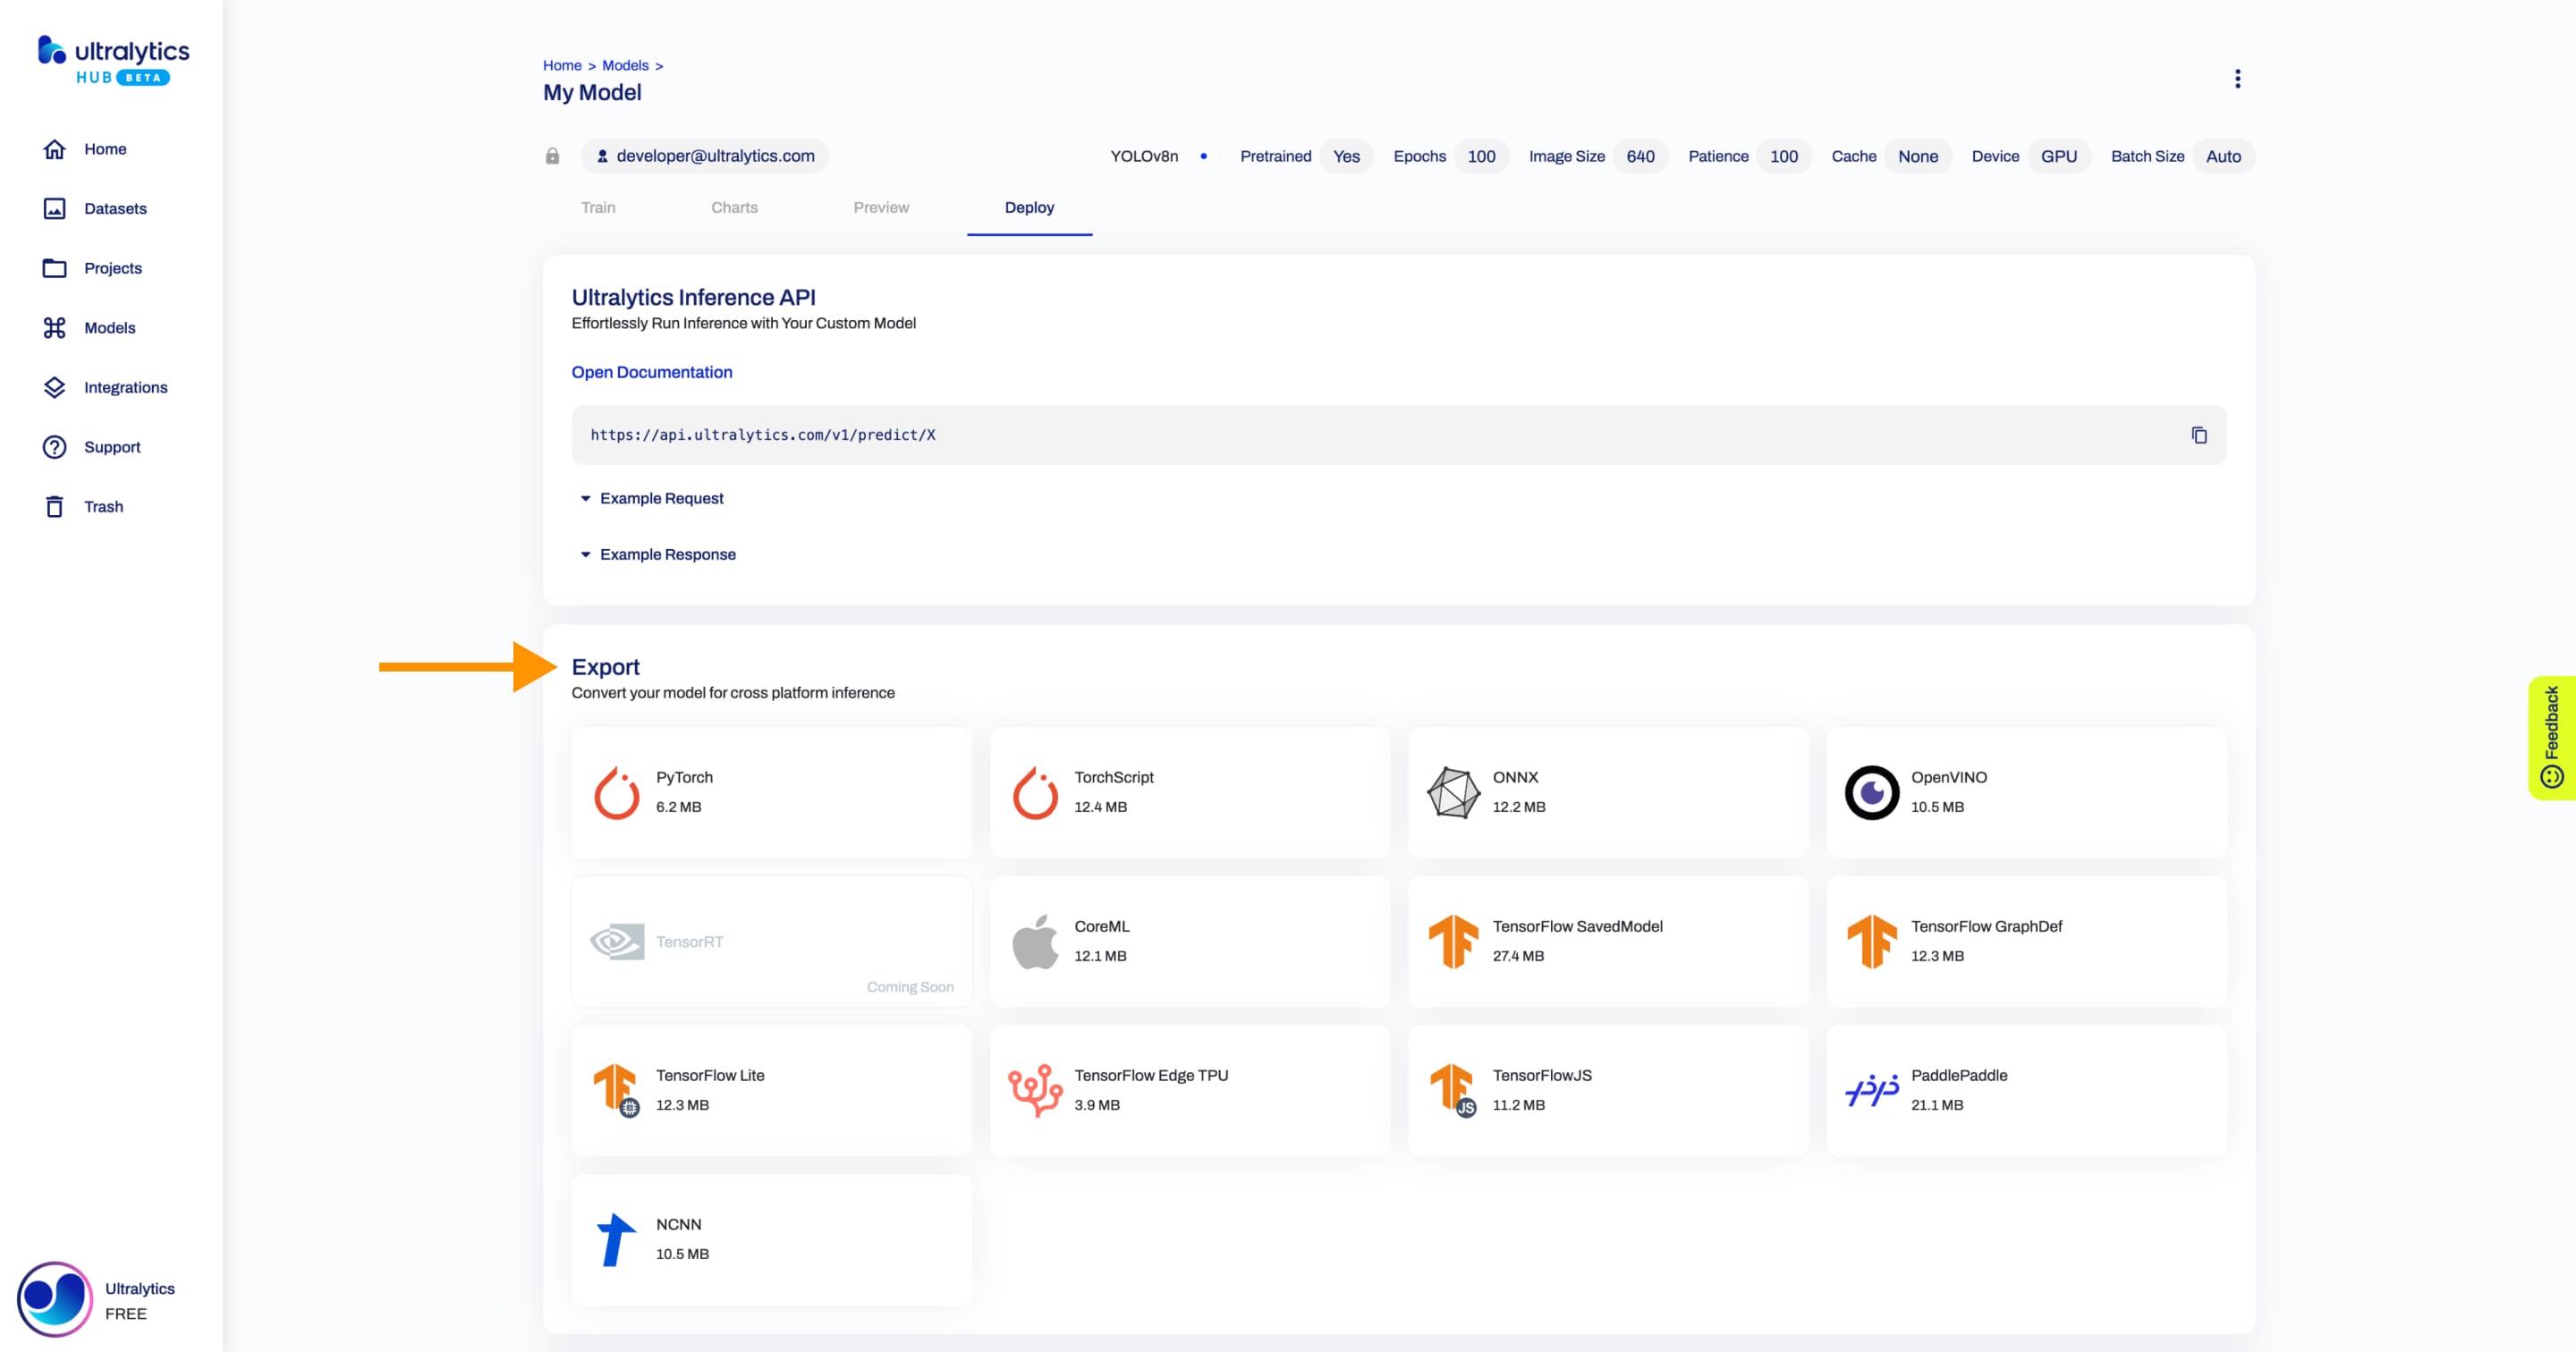
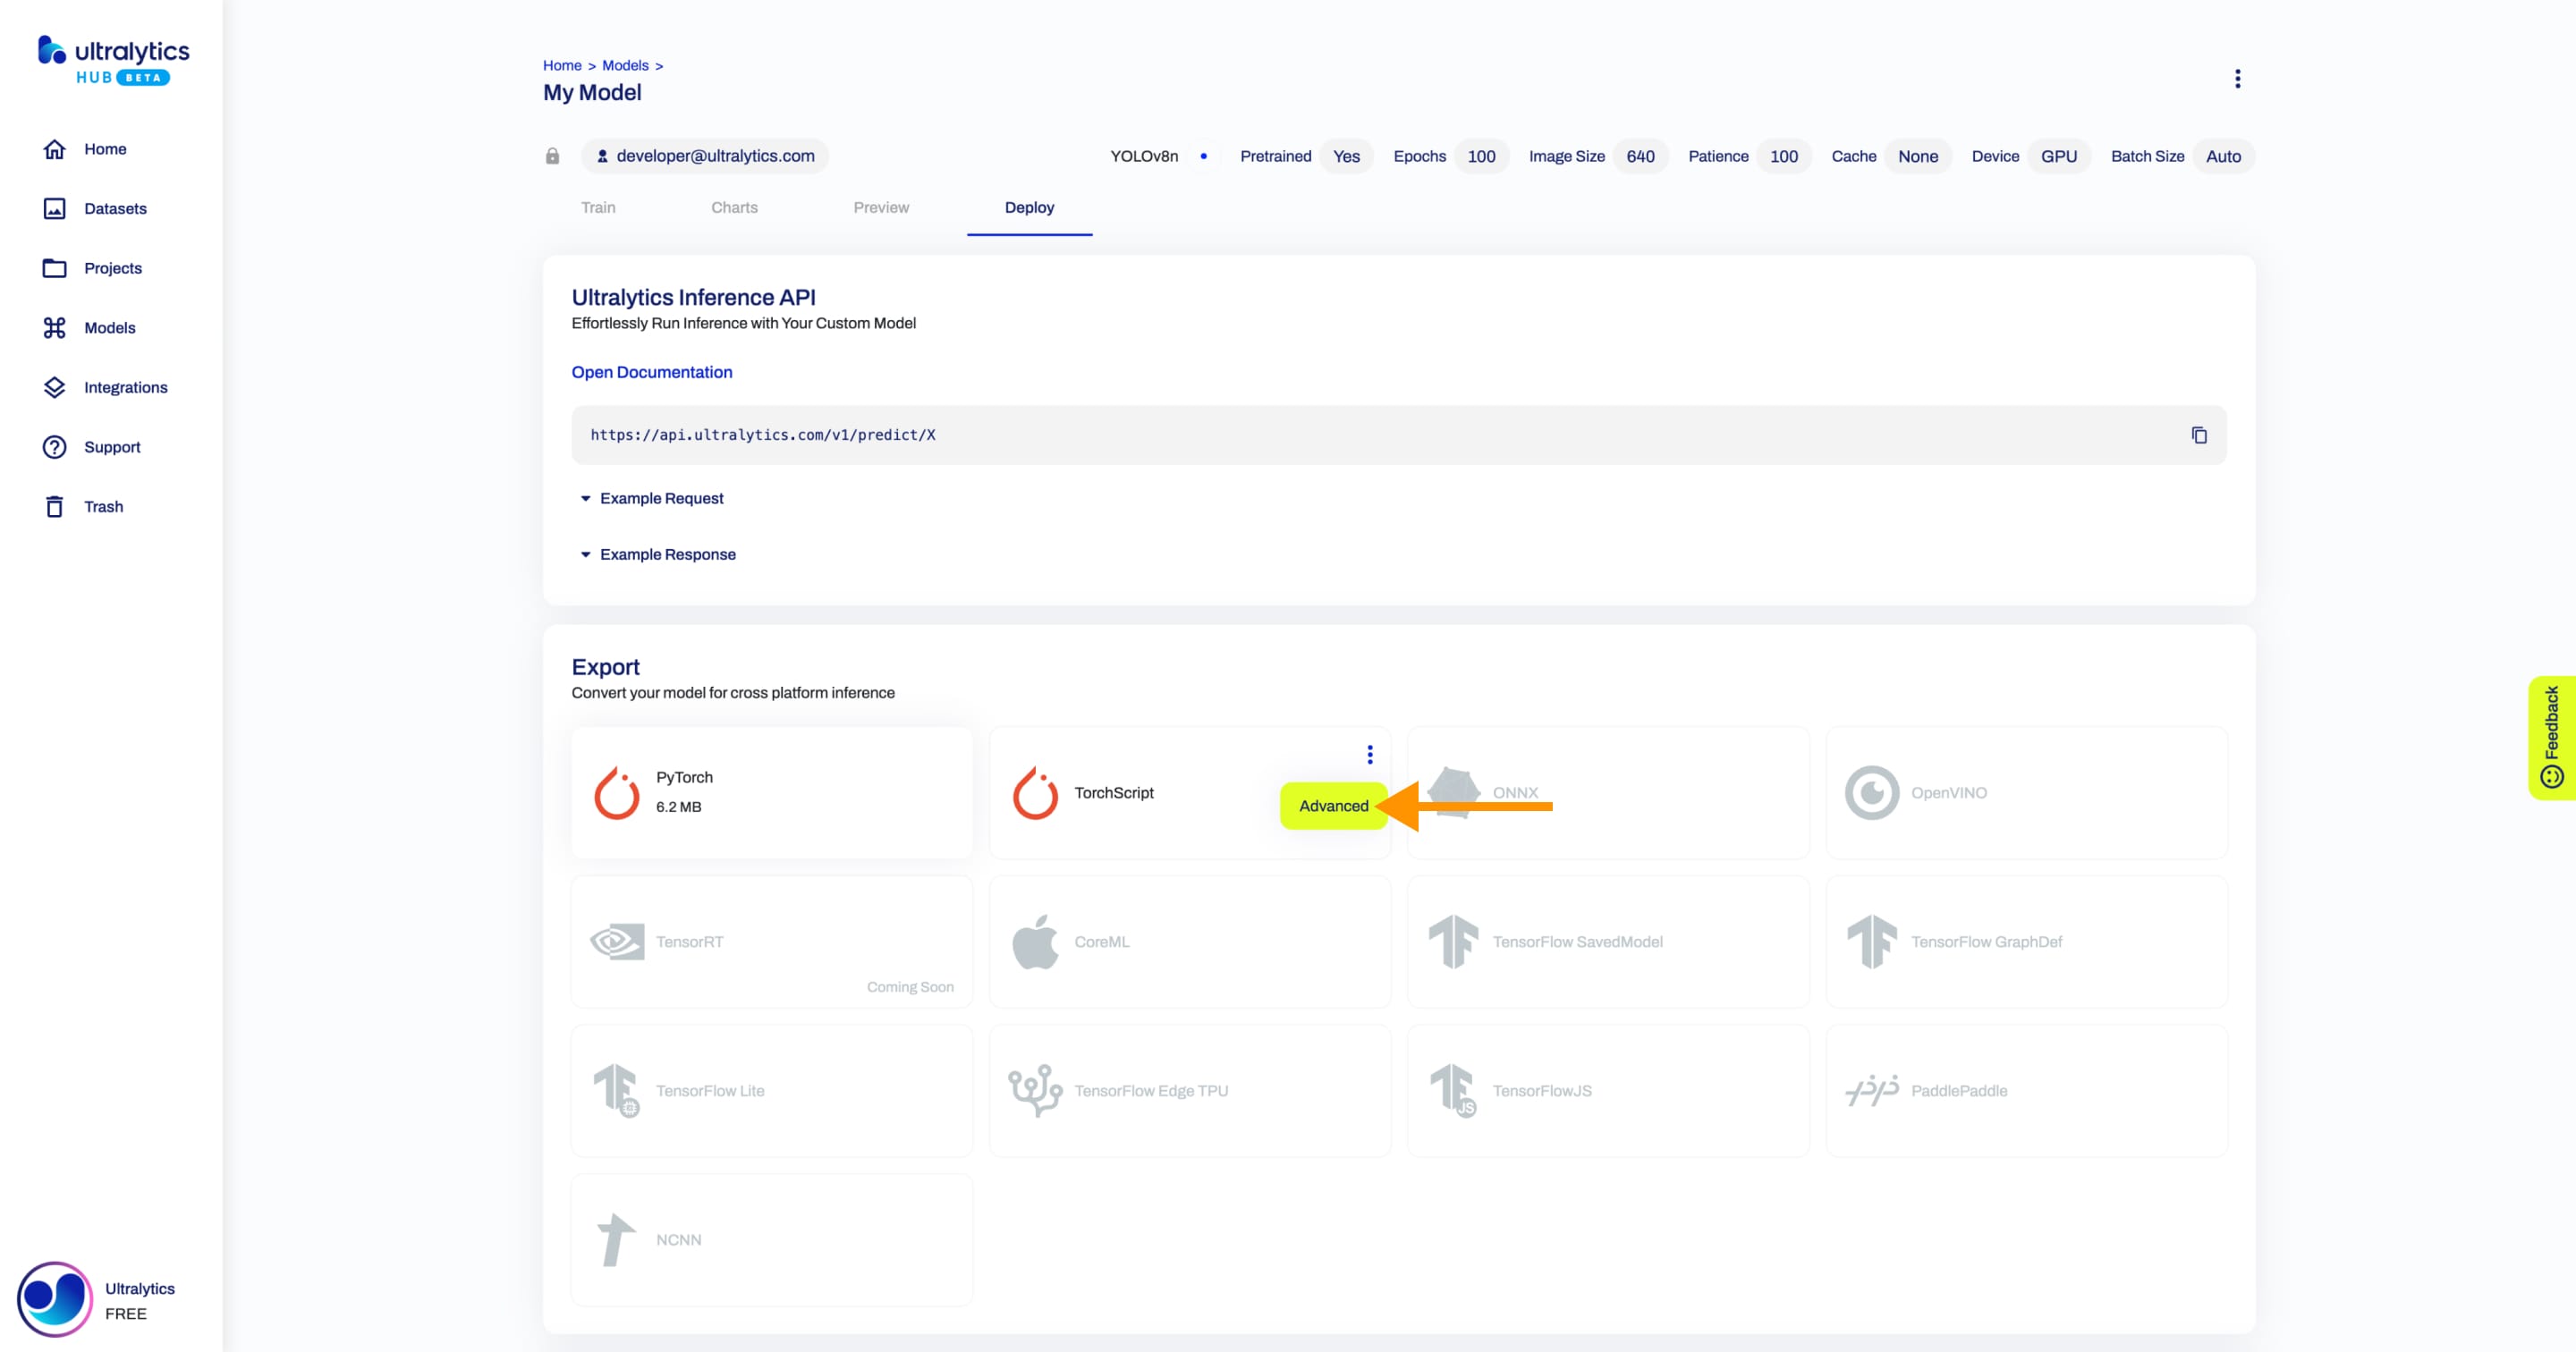
After you train a model, you can export it to 13 different formats, including ONNX, OpenVINO, CoreML, TensorFlow, Paddle and many others.
??? tip "Tip"
You can customize the export options of each format if you open the export actions dropdown and click on the **Advanced** option.
!!! note "Note"
You can re-export each format if you open the export actions dropdown and click on the **Advanced** option.
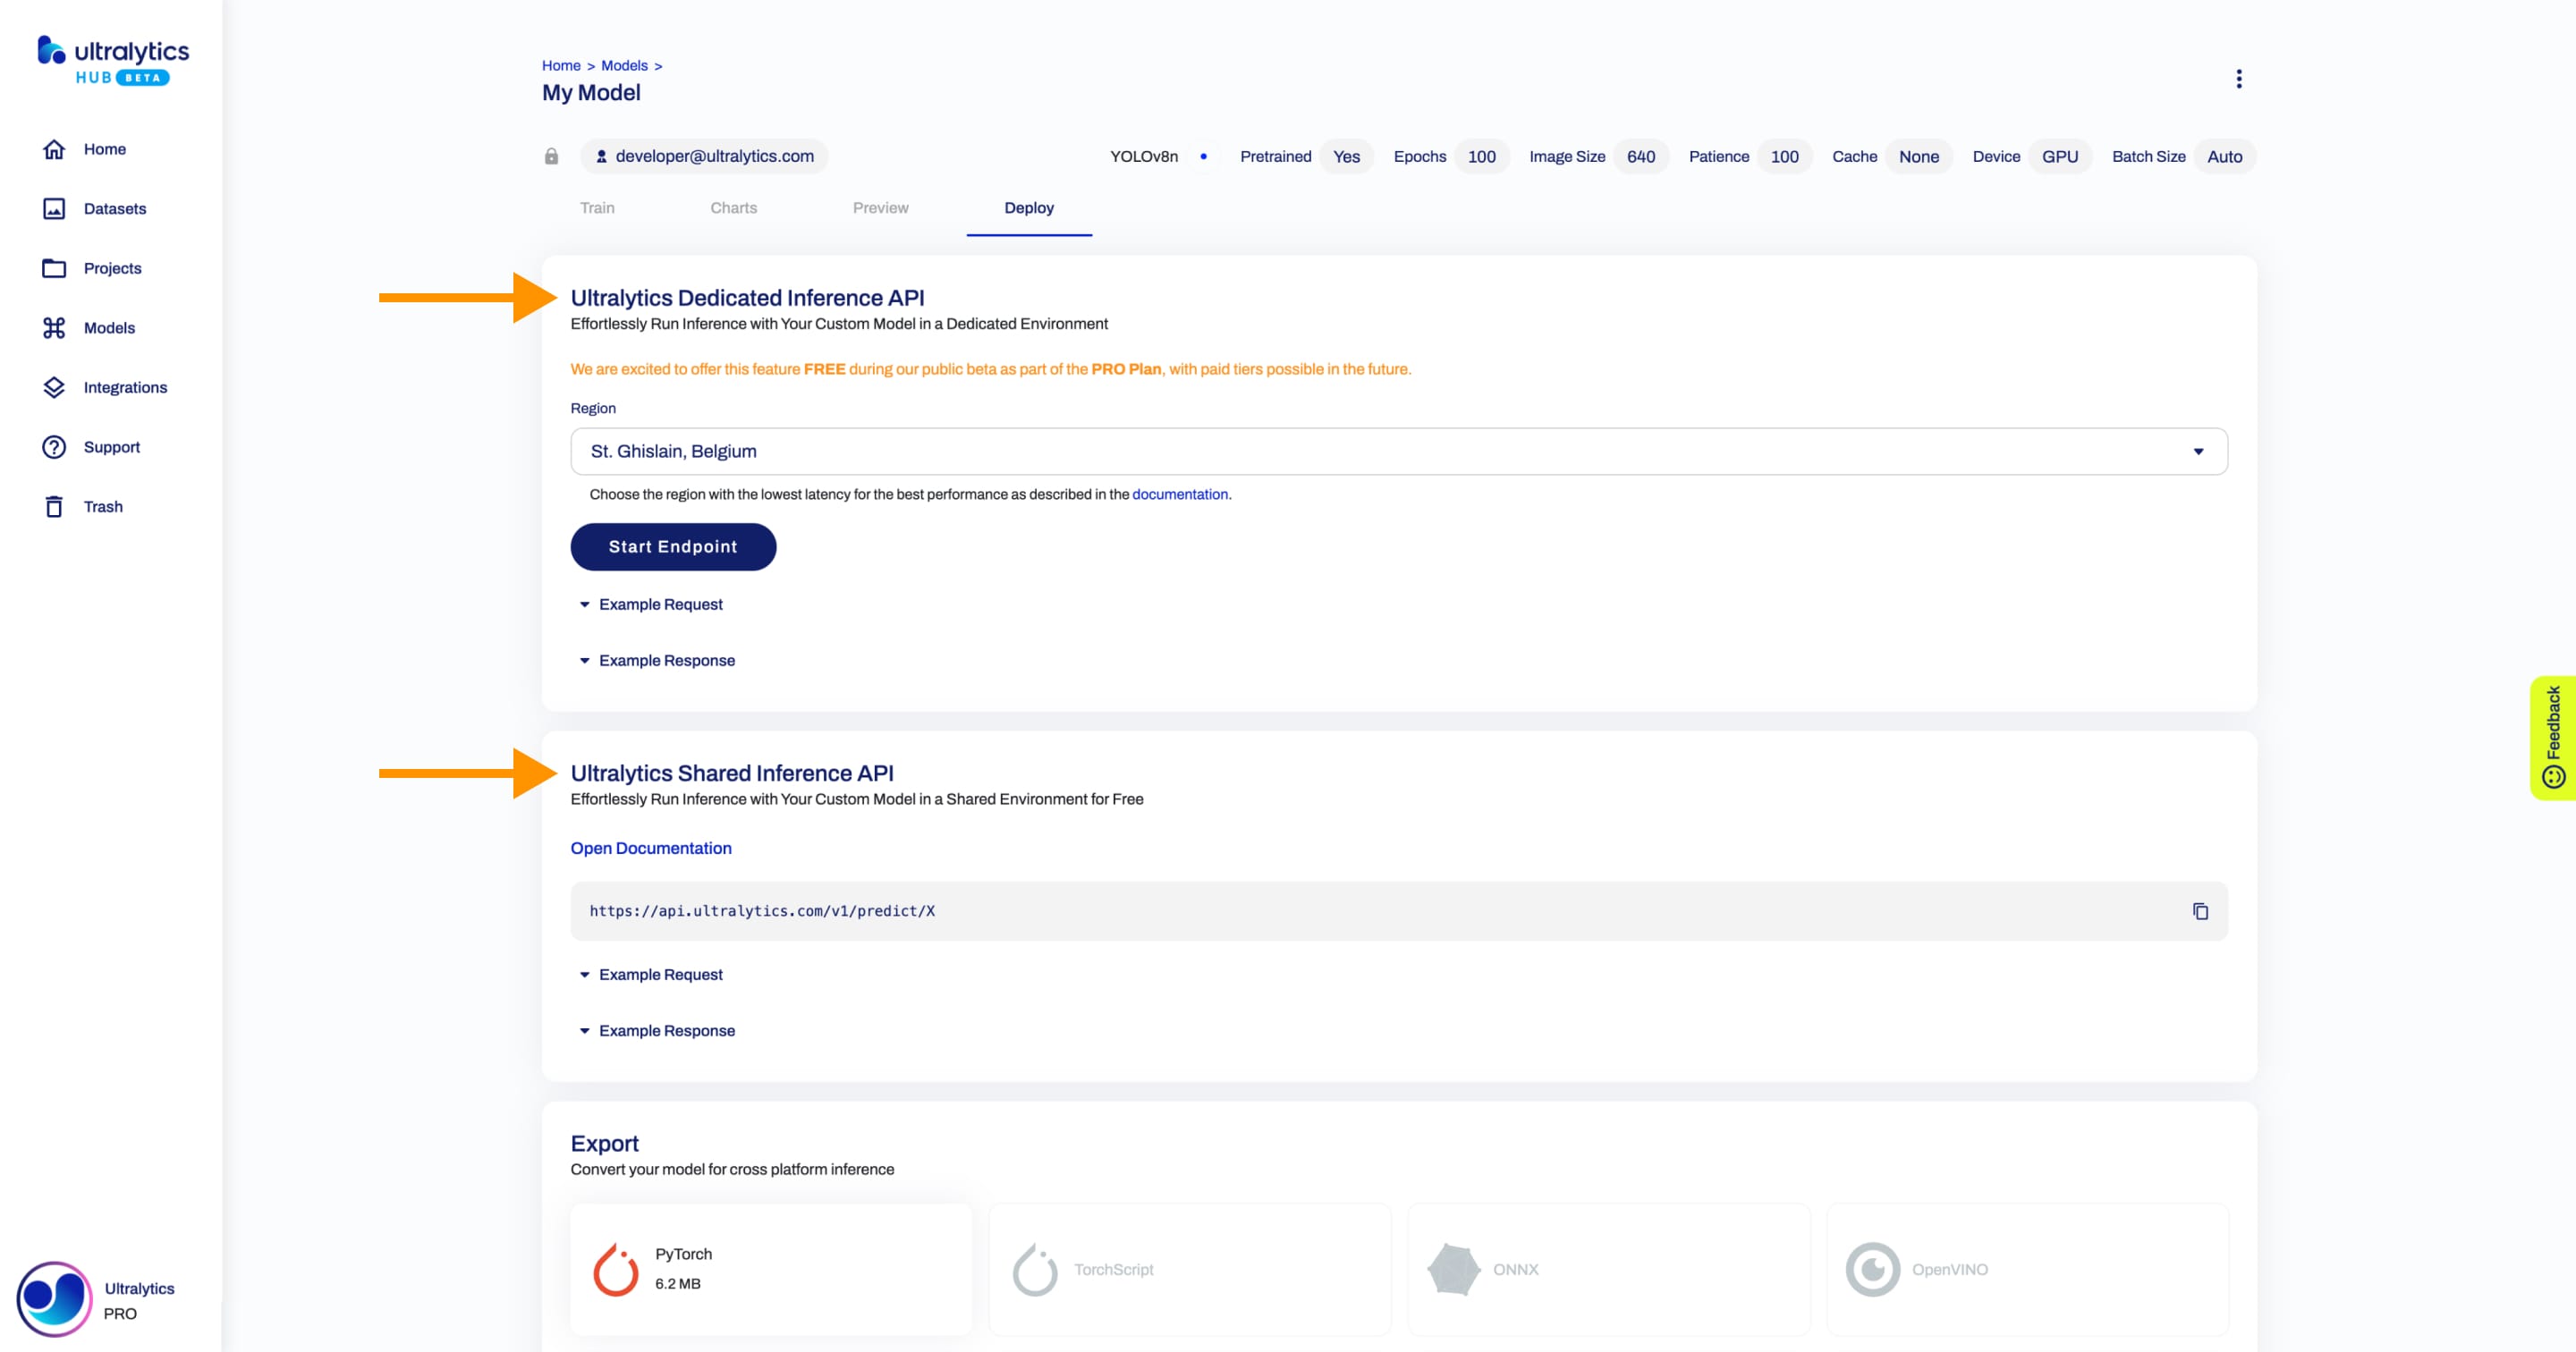
You can also use our Inference API in production.
Read the Ultralytics Inference API documentation for more information.
Share Model
!!! info "Info"
[Ultralytics HUB](https://ultralytics.com/hub)'s sharing functionality provides a convenient way to share models with others. This feature is designed to accommodate both existing [Ultralytics HUB](https://ultralytics.com/hub) users and those who have yet to create an account.
??? note "Note"
You have control over the general access of your models.

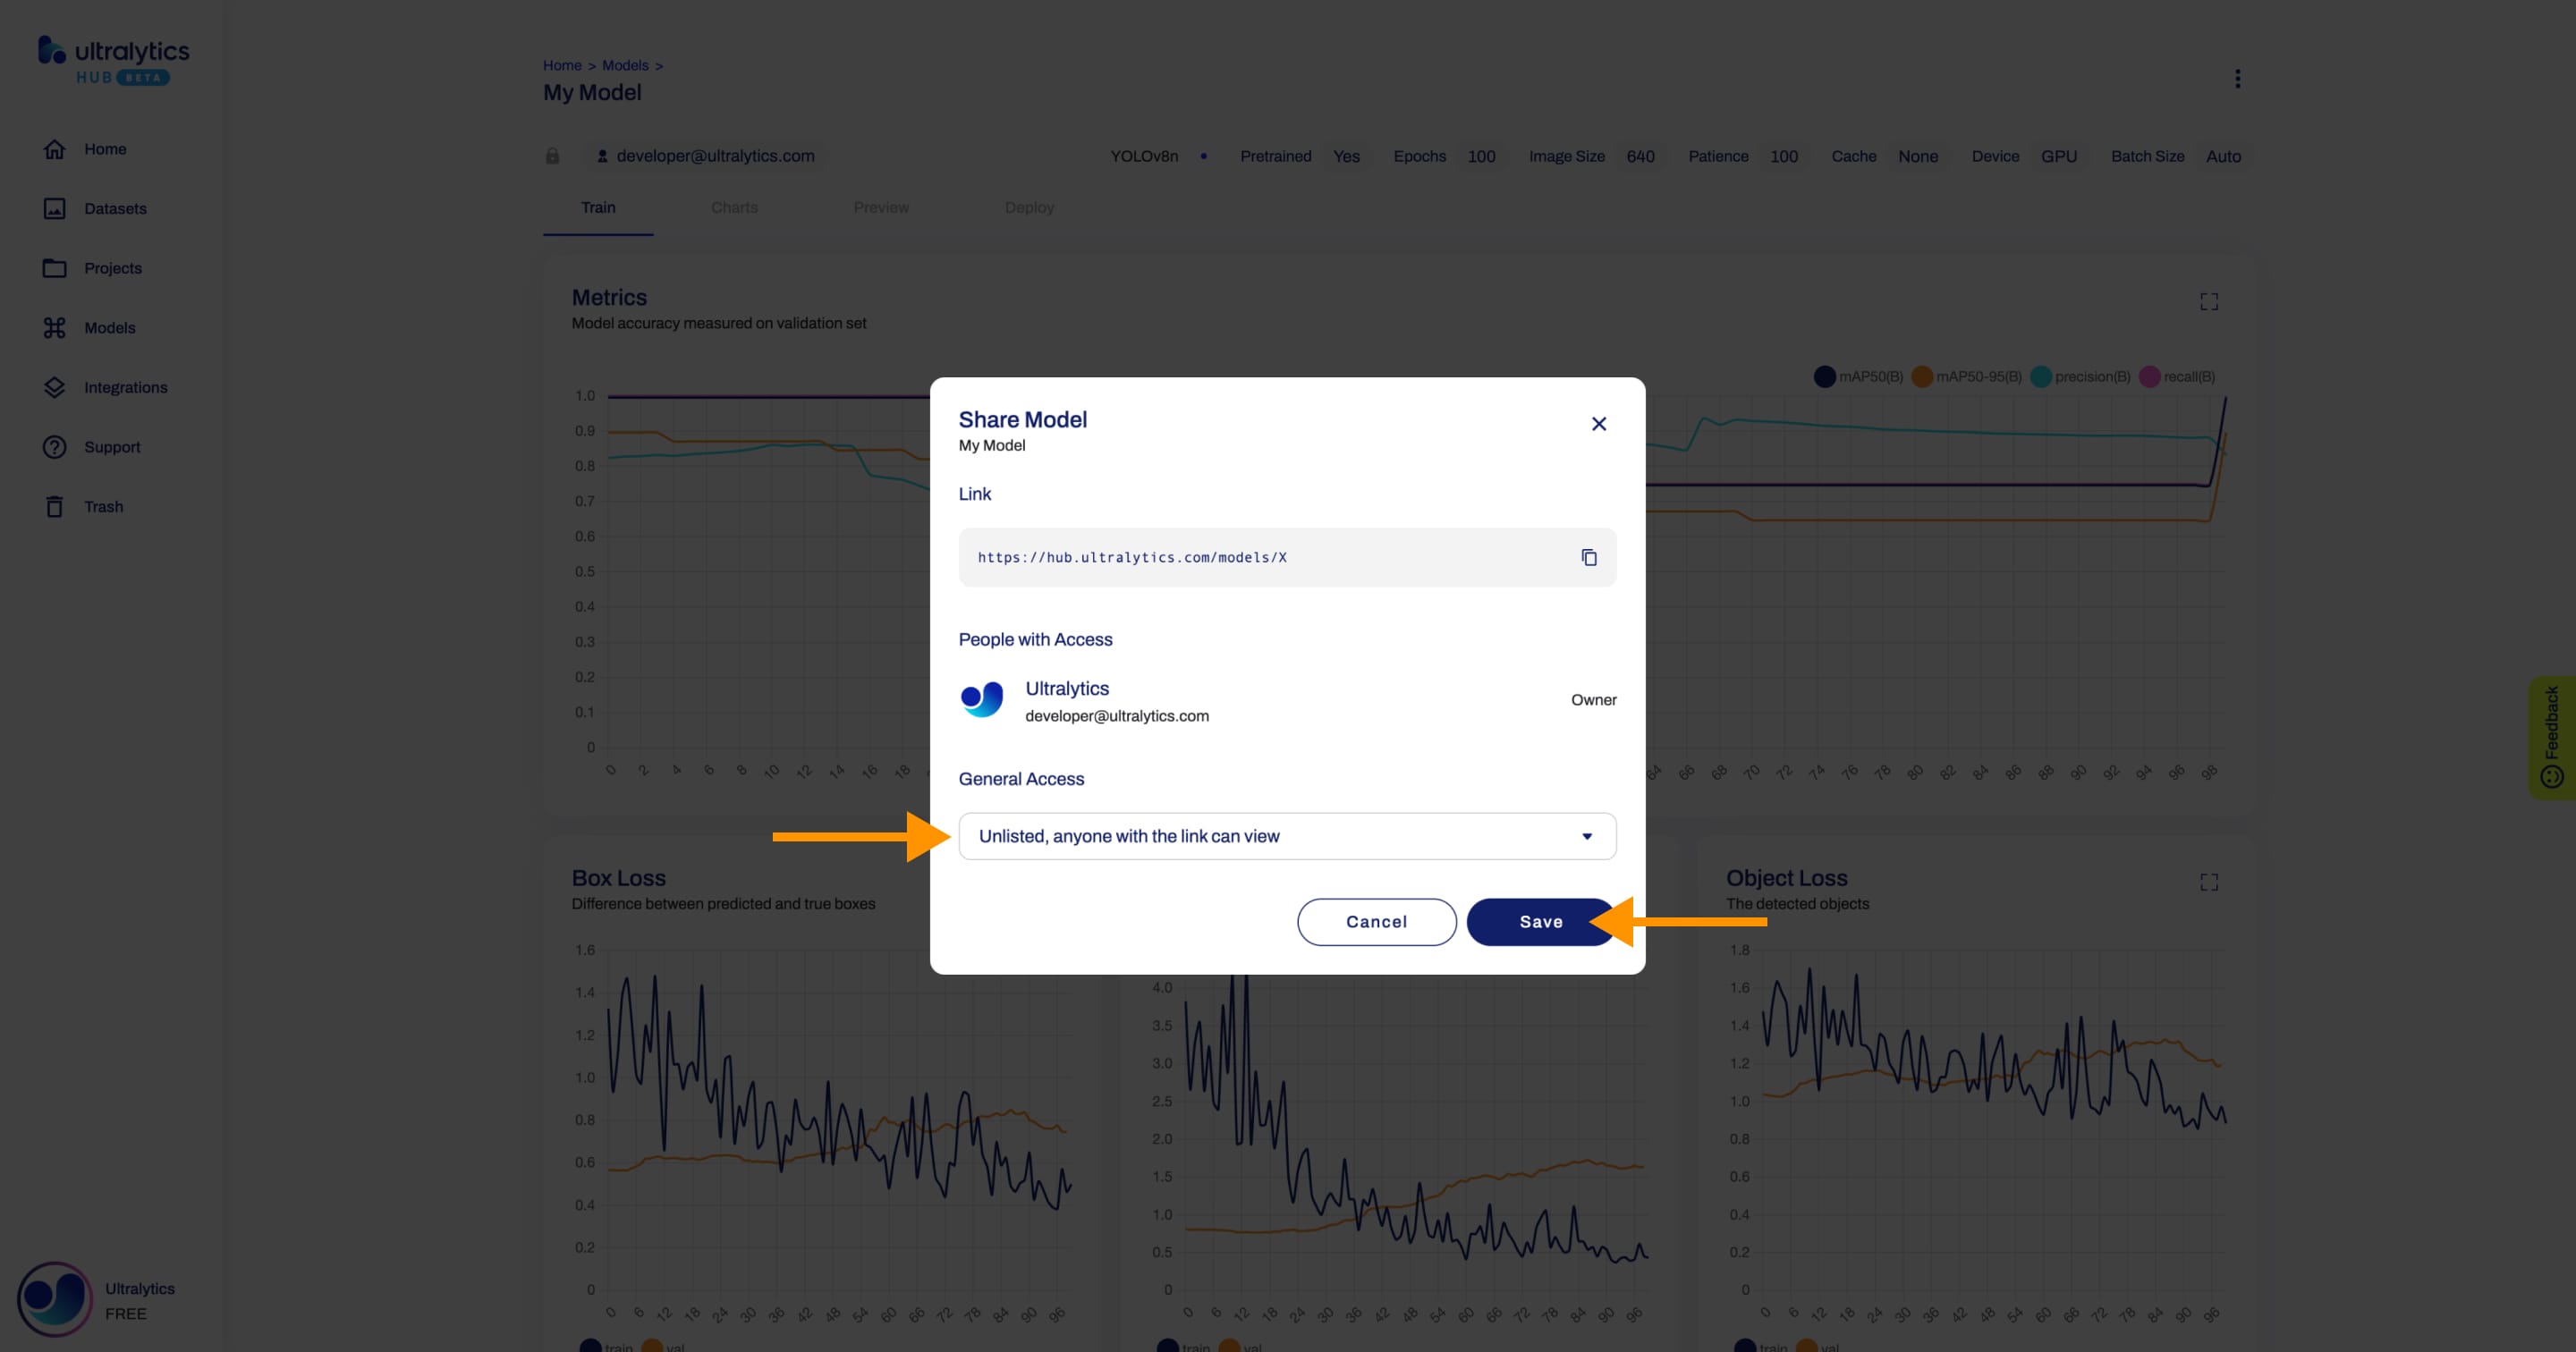
You can choose to set the general access to "Private", in which case, only you will have access to it. Alternatively, you can set the general access to "Unlisted" which grants viewing access to anyone who has the direct link to the model, regardless of whether they have an [Ultralytics HUB](https://ultralytics.com/hub) account or not.
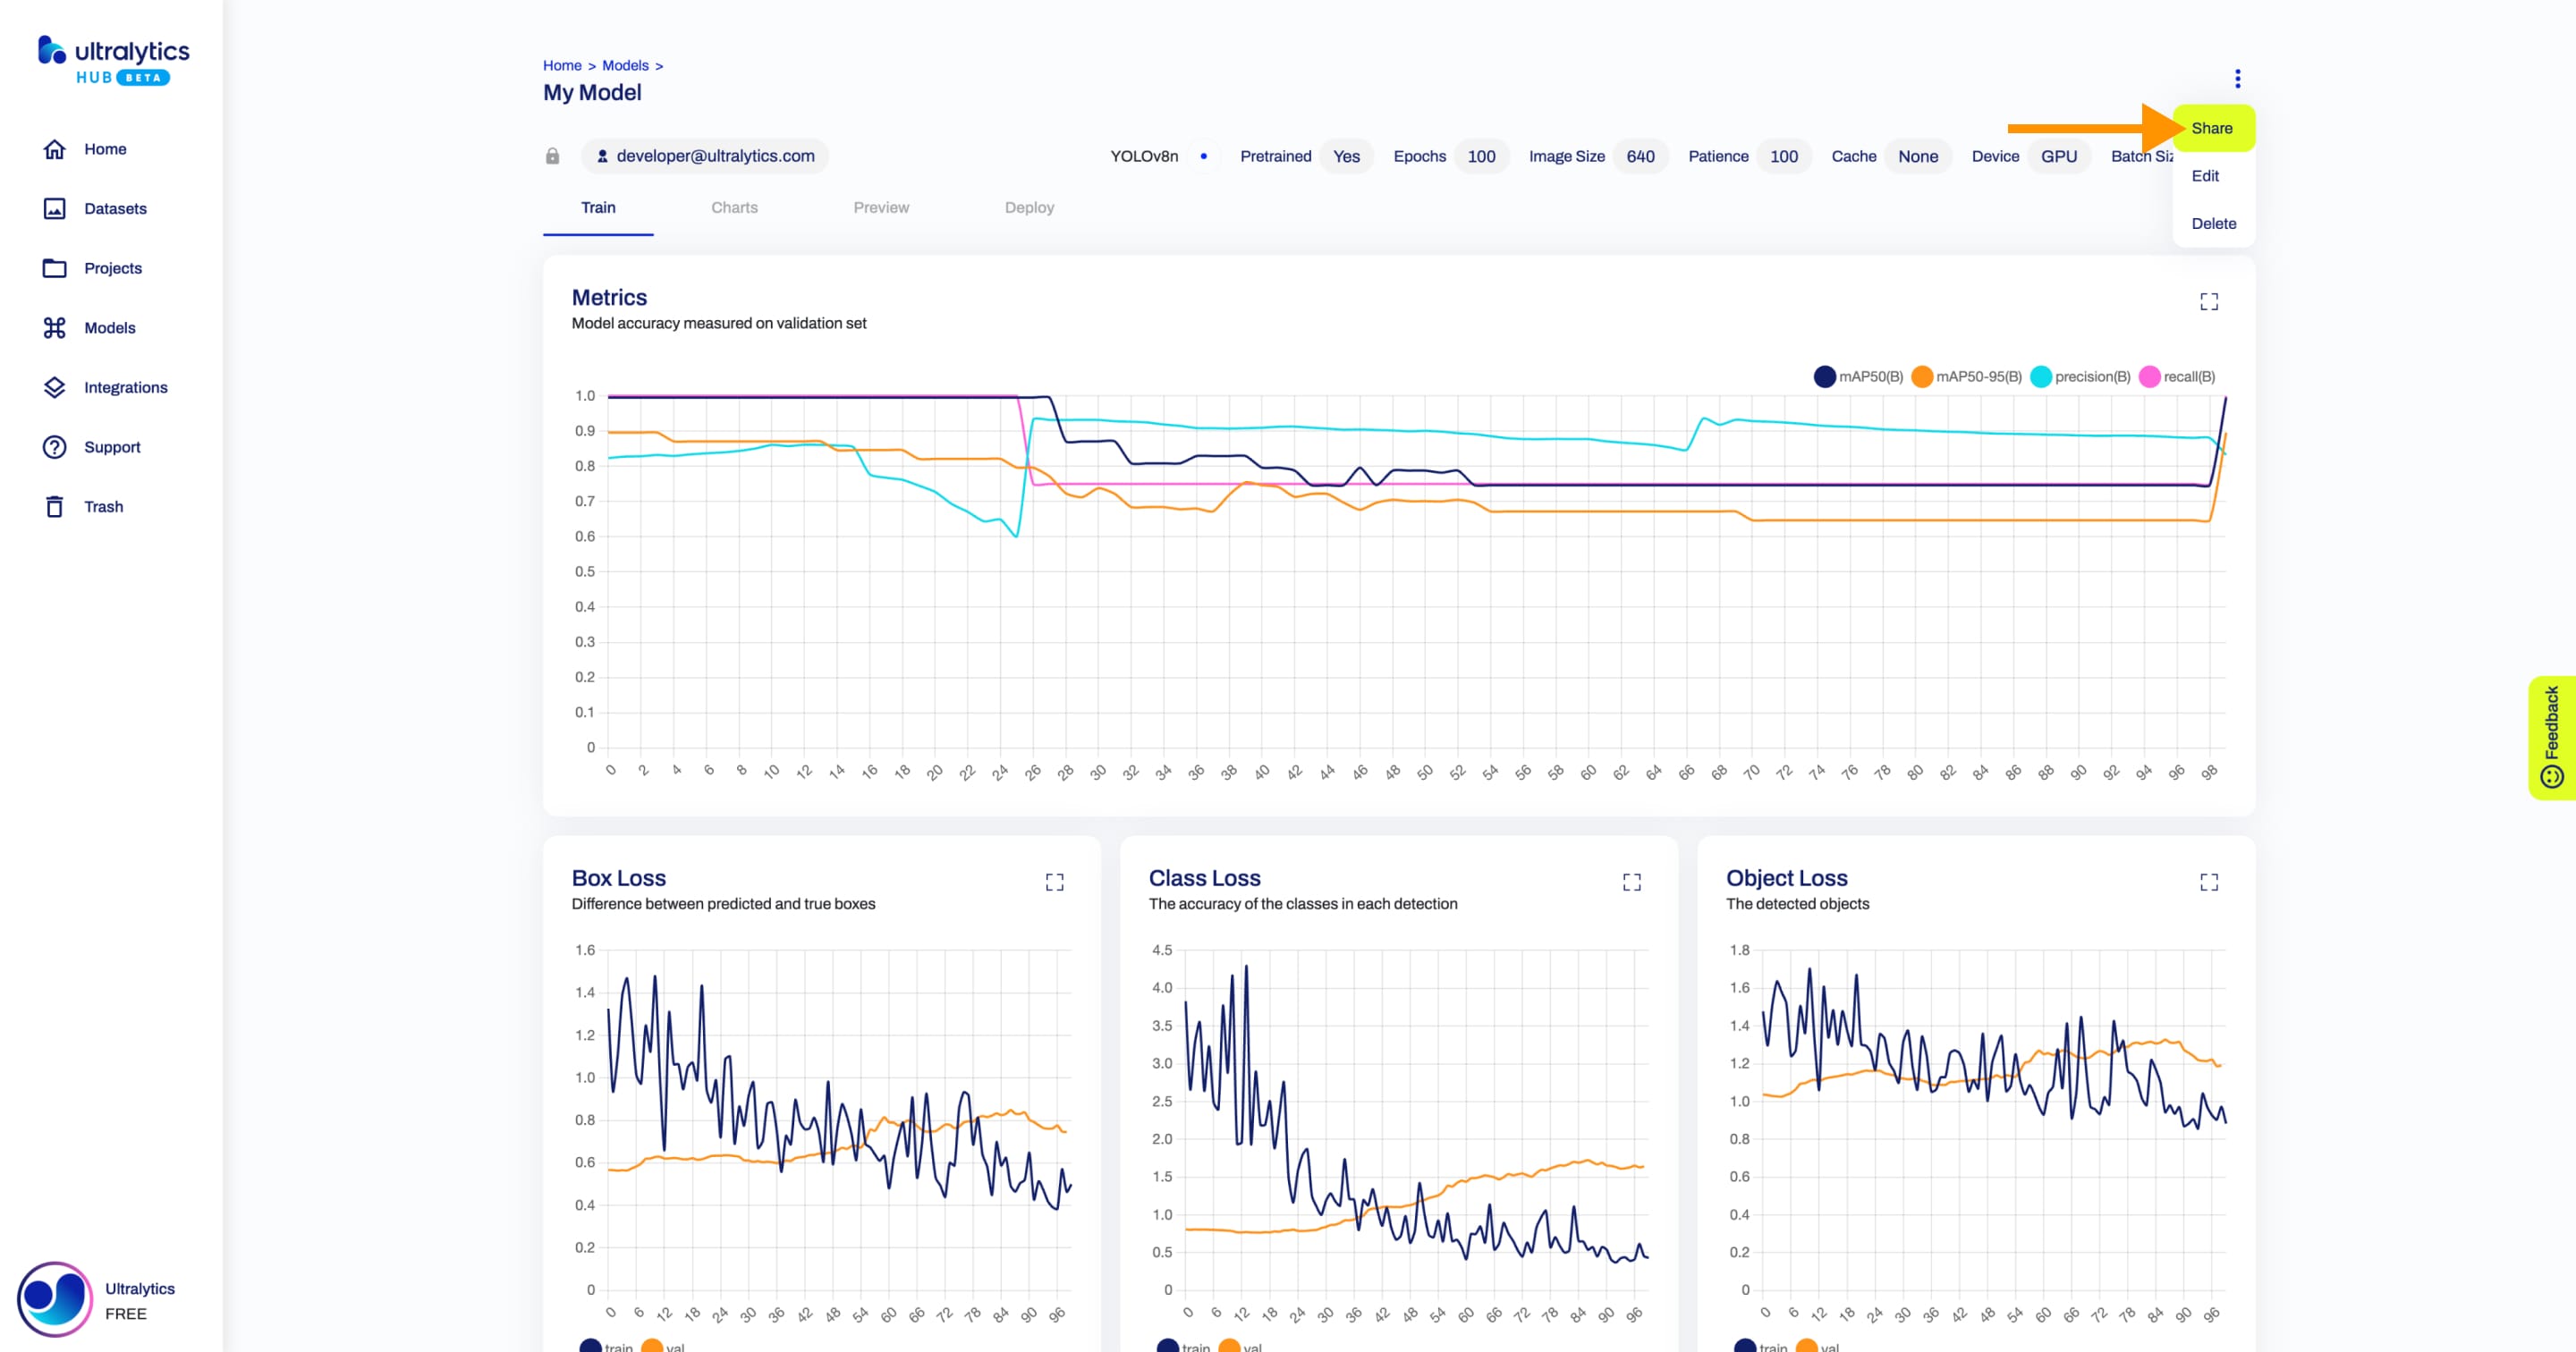
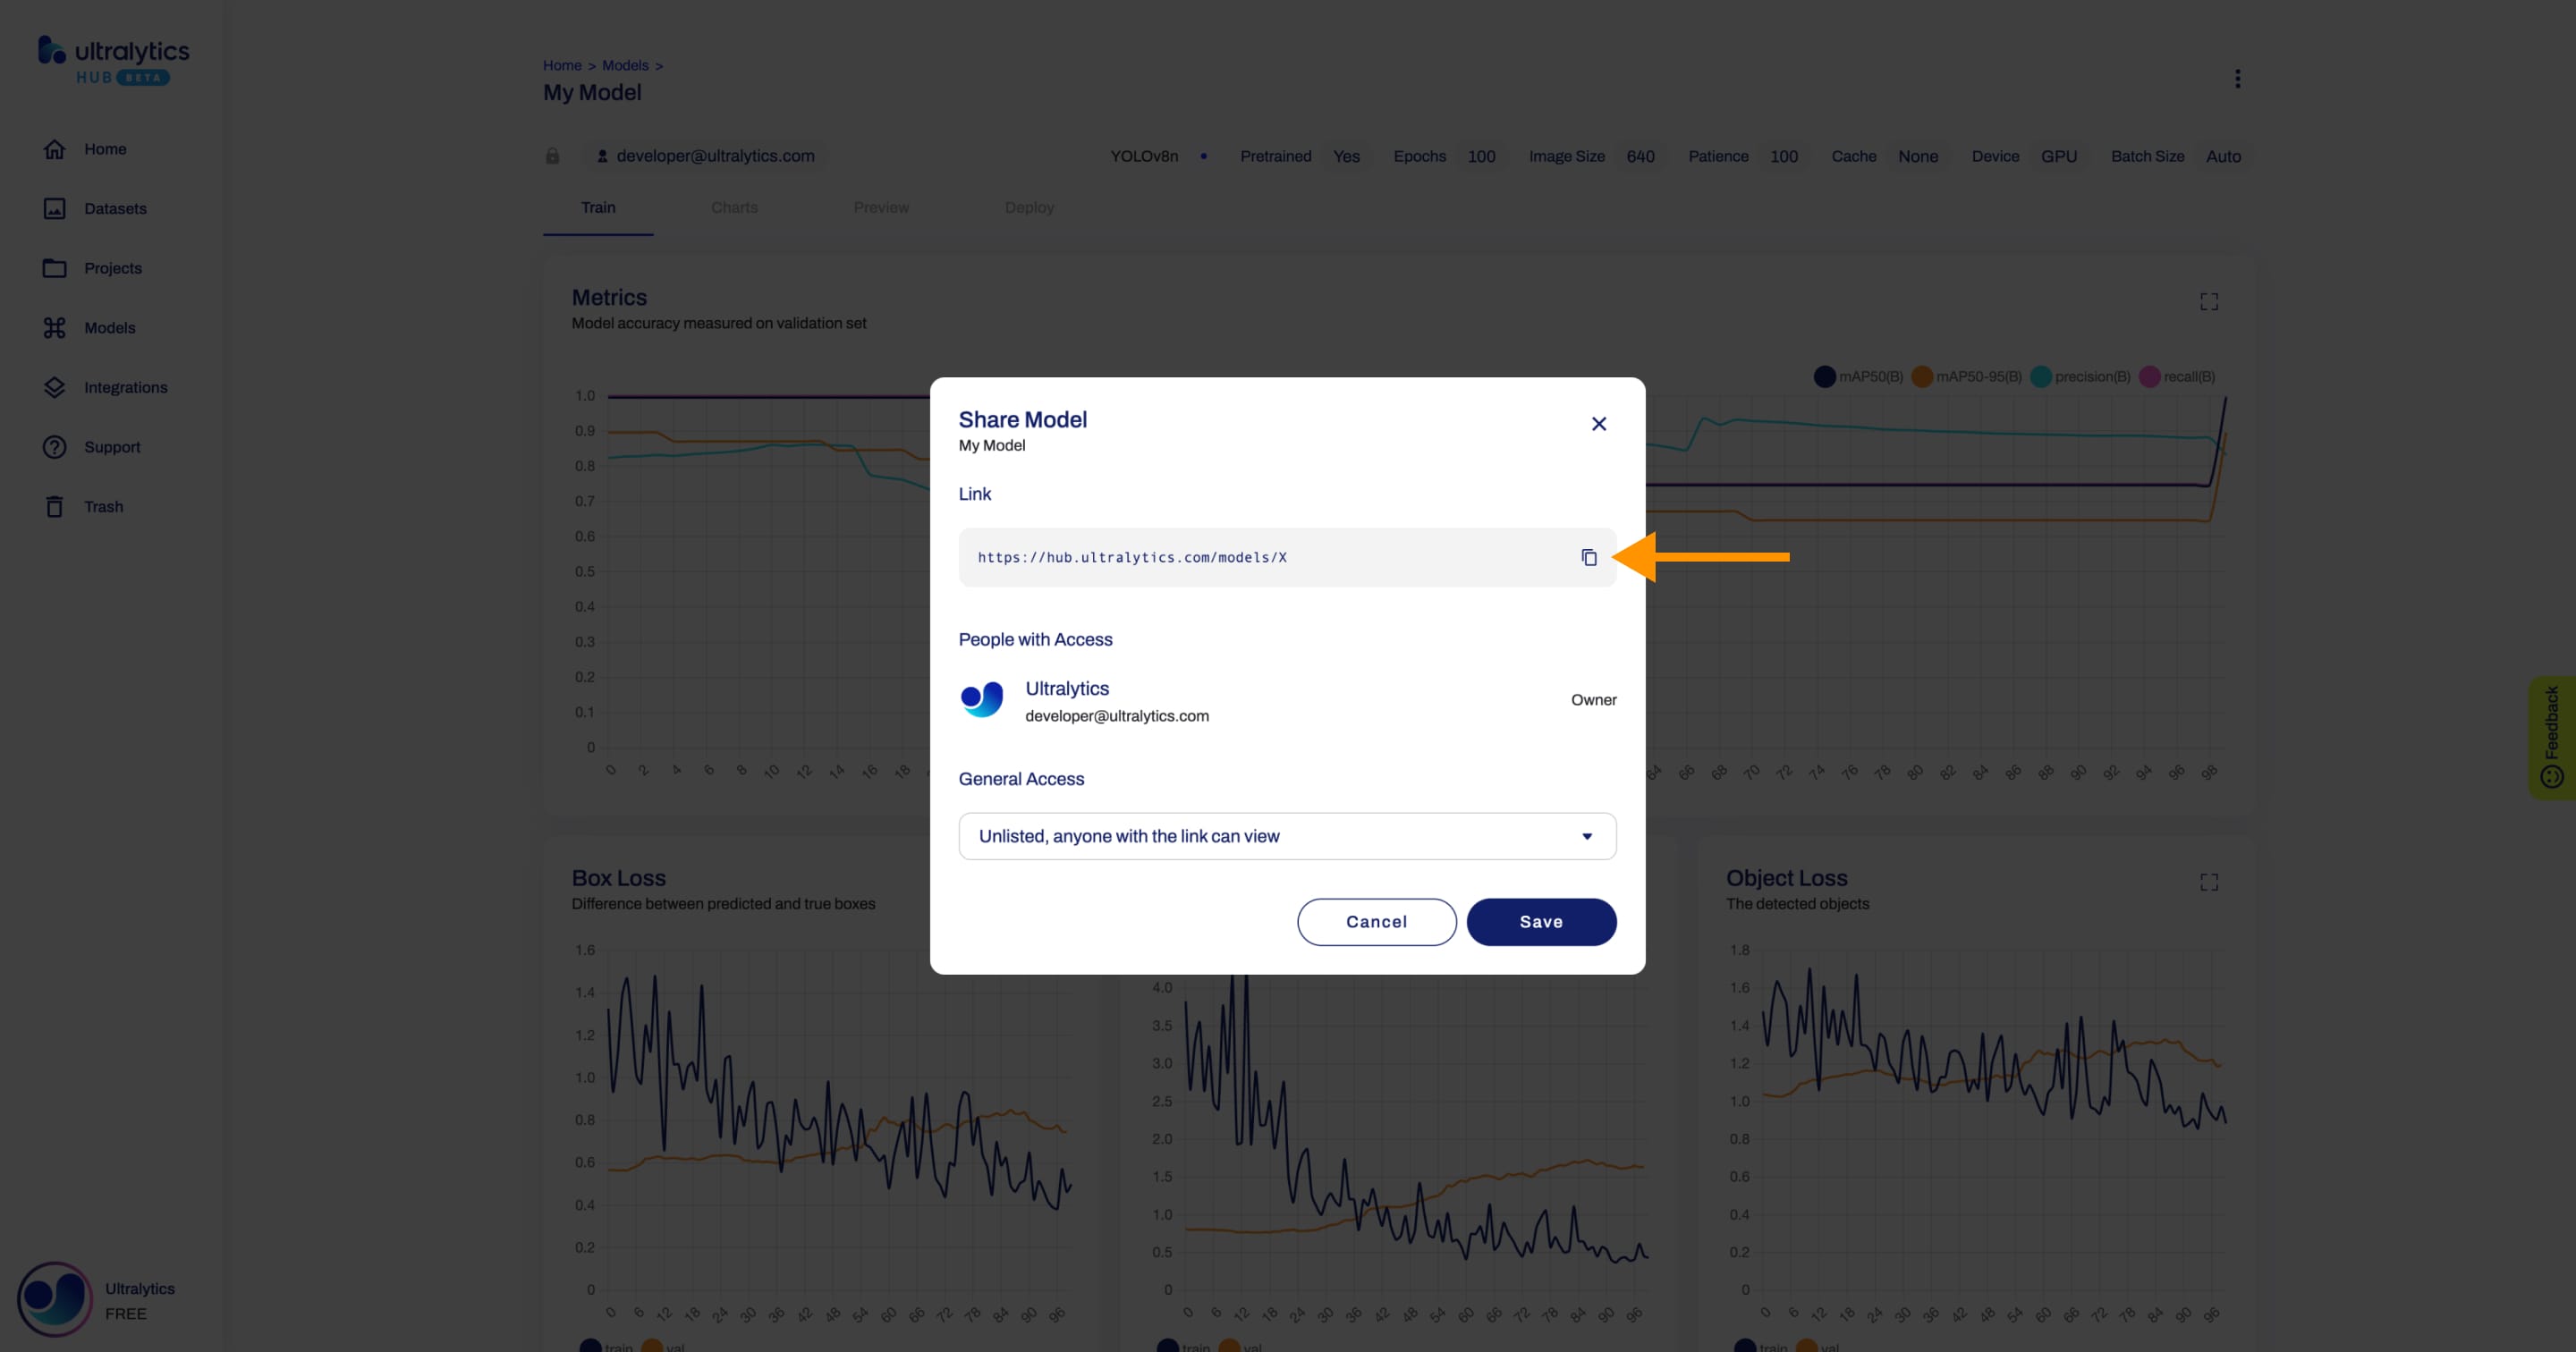
Navigate to the Model page of the model you want to share, open the model actions dropdown and click on the Share option. This action will trigger the Share Model dialog.
??? tip "Tip"
You can also share a model directly from the [Models](https://hub.ultralytics.com/models) page or from the Project page of the project where your model is located.
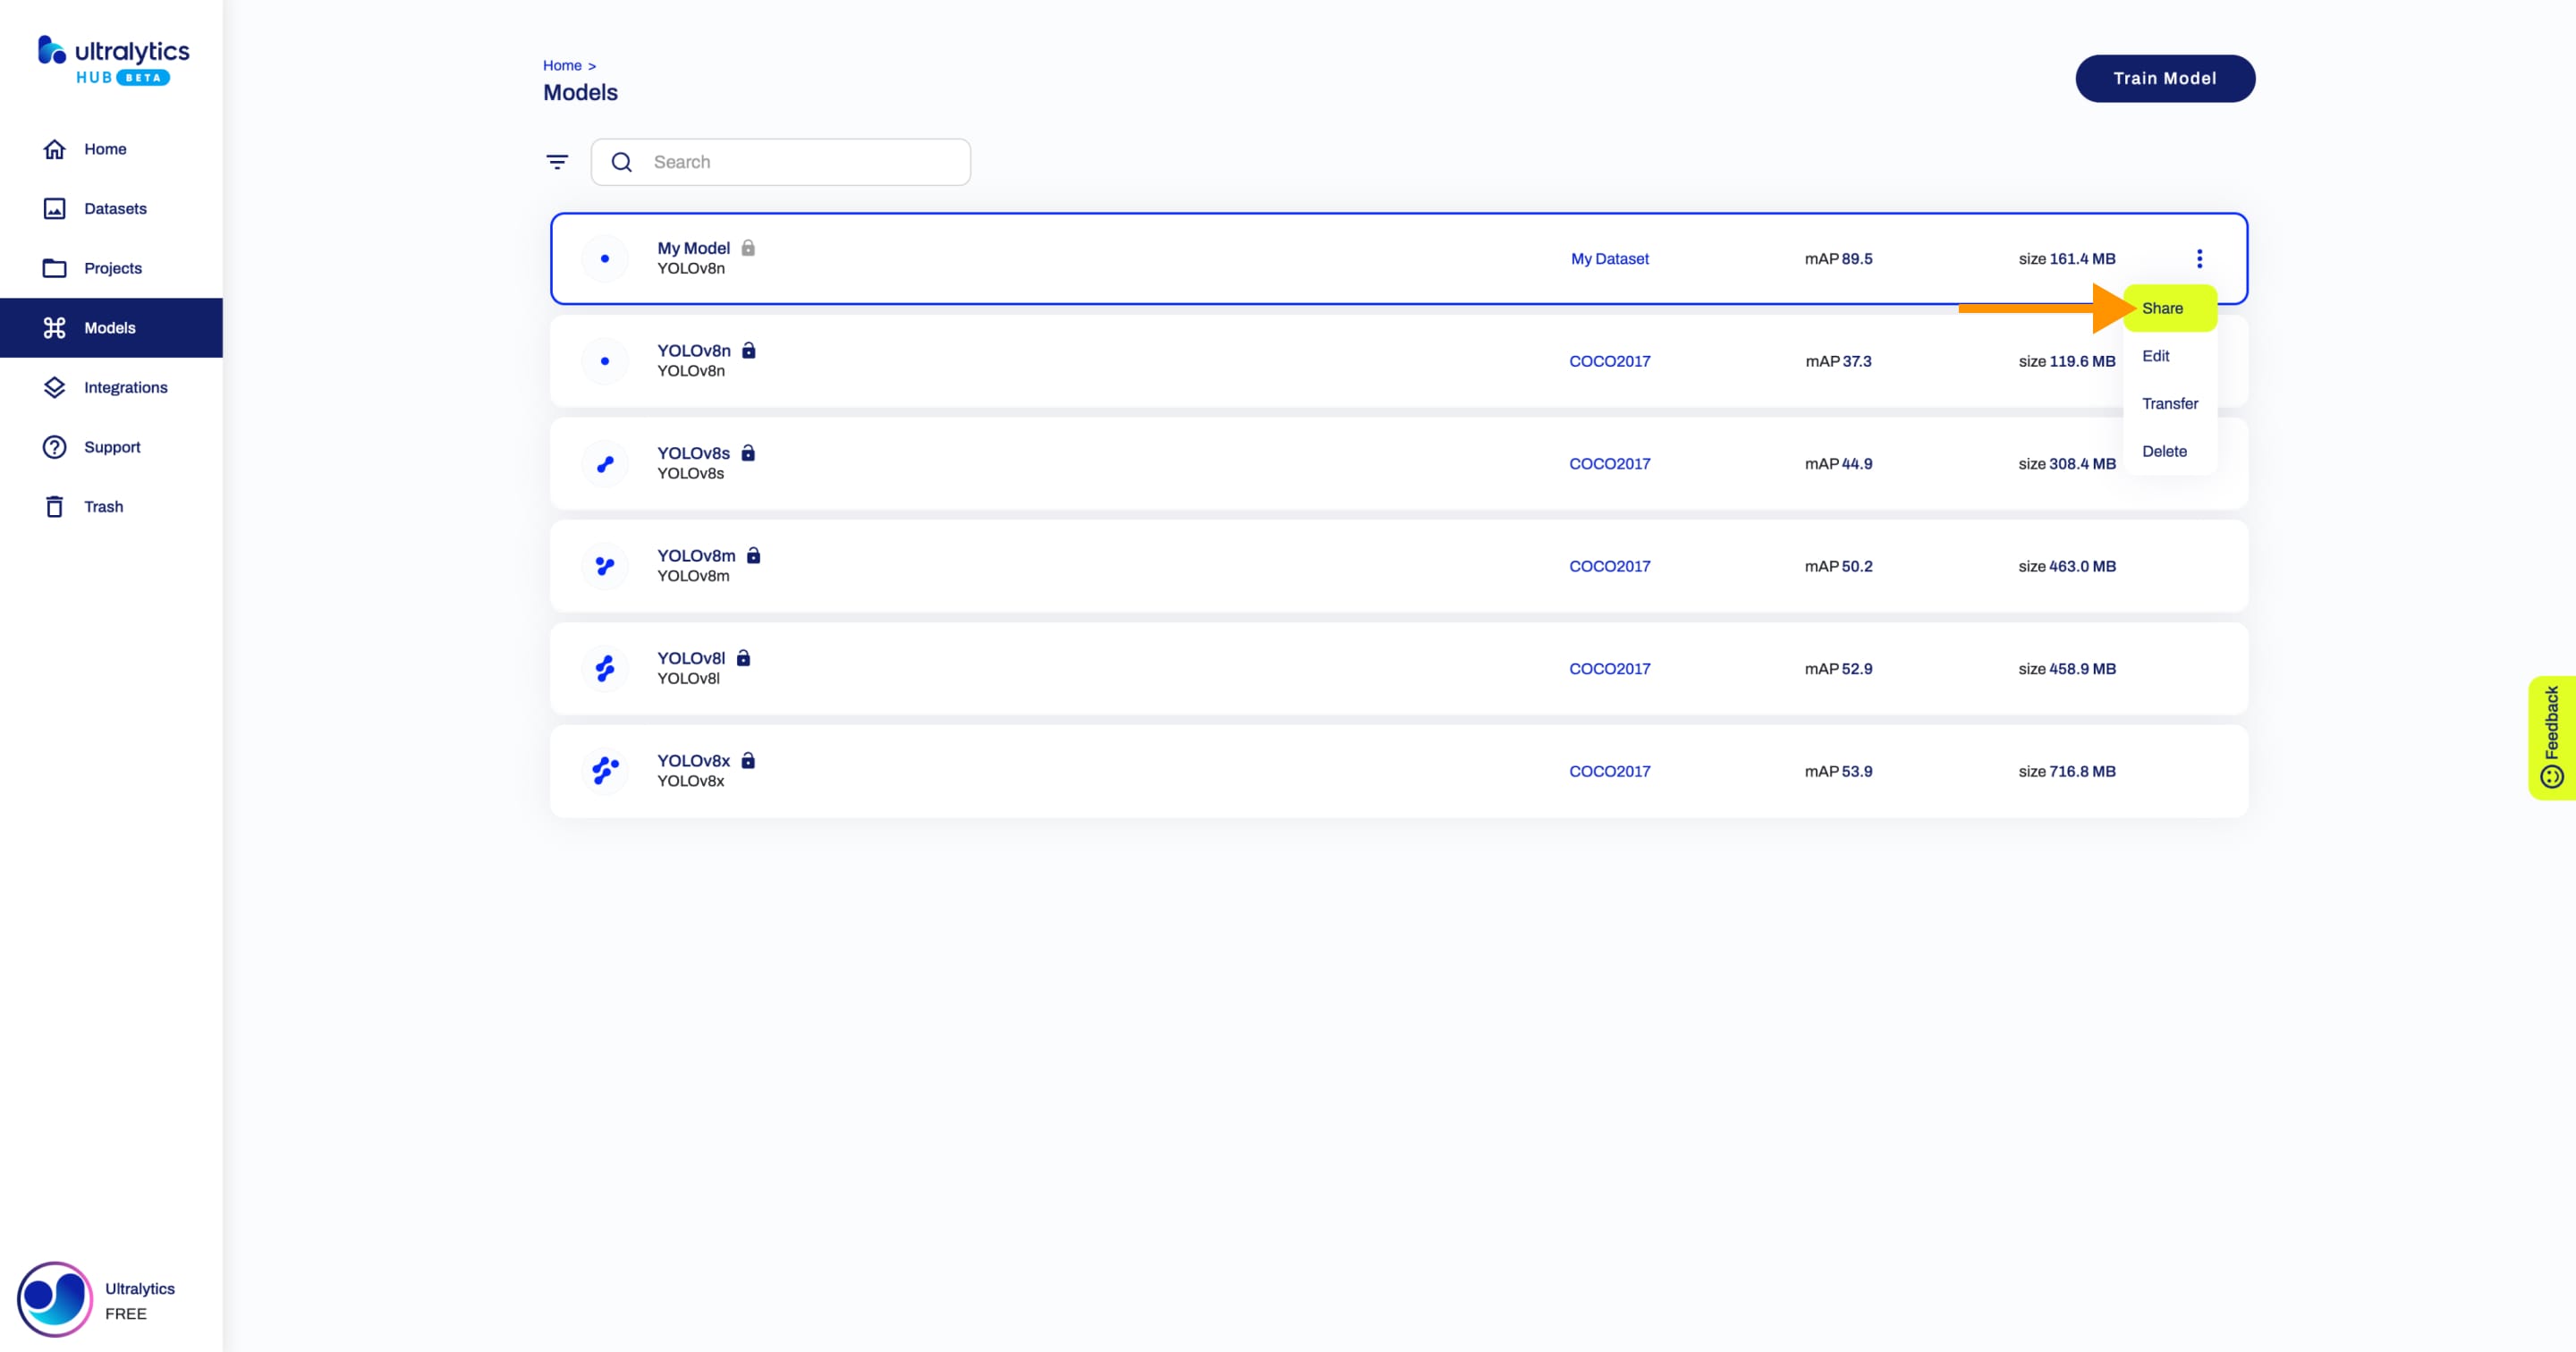
Set the general access to "Unlisted" and click Save.
Now, anyone who has the direct link to your model can view it.
??? tip "Tip"
You can easily click on the model's link shown in the **Share Model** dialog to copy it.
Edit Model
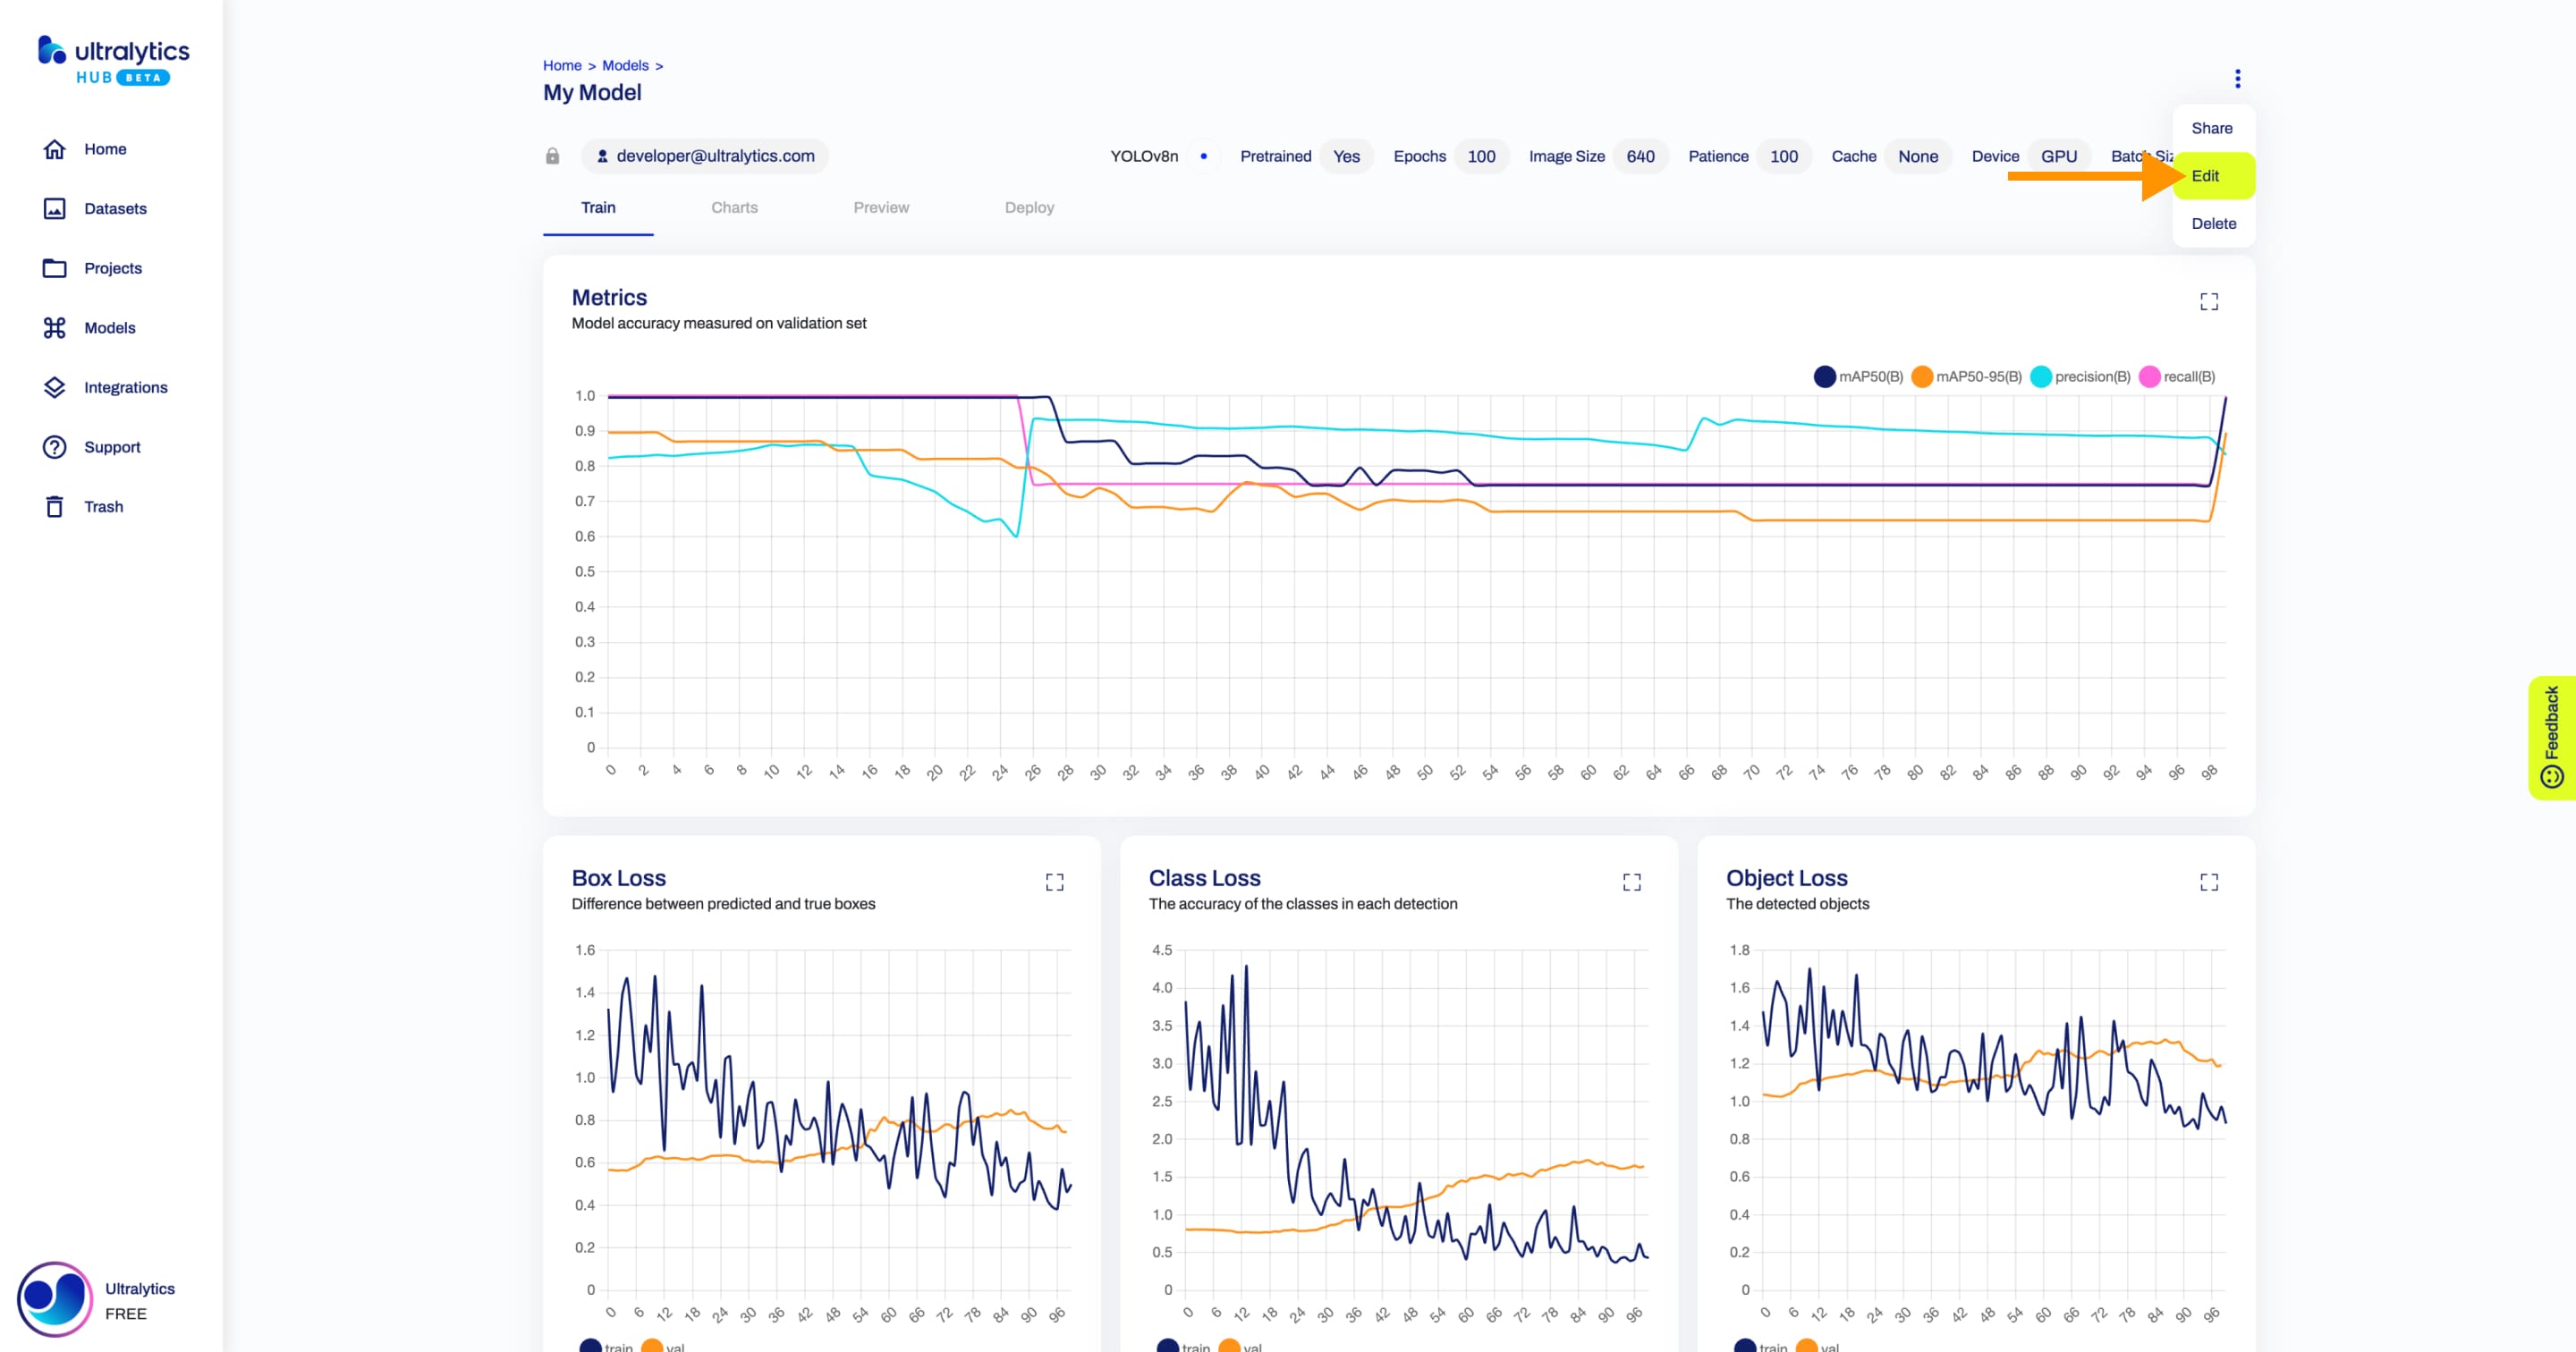
Navigate to the Model page of the model you want to edit, open the model actions dropdown and click on the Edit option. This action will trigger the Update Model dialog.
??? tip "Tip"
You can also edit a model directly from the [Models](https://hub.ultralytics.com/models) page or from the Project page of the project where your model is located.
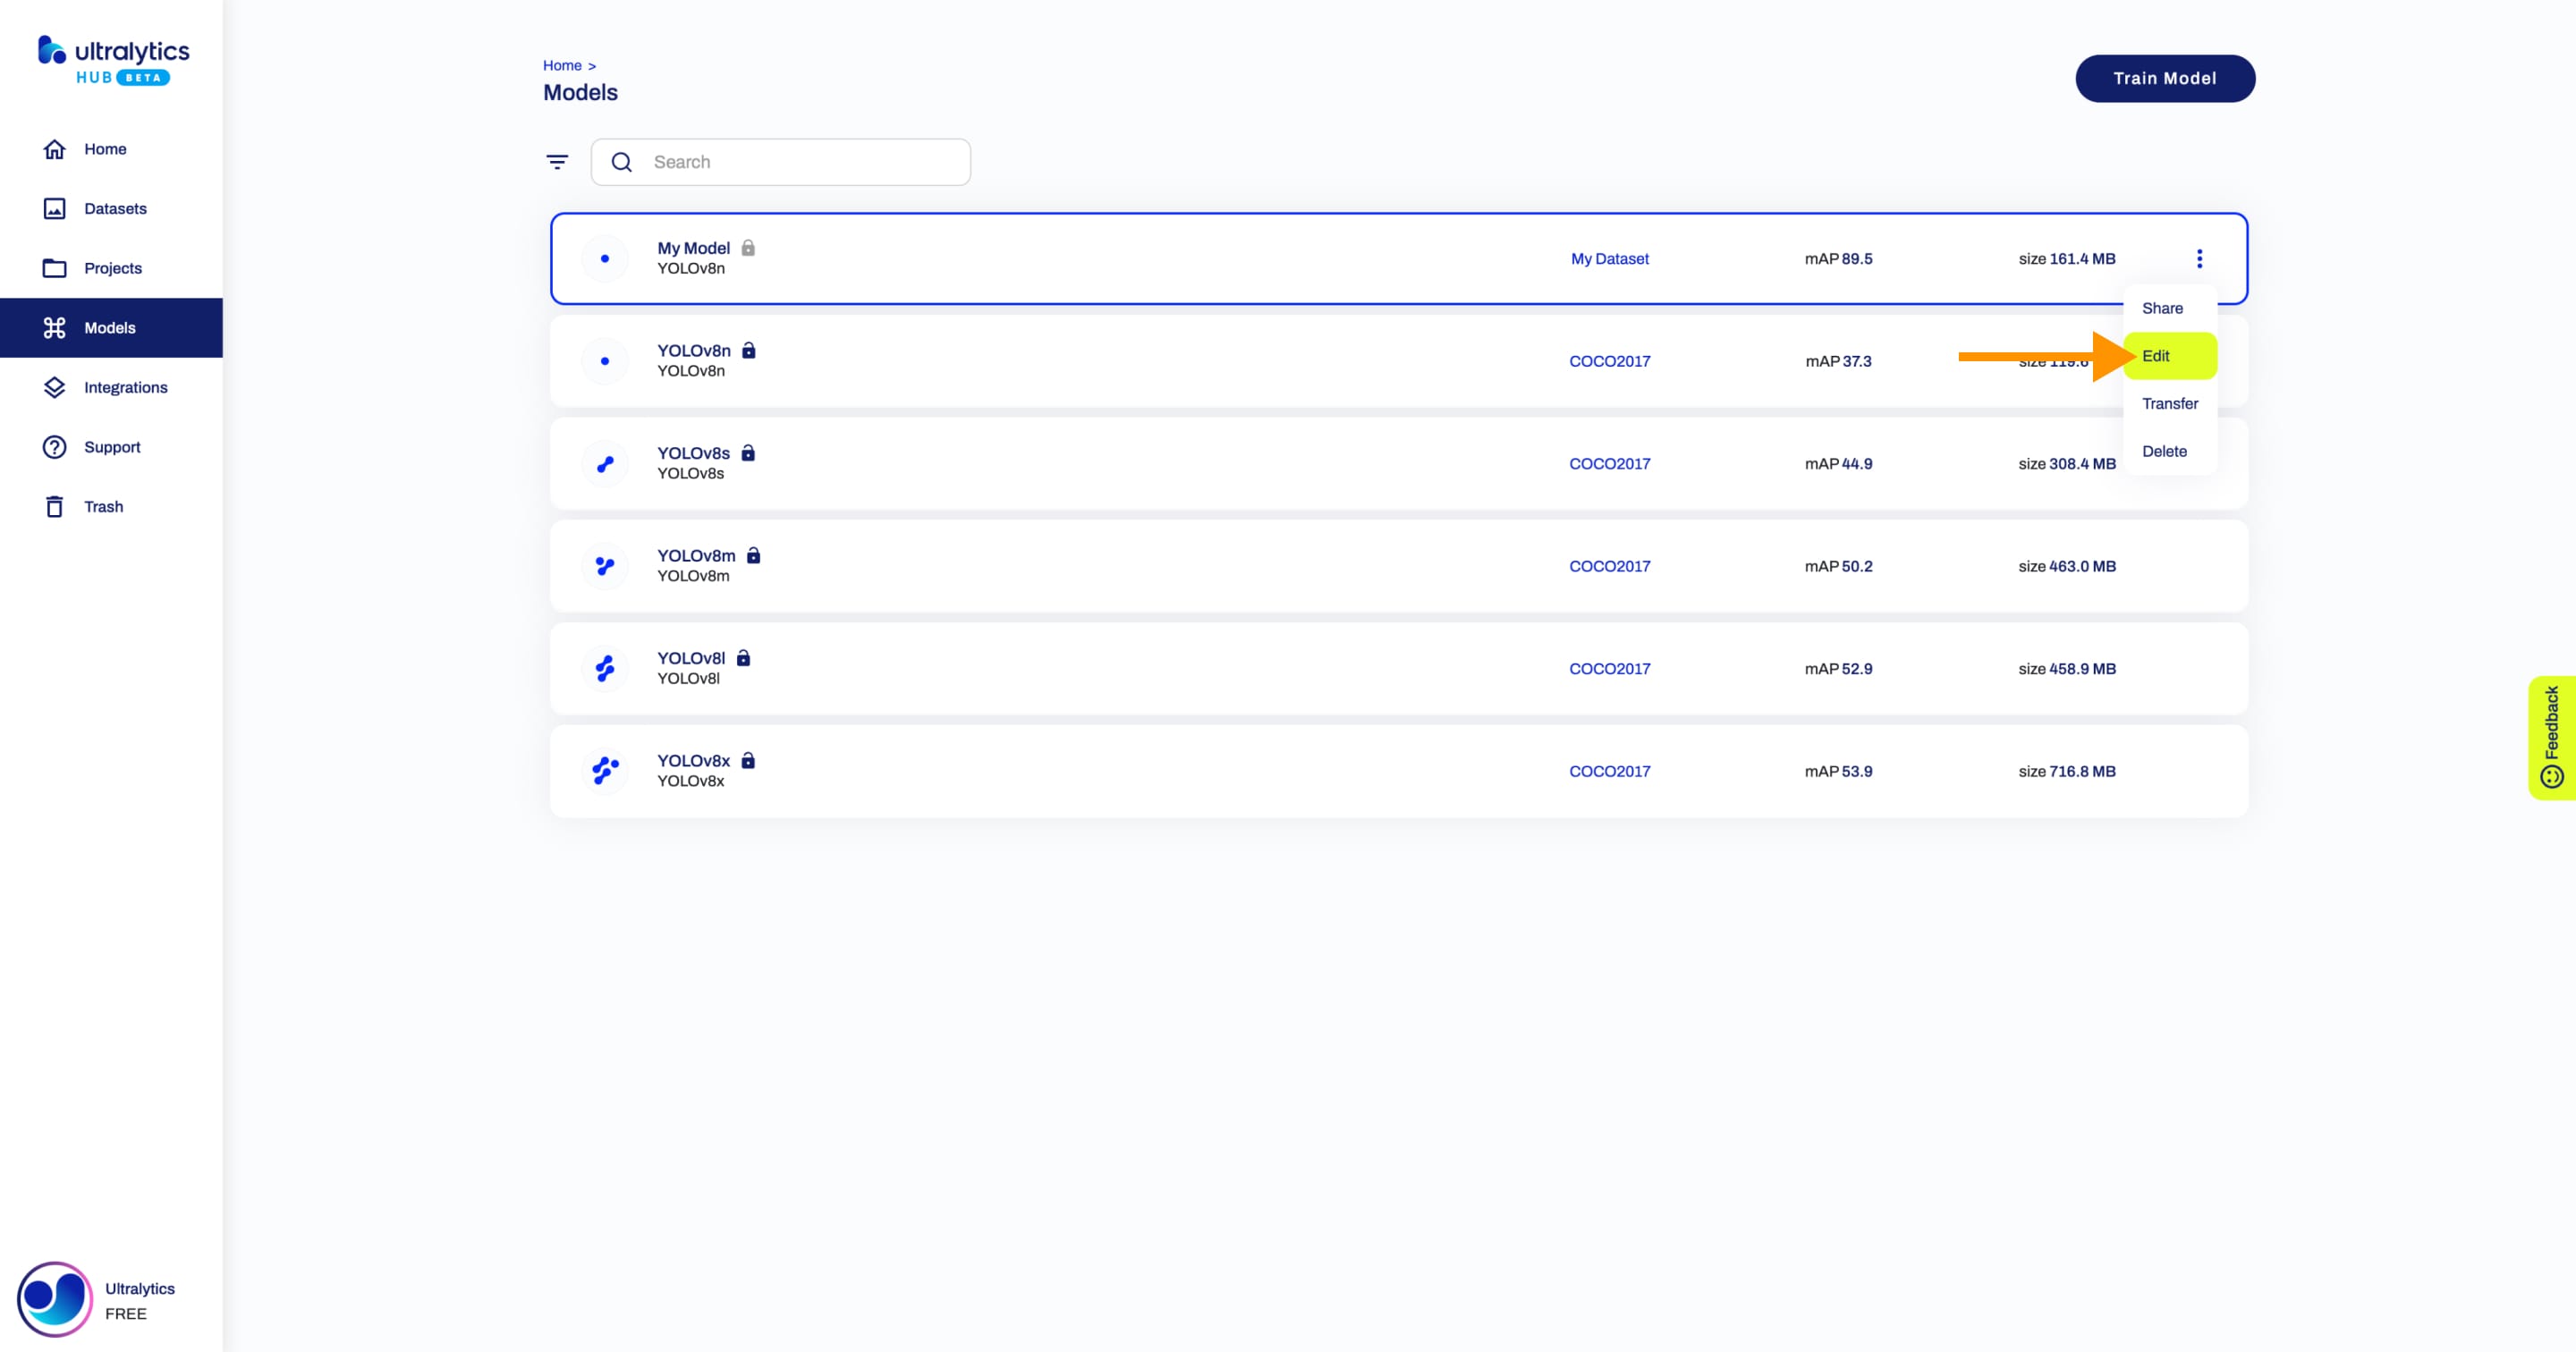
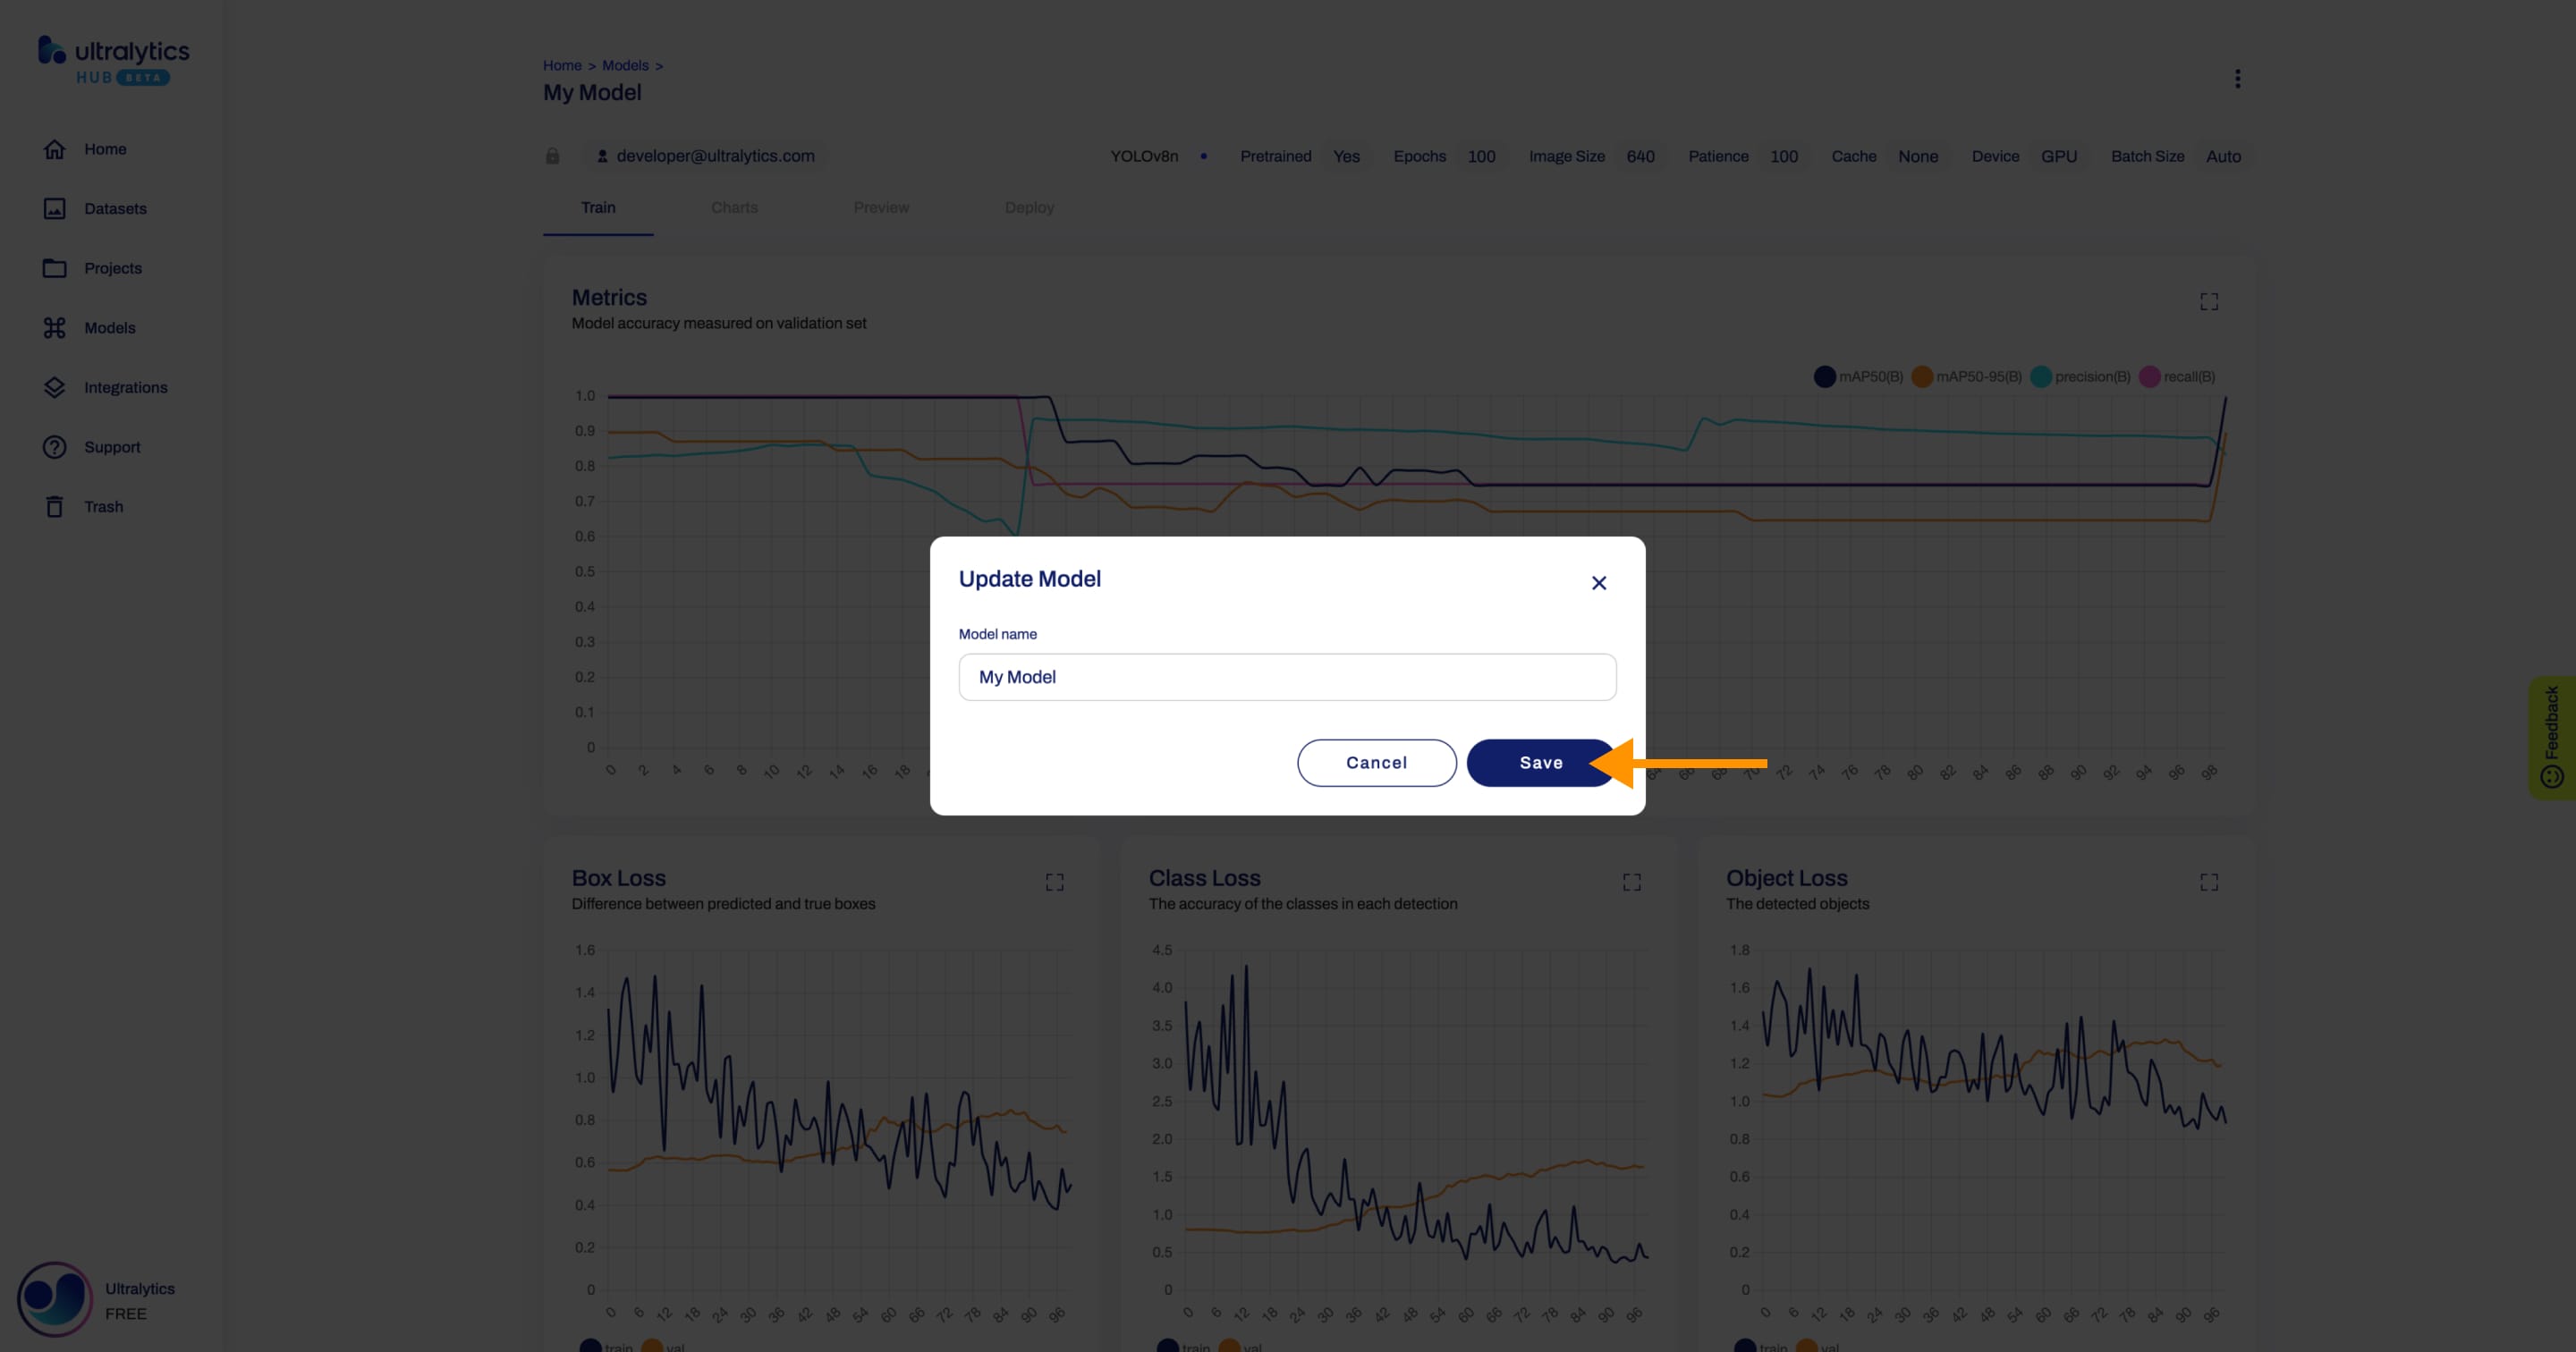
Apply the desired modifications to your model and then confirm the changes by clicking Save.
Delete Model
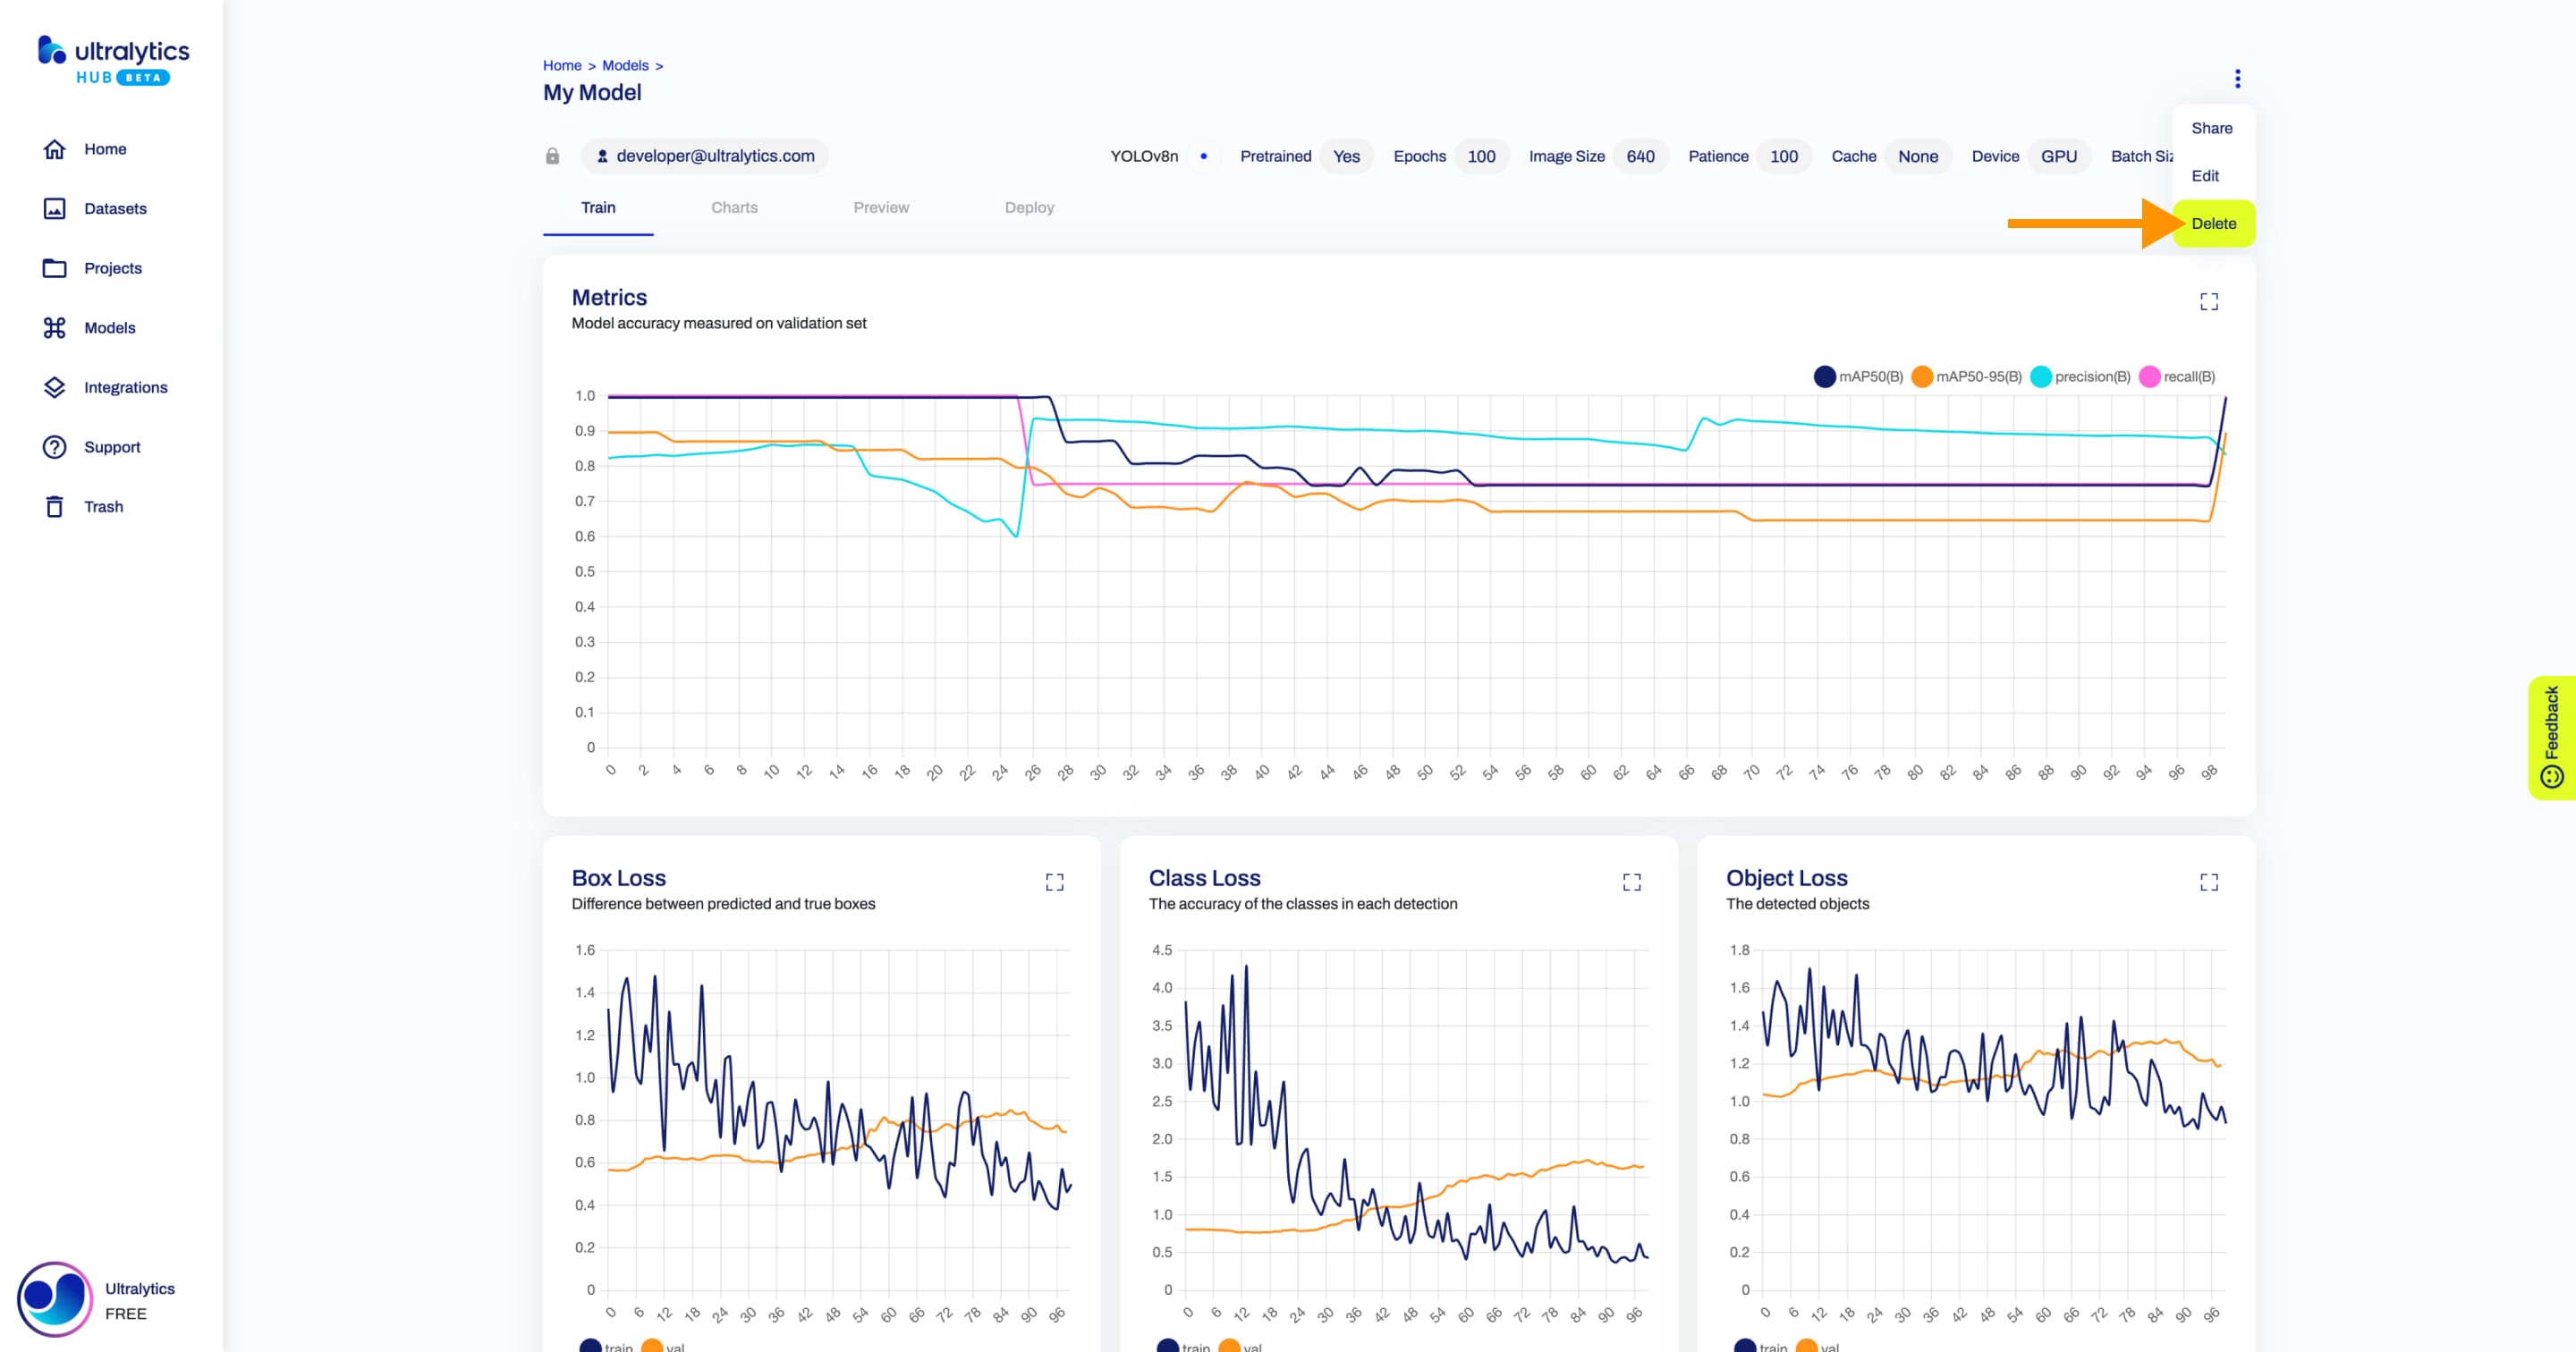
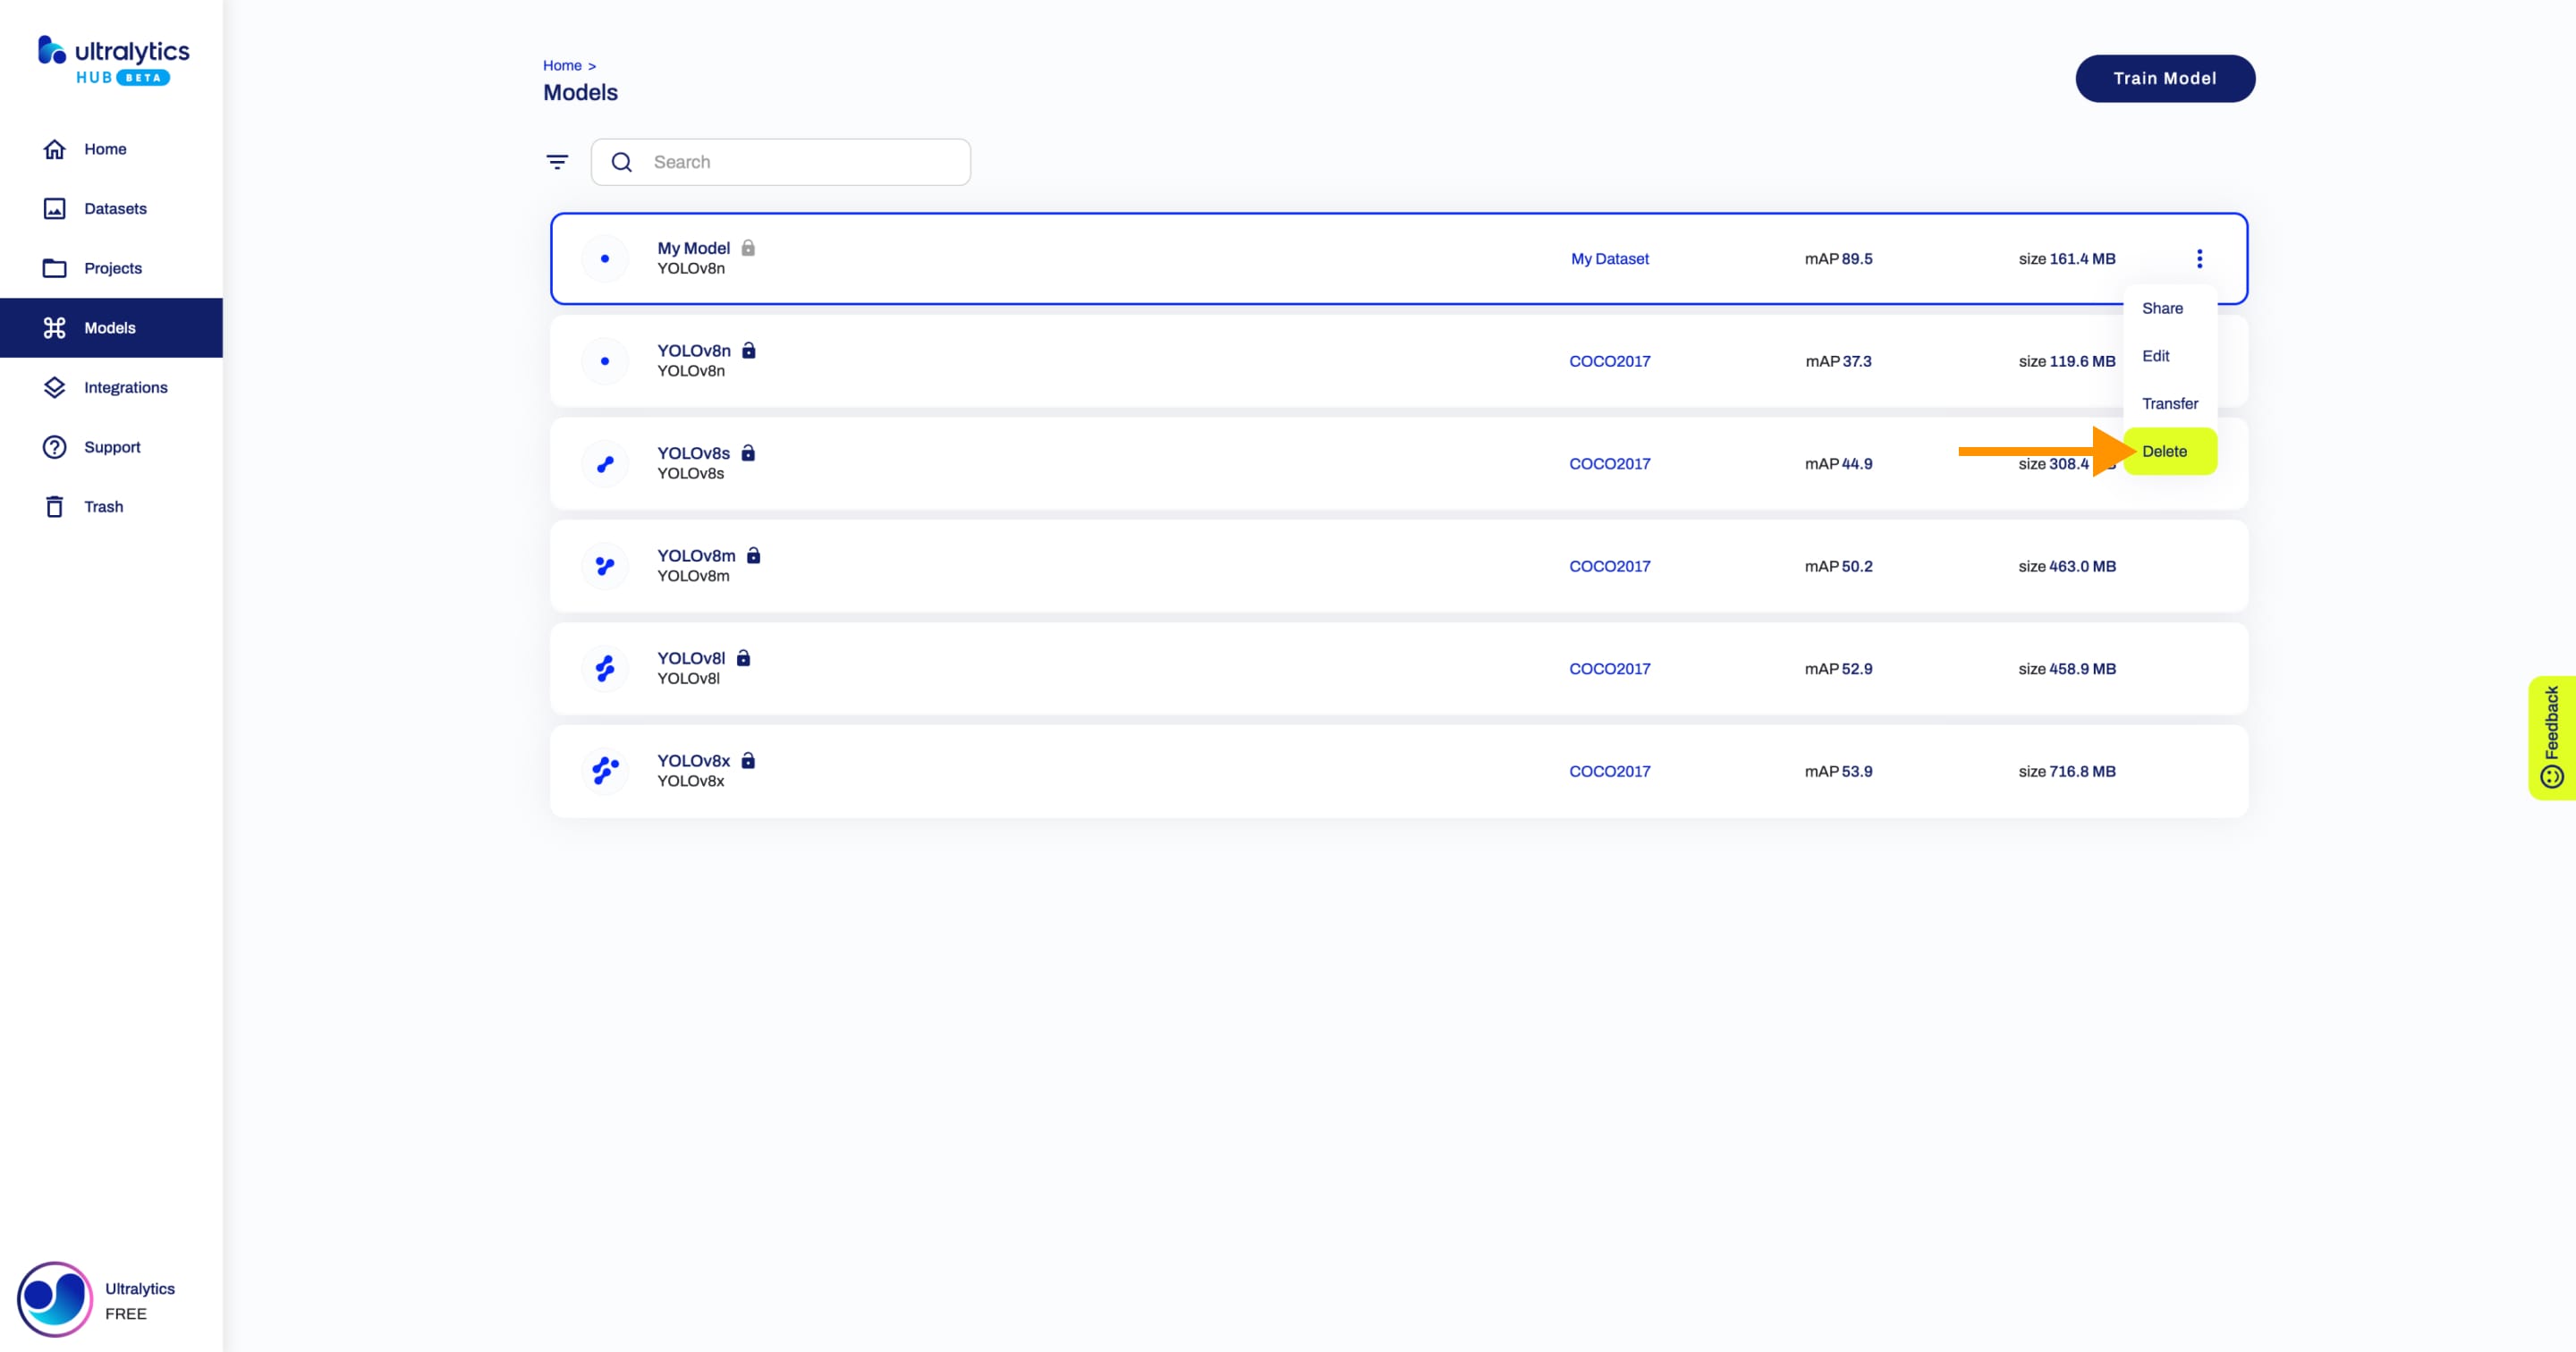
Navigate to the Model page of the model you want to delete, open the model actions dropdown and click on the Delete option. This action will delete the model.
??? tip "Tip"
You can also delete a model directly from the [Models](https://hub.ultralytics.com/models) page or from the Project page of the project where your model is located.
!!! note "Note"
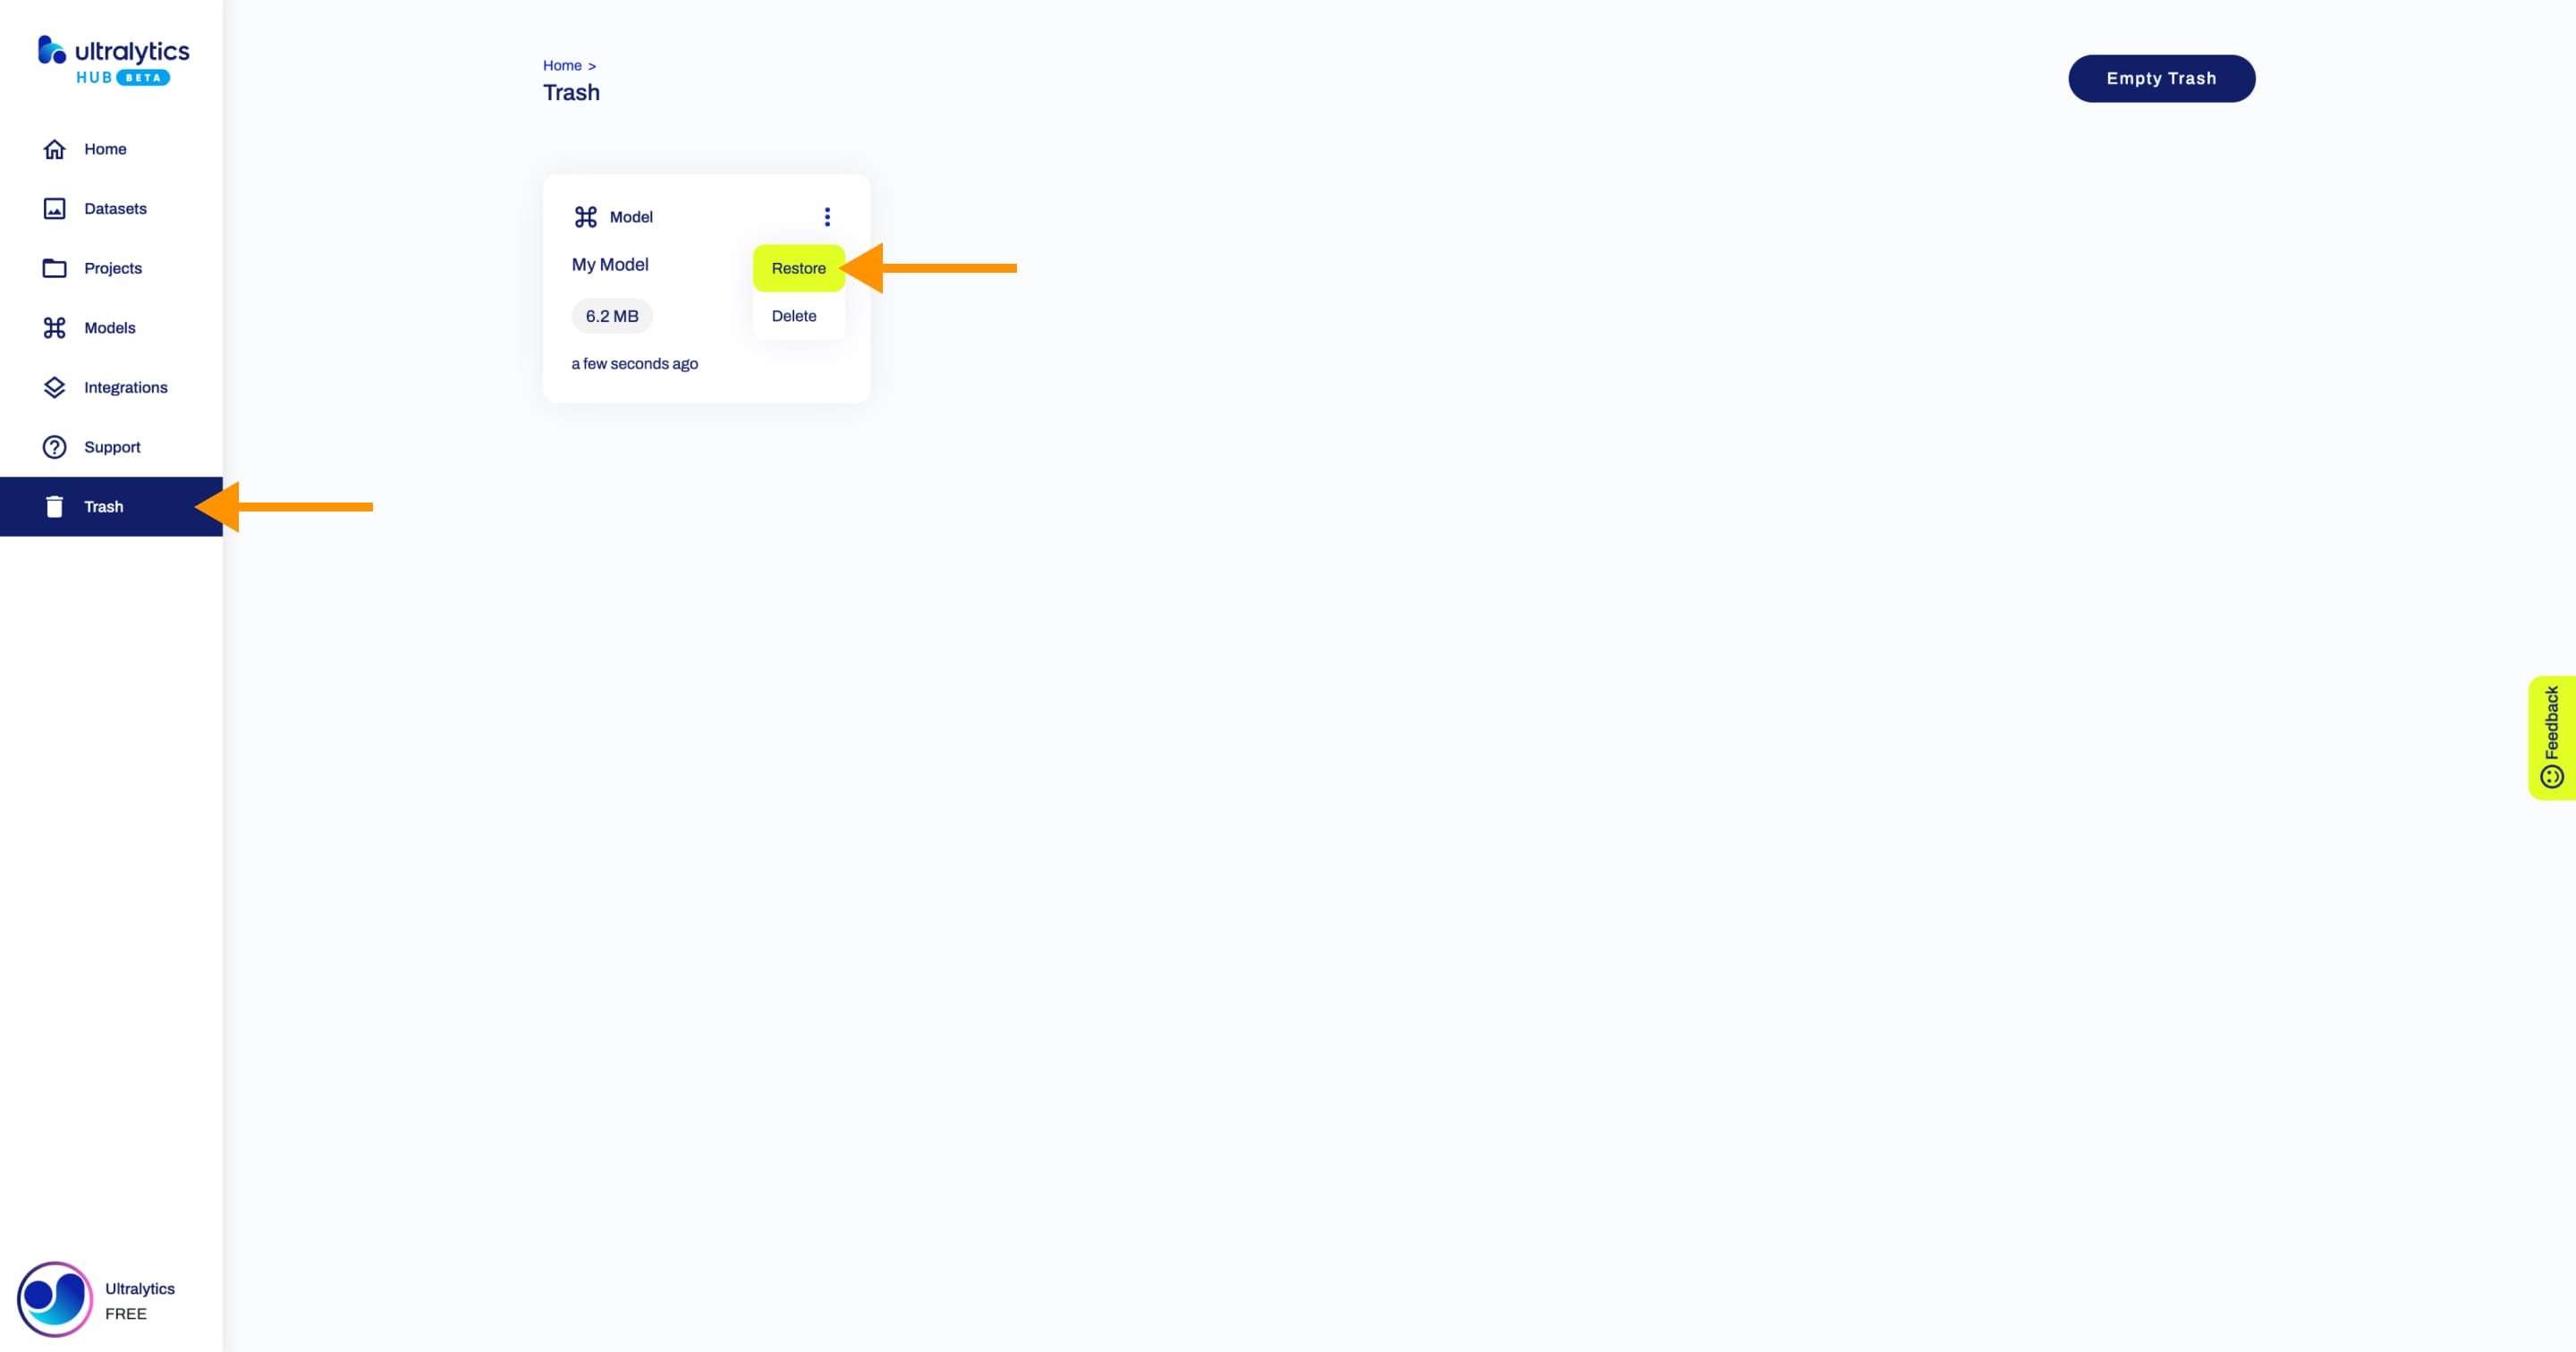
If you change your mind, you can restore the model from the [Trash](https://hub.ultralytics.com/trash) page.
